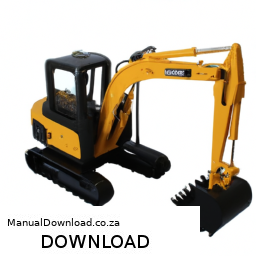
Replacing a tie rod end on a JCB Mini Excavator 8014 or 8016 involves several steps. click here for more details on the download manual…..
- Yella Fella – How to break and fix a JCB 8014 CTS JCB 8014 CTS MY2013 Issues list: Hydraulic fluid leak. Hideous and deafening knocking sound. How to tilt the cab. How I fixed …
Here’s a reverse order guide to help you understand the process from the end to the beginning:
### 6. Reassembly and Final Checks
– **Reconnect the Battery**: Reconnect the negative terminal of the battery.
– **Test the Joint**: Move the excavator’s steering to ensure the new tie rod end is functioning properly without any obstructions or unusual noises.
– **Lower the Equipment**: If elevated, lower the excavator back to the ground.
### 5. Installation of New Tie Rod End
– **Install the New Tie Rod End**: Insert the new tie rod end into the steering linkage. Make sure it is properly aligned.
– **Secure with Nut**: Use a wrench to tighten the nut to the manufacturer’s specified torque.
### 4. Removal of Old Tie Rod End
– **Remove the Old Tie Rod End**: Use a puller or hammer to detach the old tie rod end from the steering linkage. Be careful not to damage surrounding components.
– **Inspect for Damage**: Check the steering linkage and surrounding components for any signs of wear or damage.
### 3. Preparing for Installation
– **Lift the Excavator**: Use a jack to lift the excavator if needed, ensuring it is secure with jack stands.
– **Remove the Wheel (if applicable)**: If the tie rod end is on a wheel steering joint, remove the wheel to gain access.
### 2. Tools and components Needed
– **Gather Tools**: You’ll need a wrench set, socket set, tie rod end puller, torque wrench, and possibly a hammer.
– **Get the New Tie Rod End**: Ensure you have the correct replacement part specific to the JCB model.
### 1. Safety Precautions
– **Wear Safety Gear**: Ensure you have gloves, safety glasses, and other protective gear.
– **Park on Level Ground**: Make sure the excavator is parked on level ground and turned off.
– **Engage Parking Brake**: Engage the parking brake to prevent any movement during the replacement process.
By following these steps in reverse, you can effectively unders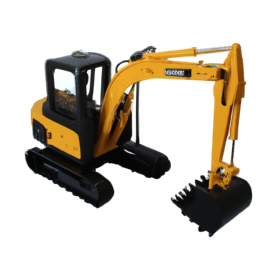 tand the tie rod end replacement process for a JCB Mini Excavator 8014 or 8016. Always refer to the specific service manual for detailed instructions and torque specifications.
A seatbelt retractor is a crucial safety component found in vehicles, designed to manage the seatbelt’s tension and ensure optimal restraint for passengers during a collision or sudden stop. This device is responsible for winding and unwinding the seatbelt webbing, allowing it to extend when the occupant enters the vehicle and retract when not in use. The retractor mechanism is typically housed within a compact casing, often mounted on the vehicle’s floor or side pillar, ensuring that it is easily accessible while remaining out of the way.
The primary function of the seatbelt retractor is to lock the seatbelt in place during a crash. Most retractors use a combination of a spring mechanism and an inertia-sensitive locking system. When the vehicle experiences rapid deceleration or an abrupt change in direction, the inertia mechanism engages, locking the seatbelt in place to prevent the occupant from moving forward. This locking feature is vital for reducing the risk of injury by keeping the passenger securely in their seat.
Additionally, modern seatbelt retractors may incorporate advanced features such as pretensioners, which tighten the belt upon impact, further minimizing slack and maximizing the effectiveness of the restraint system. Overall, the seatbelt retractor plays a pivotal role in automotive safety, contributing to the protection of passengers and reducing the severity of injuries in accidents. Its reliable operation is essential for ensuring that seatbelts function as intended, delivering a critical layer of safety in vehicles.
Replacing the input shaft on a JCB Mini Excavator 8014 or 8016 involves several critical components and steps. Here’s an overview of the main components and the general process involved in the replacement:
### Main Components:
1. **Input Shaft**: This is the primary component that transmits power from the engine to the hydraulic system.
2. **Transmission Assembly**: The input shaft is housed within the transmission, which may need to be removed or disassembled for access.
3. **Engine**: The engine is the power source for the excavator, and its alignment with the input shaft is crucial.
4. **Bearings and Seals**: New bearings and seals may be required to ensure proper operation and prevent leaks.
5. **Gaskets**: Gaskets help to create a seal between components and prevent fluid leaks.
6. **Fasteners**: Bolts and nuts that secure the input shaft and associated components may need replacement.
7. **Fluid**: Hydraulic fluid or transmission fluid may need to be drained and replaced.
### General Steps for Replacement:
1. **Preparation**:
– Ensure the excavator is on a level surface and secure it with safety stands.
– Disconnect the battery to prevent any electrical issues during the process.
2. **Drain Fluids**:
– Drain any hydraulic fluid or transmission fluid from the system to prevent spills during disassembly.
3. **Remove Components**:
– Depending on the design, you may need to remove various components such as the engine, transmission, or hydraulic pump to access the input shaft.
4. **Disassemble Transmission**:
– Carefully disassemble the transmission to access the input shaft. Take note of the order of components for reassembly.
5. **Remove Old Input Shaft**:
– Remove the old input shaft, ensuring that any retaining rings or clips are properly dealt with.
6. **Install New Input Shaft**:
– Install the new input shaft, making sure it is properly aligned and seated. Replace bearings and seals as necessary.
7. **Reassemble Components**:
– Reassemble the transmission and any other components that were removed. Ensure all gaskets and seals are in place to prevent leaks.
8. **Refill Fluids**:
– Refill the hydraulic fluid or transmission fluid as required.
9. **Reconnect Battery**:
– Reconnect the battery and perform a safety check.
10. **Testing**:
– Start the engine and test the excavator to ensure that the input shaft is functioning properly and that there are no leaks.
### Important Considerations:
– Always refer to the manufacturer’s service manual for specific instructions and torque specifications.
– Use proper safety gear and equipment, as working with heavy machinery can be hazardous.
– If you are not experienced with such repairs, consider hiring a professional mechanic or technician.
This overview provides a general approach to replacing an input shaft on a JCB Mini Excavator 8014 or 8016, highlighting the main components involved in the process.