
Replacing the leaf springs on a Chevrolet Avalanche can seem daunting if you have little mechanical experience, but with some patience and the right tools, you can tackle this task. click here for more details on the download manual…..
- 07-13 Chevy Avalanche(truck) shock replacement 07-13 Chevy avalanche rear shock replacement. Easy, quick and dirty video. This job is rated a 1 out of 5 stars for difficulty Here …
- Turbocharged 2010 Chevy Avalanche | Turbo LS | Big Wheel | Dyno Review Turbocharged 2010 Chevy Avalanche | Turbo LS | Big Wheel | Dyno Review Check out the rest of our channel for dyno videos, …
Below is a step-by-step guide to help you through the process.
### Tools and Materials Needed:
– **Tools:**
– Jack and jack stands
– Socket wrench set
– Torque wrench
– Pry bar
– Hammer
– Safety goggles and gloves
– Spraying lubricant (like WD-40)
– Ratchet straps (optional)
– **Materials:**
– New leaf springs
– New bolts and bushings (if needed)
– grease (for bushings)
### Step-by-Step Guide:
1. **Safety First:**
– Park the Avalanche on a flat surface and engage the parking brake.
– Wear safety goggles and gloves throughout the process.
2. **Lift the Vehicle:**
– Use a jack to lift the rear of the truck. Make sure it’s high enough so you can easily work underneath.
– Place jack stands under the frame for safety. Never rely solely on the jack.
3. **Remove the Wheels:**
– Use the socket wrench to remove the lug nuts and take off the rear wheels. This will give you better access to the leaf springs.
4. **Locate the Leaf Springs:**
– The leaf springs are located above the rear axle. Each spring is held in place by bolts on both ends.
5. **Spray Lubricant:**
– Spray the bolts and nuts with a lubricant to make them easier to remove. Allow it a few minutes to soak in.
6. **Remove the Old Leaf Springs:**
– Start by removing the bolts that attach the leaf springs to the axle. You may need to support the axle with a jack if it drops when the springs are removed.
– Next, remove the bolts that attach the leaf springs to the frame. Keep track of any washers or spacers that may be present.
– If the springs are stuck, gently tap them with a hammer or use a pry bar to help loosen them.
7. **Install the New Leaf Springs:**
– Position the new springs in place, aligning them with the holes on the frame and axle.
– Start by loosely inserting the bolts into the holes to hold the springs in place. Do not fully tighten them yet.
8. **Reattach the Axle:**
– If you used a jack to support the axle, lower it slowly into place so that the springs align with the axle.
– tighten the bolts that hold the leaf springs to the axle first, and then tighten the bolts that attach the springs to the frame.
9. **Torque the Bolts:**
– Use a torque wrench to tighten the bolts to the manufacturer’s specifications. This information can usually be found in your vehicle’s service manual.
10. **Reinstall the Wheels:**
– Put the wheels back on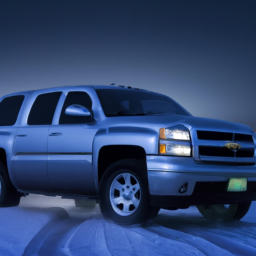 and hand-tighten the lug nuts before lowering the vehicle.
11. **Lower the Vehicle:**
– Carefully lower the truck back to the ground and remove the jack stands.
12. **Final Tightening:**
– Once the vehicle is on the ground, fully tighten the lug nuts in a crisscross pattern to ensure even pressure.
13. **Test Drive:**
– Take the Avalanche for a short test drive to ensure everything feels normal. Listen for any unusual noises that might indicate an issue.
### Tips:
– Take your time and don’t rush through the steps.
– If you encounter any difficulties, don’t hesitate to seek help from someone with more mechanical experience.
– Always refer to your vehicle’s service manual for specific details related to torque specifications and bolt sizes.
By following these steps, you should be able to successfully replace the leaf springs on your Chevrolet Avalanche. Good luck!
The engine cover, often referred to as the engine cover panel or engine cover assembly, is a protective component that sits atop the engine of a vehicle. Its primary function is to safeguard the engine from dirt, debris, and other external elements that could potentially cause damage or reduce performance. Typically made from materials such as plastic, metal, or composite materials, the engine cover is designed to endure high temperatures and vibrations associated with engine operation.
In addition to protection, the engine cover serves several other essential purposes. One notable function is noise reduction; by acting as a barrier, it helps dampen the sound produced by the engine, contributing to a quieter cabin environment for passengers. This is particularly important in modern vehicles, where consumer expectations for cabin comfort are high.
Moreover, the engine cover often features aesthetic designs that enhance the overall appearance of the engine bay. Manufacturers frequently incorporate branding or stylistic elements into the engine cover, making it visually appealing and aligning it with the vehicle’s design language.
Furthermore, the engine cover may also include ventilation or cooling features to help dissipate heat generated by the engine. In some cases, it may have integrated heat shields to protect sensitive components from excessive temperatures. Overall, the engine cover is a multifunctional component that plays a vital role in both the performance and aesthetics of a vehicle.