
Replacing the shift solenoid on a Volvo EC210B NC Excavator involves several steps and requires specific tools and preparations. click here for more details on the download manual…..
- Voltage Regulator Hella / Alternator Charging Relay Bosch / Battery Charge #volvo140 #alternator Today we’re looking at charging regulator relays. Bosch relay OEM for Volvo and Hella as alternative solution. And, of course …
- EICHER engine 8000
Below is a detailed description of the entire process, including the necessary tools:
– **Safety Precautions**
– **Personal Protective Equipment (PPE)**: Ensure to wear safety glasses, gloves, and steel-toed boots to protect yourself during the procedure.
– **Work Area Preparation**: Clear the work area of debris and ensure the excavator is on stable ground. Use cones or barriers to restrict access to the work area.
– **Tools Required**
– **Socket Set**: A complete socket set (metric) to remove bolts and nuts securing the solenoid and other components.
– **Wrench Set**: Open-end and adjustable wrenches for various fasteners.
– **Screwdrivers**: Flathead and Phillips screwdrivers for any cover or clamp removal.
– **Pliers**: Needle-nose and regular pliers for handling small connectors and clips.
– **Torque Wrench**: To ensure bolts are tightened to manufacturer specifications.
– **Multimeter**: For testing the electrical connections and ensuring the new solenoid functions properly.
– **Shop Towels**: To clean any spilled fluids and keep the work area tidy.
– **Container for Fluids**: To catch any hydraulic fluid that may leak during the replacement process.
– **Replacement Shift Solenoid**: Ensure you have the correct solenoid for your specific model.
– **Preparation Steps**
– **Disconnect the Battery**: Start by disconnecting the negative terminal of the battery to prevent any electrical short circuit.
– **Hydraulic System Depressurization**: If applicable, relieve any pressure in the hydraulic system by following the manufacturer’s guidelines to avoid leaks or accidents.
– **Accessing the Shift Solenoid**
– **Locate the Shift Solenoid**: Identify the location of the shift solenoid, which is typically found on the transmission or hydraulic valve block.
– **Remove Any Obstructions**: If there are any covers, shields, or components blocking access to the solenoid, carefully remove them using the appropriate tools.
– **Removing the Old Shift Solenoid**
– **Disconnect Electrical Connections**: Carefully unplug the electrical connectors from the solenoid. Use pliers if necessary to release clips or locks.
– **Remove Bolts**: Using the socket set, remove the bolts securing the solenoid. Keep these bolts for reinstallation if they are in good condition.
– **Take Out the Solenoid**: Gently pull the solenoid out from its mounting position. Be cautious of any hydraulic fluid that may leak out.
– **Installing the New Shift Solenoid**
– **Prepare the New Solenoid**: Inspect the new solenoid for damage and ensure it matches the specifications of the old one.
– **Install the New Solenoid**: Position the new solenoid in its mounting location and secure it with the previously removed bolts, ensuring they are snug But not overtightened.
– **Reconnect Electrical Connections**: Plug the electrical connectors back into the new solenoid, ensuring a secure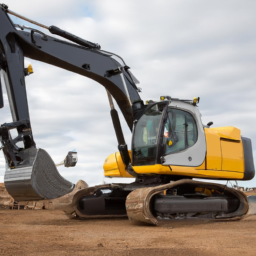 and correct fit.
– **Reassemble Any removed Components**
– **Replace Covers and Shields**: Reinstall any covers or components that were removed to access the solenoid, ensuring all fasteners are tightened properly.
– **Final Steps**
– **Reconnect the Battery**: Reconnect the negative terminal of the battery.
– **Check Hydraulic Fluid Levels**: Inspect hydraulic fluid levels and add fluid if necessary.
– **Test the New Solenoid**: Start the excavator and test the operation of the transmission or hydraulic system to ensure the new solenoid is functioning correctly. Use a multimeter to check for proper voltage at the solenoid if needed.
– **Cleanup**
– **Dispose of Old Parts**: Properly dispose of the old solenoid and any other materials used during the replacement.
– **Clean Work Area**: Ensure the work area is clean and free of tools and debris to maintain safety.
By following these detailed steps, you can effectively replace the shift solenoid on a Volvo EC210B NC Excavator. Always refer to the specific service manual for your model for any unique instructions or specifications.
An ashtray is a small receptacle designed to hold ash and cigarette butts, primarily used in vehicles to accommodate smokers. Traditionally, ashtrays were common fixtures in cars, serving as a practical solution for managing waste generated by smoking. Typically made from materials such as metal, ceramic, or durable plastic, an ashtray is designed to withstand heat and minimize the risk of fire. The interior is often lined or shaped to facilitate easy disposal and cleanup, with a slightly raised rim to contain ash and debris.
In terms of design, ashtrays can vary significantly between different car models and eras. Older vehicles often featured built-in ashtrays integrated into the dashboard or center console, providing a discreet and accessible location for smokers. Many modern vehicles have shifted away from incorporating dedicated ashtrays, reflecting a broader societal trend toward reduced smoking and increased environmental awareness. Instead, some cars offer multifunctional storage compartments that can serve as makeshift ashtrays.
The decline of the traditional ashtray in cars is also tied to changing regulations and public health campaigns aimed at reducing smoking. As a result, many contemporary vehicles are designed with a focus on promoting a smoke-free environment, and the ashtray has become less common in new models. Nevertheless, ashtrays remain a nostalgic symbol of car culture for many and continue to be available as aftermarket accessories for those who still smoke while driving.