
Replacing the gearbox and planetary gear on a Kubota Z482 or D722 engine involves several steps and requires a good understanding of mechanical systems. click here for more details on the download manual…..
- In Stock: For Kubota Original Engine Crankshaft Store Link: https://www.yemparts.com/ My whatsapp :+86 15089891322 Email: part@yempart.com Hot kubota Engine V2403, …
- Turning up the fuel In my kubota d722
below is a detailed guide on how to perform this task, including descriptions of the components involved.
### Tools and Materials Needed
**Tools:**
1. Socket set (metric)
2. Wrenches (metric)
3. Screwdrivers (flathead and Phillips)
4. Pliers
5. Torque wrench
6. Gear puller (if needed)
7. Soft mallet
8. Oil or grease for lubrication
9. Clean rags
**Materials:**
1. Replacement planetary gears
2. Replacement gearbox (if necessary)
3. Gasket or RTV sealant (if applicable)
4. Lubricant (gear oil)
### components to Understand
1. **Gearbox:** This is the assembly that houses the gears, providing different gear ratios to help manage Engine power and speed.
2. **Planetary Gears:** These are gears that rotate around a central sun gear and are integral to the gearbox. They allow for compact gear reduction and smooth operation.
3. **Sun Gear:** The central gear in a planetary system that drives the planetary gears.
4. **Ring Gear:** The outer gear that the planetary gears rotate against.
5. **Carrier Assembly:** Holds the planetary gears in place and allows them to rotate while transmitting power.
6. **Bearings:** Support the rotating gears and reduce friction.
7. **Seals:** Prevent oil leakage and contamination.
### Step-by-Step Replacement Procedure
#### 1. Preparation
– **Safety First:** Ensure the Engine is turned off, and the key is removed. Disconnect the battery to avoid any electrical issues.
– **Clean Area:** Work in a clean, dry area. Gather all necessary tools and materials.
#### 2. Access the Gearbox
– **Remove Covers:** Take off any Engine covers or panels that obstruct access to the gearbox. This may involve unscrewing bolts and lifting the covers off.
– **Disconnect Components:** Disconnect any components that are attached to the gearbox, such as cables, hoses, or mounting brackets. Label these for easier reassembly.
#### 3. Remove the Gearbox
– **Unbolt the Gearbox:** Locate the bolts securing the gearbox to the engine. Use the appropriate socket to remove these bolts.
– **Separate the Gearbox:** Gently pull the gearbox away from the engine. If it’s stuck, use a soft mallet to tap it free, being careful not to damage any components.
#### 4. Disassemble the Gearbox
– **Open the Gearbox:** With the gearbox out, remove any screws or bolts that secure the gearbox casing. Carefully separate the casing to expose the internal gears.
– **Remove the Planetary Assembly:** Note how the planetary gears are arranged. Carefully lift out the carrier assembly with the planetary gears attached. If necessary, use a gear puller for this step.
#### 5. Inspect Components
– **Examine Gears:** Check the planetary gears, sun gear, and ring gear for wear or damage. If any components are worn, they should be replaced.
– **Check bearings and Seals:** Inspect bearings and seals for wear. Replace them if they show signs of damage.
#### 6. Replace Gears
– **Install New Planetary Gears:** Place the new planetary gears onto the carrier assembly. Ensure they are seated properly.
– **Reassemble Carrier:** If the carrier assembly was disassembled, reassemble it, ensuring all gears align correctly.
#### 7. Reassemble the Gearbox
– **Reattach Gearbox Casing:** Carefully align the gearbox casing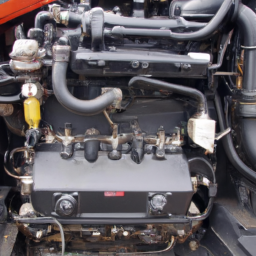 and secure it with screws or bolts, tightening them to the manufacturer’s specifications using a torque wrench.
#### 8. Reinstall the Gearbox
– **Attach Gearbox to Engine:** Align the gearbox with the Engine and push it back into place. Secure it with the previously removed bolts.
– **Reconnect Components:** Reattach any cables, hoses, or brackets that were disconnected earlier. Ensure everything is properly aligned.
#### 9. Final Steps
– **Replace Gaskets/Seals:** If applicable, replace any gaskets or seals to prevent oil leaks. Use RTV sealant if necessary.
– **Refill Gear Oil:** Fill the gearbox with the appropriate type and amount of gear oil as specified in the Engine manual.
– **Reattach Covers:** Replace any Engine covers or panels that were removed.
#### 10. Testing
– **Reconnect the Battery:** Once everything is reassembled, reconnect the battery.
– **Start Engine:** Start the Engine and let it run for a few minutes. Listen for unusual noises and watch for leaks around the gearbox.
– **Test Drive:** If applicable, take the Engine through its paces to ensure the gearbox operates correctly.
### Conclusion
Replacing the gearbox and planetary gears on a Kubota Z482 or D722 Engine involves careful disassembly and reassembly. Always refer to the service manual for specific torque specifications and detailed diagrams. Proper maintenance and careful handling can ensure a successful replacement and prolong the life of your engine.
A roof rack is a versatile and essential accessory for many vehicles, designed to provide additional storage space and enhance the functionality of a car. Typically mounted on the roof of the vehicle, a roof rack consists of crossbars and mounting hardware that securely attach to the vehicle’s existing roof structure. This component is particularly beneficial for individuals or families who engage in outdoor activities, travel frequently, or require extra cargo capacity beyond what the trunk or passenger area can accommodate.
Roof racks come in various styles and configurations to suit different needs. Some are designed for specific types of gear, such as kayak carriers, bike racks, or cargo boxes, while others offer a more universal fit. The crossbars can be adjustable to accommodate various loads and can be made from materials like aluminum or steel, ensuring strength and durability.
In addition to providing additional storage for sporting equipment, luggage, or other cargo, roof racks also facilitate better organization during trips. They help free up interior space, making for a more comfortable ride, especially on long journeys. Furthermore, many roof racks are designed to be aerodynamic, minimizing wind resistance and noise while driving. Overall, a roof rack is a practical investment for those who need to maximize their vehicle’s carrying capacity without compromising safety or comfort.