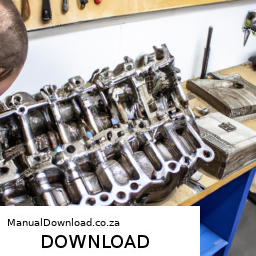
Lowering the control arm on a Perkins 102-05 engine can be a complex task, especially for someone without much mechanical experience. click here for more details on the download manual…..
- Here's Why the 5.9L Cummins is one of the Best Diesel Engines Ever Check out our website: dustrunnersauto.com Follow me on Instagram: @bryce.cleveland Gear I use to shoot my videos: (Buying …
However, I’ll break it down into simple steps to make it easier to understand.
**Important Note:** If you’re not comfortable doing this work yourself, it’s always best to consult with a professional mechanic. Safety should always come first.
### Tools and Materials Needed:
1. **Basic Hand Tools:** Wrenches, sockets, and ratchet.
2. **Jack and Jack Stands:** To lift the vehicle safely.
3. **Pliers:** For any clips or fasteners.
4. **Torque Wrench:** To ensure bolts are tightened to specifications.
5. **Replacement Control Arm:** Ensure you have the correct part for your model.
6. **Safety Gear:** Gloves and safety glasses.
### Steps to Lower the Control Arm:
1. **Preparation:**
– **Safety First:** Make sure you’re wearing gloves and safety glasses.
– **Check the Environment:** Ensure you’re in a well-ventilated area and that the vehicle is on a flat, stable surface.
– **Disconnect the Battery:** To prevent any electrical issues.
2. **Lift the Vehicle:**
– Use a jack to lift the vehicle from its designated lift points.
– Once lifted, place jack stands securely under the vehicle to ensure it won’t fall while you work.
3. **Remove the Wheel:**
– Using a wrench or socket, loosen and remove the lug nuts on the wheel that is connected to the control arm you want to replace.
– Take off the wheel and set it aside.
4. **Locate the Control Arm:**
– The control arm is usually a metal arm that connects the vehicle’s chassis to the wheel assembly. It may have bushings and ball joints attached to it.
5. **Disconnect the Control Arm:**
– Look for bolts that connect the control arm to the chassis and the wheel assembly.
– Using the appropriate socket or wrench, carefully remove these bolts. Keep track of where they belong (you might want to label them or take a picture).
6. **Remove the Control Arm:**
– Once all bolts are removed, the control arm should be loose. You may need to wiggle it a bit to get it out. Be careful not to damage surrounding components.
7. **Install the New Control Arm:**
– Take your new control arm and align it where the old one was.
– Insert the bolts back into the appropriate holes and hand-tighten them first to ensure everything is aligned properly.
8. **Tighten the Bolts:**
– Once the control arm is in place, use a torque wrench to tighten all bolts to the manufacturer’s specifications. This step is crucial for safety and proper vehicle handling.
9. **Reattach the Wheel:**
– Place the wheel back onto the hub and hand-tighten the lug nuts.
– Once the wheel is on, lower the vehicle slightly to the ground so you can fully tighten the lug nuts in a crisscross pattern for even tightening.
10. **Lower the Vehicle:**
– Remove the jack stands and then lower the vehicle completely to the ground.
11. **Reconnect the Battery:**
– Reconnect the battery terminal that you had disconnected earlier.
12. **Test Drive:**
– Take the vehicle for a short test drive to ensure everything feels right. Listen for any unusual noises or handling issues.
### Final Thoughts:
Replacing a control arm can be a rewarding project, but it requires careful attention to detail and safety. If you encounter any difficulties, don’t hesitate to consult a professional mechanic.
A lug wrench, also known as a tire iron or wheel brace, is a crucial automotive tool designed for loosening and tightening the lug nuts that secure a vehicle’s wheel to its hub. Typically made of steel, it features a long handle for leverage and a socket at one or both ends that fits the specific size of the lug nuts. The design of a lug wrench can vary, with some featuring a cross or star shape that allows for multiple nut sizes to be accommodated, while others may be a simple L-shape or a telescoping design that enhances portability and ease of use.
The primary use of a lug wrench is during tire changes, whether due to a flat tire or routine maintenance such as rotating tires. When a driver encounters a flat tire, the lug wrench is an essential tool for removing the wheel. Its long handle provides the leverage necessary to break the torque applied to the lug nuts, which can be particularly tight due to the vehicle’s weight or rust accumulation.
In addition to its practical use, lug wrenches are often included in a vehicle’s emergency kit, ensuring that drivers are prepared for unexpected tire issues. Some modern vehicles come equipped with specialized lug wrenches that may also incorporate features like built-in ratchets or extensions for added convenience. Overall, the lug wrench is a simple yet indispensable tool for any vehicle owner, emphasizing the importance of being prepared for roadside emergencies.
The topic of “Planetary gear set replacement on a Perkins 102-05 Engine Work Shop” involves the process of replacing the planetary gear set in a Perkins 102-05 engine, which is a type of diesel engine commonly used in various applications such as agricultural machinery, construction equipment, and other industrial uses.
### Key Components of the Process:
1. **Understanding the Planetary Gear Set**:
– The planetary gear set is a crucial component of the engine’s transmission system. It allows for smooth power transfer and torque multiplication, enabling efficient operation of the engine under different load conditions.
2. **Inspection and Diagnosis**:
– Before replacement, it’s essential to diagnose any issues with the existing planetary gear set. This may involve checking for wear, damage, or malfunction that could affect performance.
3. **Disassembly**:
– The replacement process typically begins with disassembling the engine or transmission housing to access the planetary gear set. This might include removing various components such as the oil pan, bell housing, and other related parts.
4. **Removal of the Old Gear Set**:
– After disassembly, the old planetary gear set is carefully removed. This step requires precision to avoid damaging surrounding components.
5. **Installation of the New Gear Set**:
– The new planetary gear set is then installed, ensuring proper alignment and fit. It’s essential to follow manufacturer specifications and guidelines during installation.
6. **Reassembly**:
– Once the new gear set is in place, the engine or transmission is reassembled. All components must be reattached in the correct order, and any seals or gaskets should be replaced to prevent leaks.
7. **Testing**:
– After reassembly, the engine is tested to ensure that the new gear set is functioning correctly. This may involve running the engine under various conditions to verify performance and stability.
8. **Maintenance Considerations**:
– Post-replacement, it’s important to conduct regular maintenance on the engine and transmission to ensure longevity and optimal performance of the new gear set.
### Conclusion:
Replacing a planetary gear set in a Perkins 102-05 engine is a technical process that requires a good understanding of engine mechanics, precision in execution, and adherence to safety protocols. Properly performed, this replacement can restore the engine’s performance and reliability.