Download Isuzu Trooper Service Repair Workshop Manual 1993-1998 –

service manual
Repairing the exhaust system on an Isuzu Trooper involves several steps, including identifying the problem, gathering necessary tools and materials, and executing the repair. click here for more details on the download manual…..


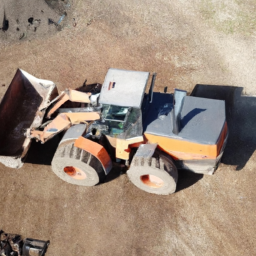
    Isuzu Trooper Off Road Vehicle Specifications: – Opel monterey / Isuzu trooper: 3.1 TD (Manual transmission) 33″ Silverstone MT-117 Xtreme.

    Solid axle Isuzu Trooper at Va4wda annual trail ride 2016 1992 Isuzu trooper with trail gear leafspring Toyota solid axle conversion on 35 inch Procomp mud terrains, four wheeling in …

below is a detailed guide on how to perform exhaust repair on an Isuzu Trooper, including descriptions of every component involved.

### Components of the Exhaust System

1. **Exhaust Manifold**: The exhaust manifold collects the exhaust gases from the engine cylinders and directs them into the exhaust system.
2. **O2 Sensors**: Oxygen sensors monitor the level of oxygen in the exhaust gases, helping the engine control unit (ECU) adjust the air-fuel mixture.
3. **Catalytic Converter**: This component reduces harmful emissions by converting exhaust gases into less harmful substances.
4. **Muffler**: The muffler reduces engine noise and helps to control exhaust flow.
5. **Exhaust Pipes**: These pipes connect all components of the exhaust system, allowing exhaust gases to flow from the engine to the atmosphere.
6. **Hangers and Clamps**: These hold the exhaust system components in place and ensure that they are properly aligned.
7. **Gaskets and Seals**: Gaskets seal the joints between different components to prevent leaks.

### Tools and Materials Needed

– **Tools**:
– Socket set (including deep sockets)
– Wrenches (both metric and standard)
– Jack and jack stands
– Screwdrivers (flathead and Phillips)
– Pliers
– Exhaust pipe cutter or hacksaw
torque wrench
– Wire brush or grinder
– Safety glasses and gloves

– **Materials**:
– Replacement exhaust parts (manifold, pipes, muffler, etc., as needed)
– Exhaust gaskets
– Exhaust sealant or permatex
– Replacement O2 sensors (if needed)
– Exhaust hangers (if the existing ones are damaged)

### Steps for Exhaust Repair

1. **Diagnosis**:
– Start by inspecting the exhaust system for any visible damage or leaks. Look for holes, rust, or broken components.
– Listen for unusual noises, such as hissing or loud rumbling, which may indicate a leak.
– Check for warning lights on the dashboard related to the exhaust system (e.g., check engine light).

2. **Safety First**:
– Ensure the vehicle is parked on a flat surface and the engine is cool.
– Use a jack to lift the vehicle and secure it with jack stands. Never work under a vehicle supported only by a jack.

3. **Remove Damaged Components**:
– Use a socket or wrench to remove the bolts connecting the exhaust components. If bolts are rusty, consider applying penetrating oil and allowing it to soak for a while.
– Carefully remove components like the muffler, catalytic converter, or exhaust pipes. You may need to cut sections with an exhaust pipe cutter or hacksaw if they are severely rusted or damaged.
– Take care not to damage surrounding components or the vehicle’s undercarriage.

4. **Clean the Surface**:
– Use a wire brush or grinder to clean the surfaces where the new components will be installed. This helps to ensure a good seal and prevents leaks.

5. **Install New Components**:
– Begin with the exhaust manifold (if replaced). Ensure the new gaskets are in placedownload Isuzu Trooper workshop manual and torque the bolts to the manufacturer’s specifications.
– Install the catalytic converter and secure it with the appropriate hardware. Use new gaskets as needed.
– Attach the exhaust pipes, ensuring they are aligned properly.
– Install the muffler and ensure it is securely attached using hangers and clamps.

6. **Reinstall O2 Sensors**:
– If you replaced O2 sensors, reinstall them in the correct locations and ensure they are securely connected.

7. **Check Alignment**:
– Make sure all components are aligned properly and that there are no places where the exhaust system could rub against other parts of the vehicle.

8. **Test the System**:
– Start the engine and allow it to idle. Listen for any unusual noises and check for exhaust leaks around joints and connections.
– If there are no leaks and everything sounds normal, take the vehicle for a short test drive to ensure proper operation.

9. **Final Checks**:
– After the test drive, check all connections again to ensure nothing has come loose and that there are no leaks.

### Conclusion

Exhaust repair on an Isuzu Trooper is a manageable task if you take the time to properly diagnose the issue and follow the steps methodically. Always follow safety precautions and consult the vehicle’s service manual for specific torque specifications and procedures. If you encounter complex issues or if the repair seems beyond your capability, don’t hesitate to consult a professional mechanic.
The camshaft is a crucial component in an internal combustion engine, playing a vital role in controlling the timing and operation of the engine’s valves. Typically made from steel or cast iron, the camshaft consists of a long, cylindrical rod with specially shaped lobes that push against the engine’s valves. Its primary function is to convert the rotational motion from the crankshaft into the linear motion required to open and close the engine’s intake and exhaust valves at the appropriate times during the engine cycle.

Camshafts can be found in various configurations, including single overhead camshaft (SOHC), double overhead camshaft (DOHC), and pushrod setups. The design influences engine performance, efficiency, and power delivery. The lobes of the camshaft are meticulously shaped to dictate the timing, duration, and lift of the valve opening, allowing for precise control of the air-fuel mixture entering the combustion chamber and the exhaust gases exiting.

Modern engines may also incorporate variable valve timing (VVT) systems, which adjust the camshaft’s position to optimize performance across different engine speeds and loads. This enhances fuel efficiency, reduces emissions, and improves power output. Overall, the camshaft is integral to engine operation, influencing performance characteristics and overall engine efficiency. Its design and functionality are critical for achieving the desired balance between power and fuel economy in contemporary automotive engineering.

Download Hitachi EX1200-5 Excavator Service Repair Manual –

diy
Performing suspension alignment on a Hitachi EX1200-5 Excavator is a complex process that requires a thorough understanding of the machine’s components and systems. click here for more details on the download manual…..


    High tech solutions on Hitachi dump trucks revealed We used in-house technology within the Hitachi group to develop the AC-3 series mining truck. This resulted in better …

    Hitachi EX1200 ARM Cylinder #shortvideo #

Below are detailed steps and descriptions of the tools required for the alignment process.

### Tools and Equipment Needed

– **Laser Alignment Tool**
– A precision tool that uses a laser beam to measure alignment. It helps in ensuring that all axles and suspension components are aligned accurately.

– **Digital Level**
– A digital leveling tool that measures angles and slope; essential for checking the level of the machine and its components during alignment.

– **Torque Wrench**
– A tool used to apply a specific torque to fasteners, ensuring that bolts are tightened to the manufacturer’s specifications.

– **Grease Gun**
– A device for applying lubricant to suspension components, which is crucial for maintaining smooth operation and preventing wear.

– **Measuring Tape**
– A measuring tool used to measure distances between suspension components and ensure correct spacing and alignment.

– **Socket and Ratchet Set**
– A set of various-sized sockets and ratchets to remove and install bolts and nuts on suspension components.

– **Service Manual for Hitachi EX1200-5**
– A comprehensive guide that provides specifications, diagrams, and procedures specific to the Hitachi EX1200-5, ensuring adherence to manufacturer standards.

– **Safety Gear**
– Personal protective equipment (PPE) including gloves, safety glasses, and steel-toed boots to protect the technician during the alignment process.

### Suspension Alignment Process

– **Preparation**
– Ensure the excavator is parked on a flat, stable surface. Engage the parking brake to prevent movement during the alignment process.
– Put on all necessary safety gear.

– **Inspect Suspension Components**
– Thoroughly examine all suspension components, including bushings, joints, and links, for wear or damage. Replace any worn or damaged parts before proceeding with alignment.

– **Lift the Excavator**
– Use a hydraulic jack or appropriate lifting equipment to raise the excavator, allowing access to the undercarriage and suspension components. Secure with jack stands for safety.

– **Check Level and Plumb**
utilize the digital level to ensure that the excavator is perfectly level before beginning the alignment process. Adjust as necessary.

– **Measure Suspension Geometry**
– Use the measuring tape to take baseline measurements of the suspension components. Document these measurements for comparison after adjustments are made.

– **Laser Alignment Setup**
– Set up the laser alignment tool according to the manufacturer’s instructions. Position the laser at a reference point on the excavator to project a straight line for alignment.

– **Adjust Suspension Components**
– Begin adjusting the suspension components based on the measurements taken. This may involve loosening bolts and repositioning parts to ensure they align with the laser’s reference line.
– Use the torque wrench to tighten bolts to the specified torque settings as per the service manual once adjustments are made.

– **Check Alignment**
– After adjustments, check the alignment using the laser tooldownload Hitachi EX1200 5 Excavator workshop manual and compare with the baseline measurements. Make any necessary fine adjustments to achieve proper alignment.

– **Lubricate Components**
– Use the grease gun to apply lubricant to all moving parts of the suspension system to ensure smooth operation and reduce wear.

– **Final Inspection**
– Conduct a thorough final inspection of all suspension components, ensuring everything is secure and properly aligned.
– Recheck all torque settings to ensure they meet manufacturer specifications.

– **Lower the Excavator**
– Carefully lower the excavator back to the ground and remove any tools or equipment used during the alignment process.

– **Test Operation**
– Before putting the excavator back into regular use, conduct a test operation to ensure that the suspension system functions correctly and that the alignment has been successfully achieved.

### Documentation
– **Record All Findings**
– Document all measurements, adjustments made, and any parts replaced. This information can be valuable for future reference and maintenance.

– **Report to Maintenance Log**
– Update the maintenance log for the Hitachi EX1200-5 with details of the alignment process conducted, including dates, findings, and any parts ordered or replaced.

By following these detailed steps and using the appropriate tools, you can perform a suspension alignment on a Hitachi EX1200-5 Excavator effectively and safely. always refer to the service manual for specific details related to your machine’s model.
The timing belt cover is a crucial component in an internal combustion engine, serving both protective and functional purposes. Typically made from durable plastic or metal, the timing belt cover encases the timing belt, which is responsible for synchronizing the rotation of the crankshaft and camshaft(s). This synchronization is essential for ensuring that the engine’s valves open and close at the correct times in relation to the movement of the pistons, thereby maintaining optimal engine performance and efficiency.

The timing belt cover protects the timing belt from dirt, debris, and moisture, which can lead to premature wear or damage. By sealing off this critical area, the cover helps maintain the integrity of the belt and the components surrounding it. Additionally, the cover often incorporates features such as inspection windows for visual checks, as well as mounting points for other engine components.

In some designs, the timing belt cover also plays a role in the overall aesthetic of the engine bay, contributing to a cleaner and more organized appearance. It is important to periodically inspect the timing belt cover for signs of cracks, leaks, or wear, as these can indicate potential issues with the timing belt itself. A failing timing belt can lead to severe engine damage, making the cover an essential part of the overall engine maintenance regimen.

Download Mitsubishi NimbusService & Repair Manual 1993-1999 –

purchase
Replacing the engine gasket on a Mitsubishi Nimbus is a task that requires some mechanical knowledge and the right tools. click here for more details on the download manual…..


    Mitsubishi Space Sta 1998 98 Diagnostic Obd Port Connector Socket Location Obd2 Dlc Data Link 10… Subscribe for more OBD locations! Biggest OBD/diagnostic port locations data base in the world!!!

    pull down transmission mitsubishi space wagon. problem makapal pressure plate. Disclaimer. No copyright infringement intended.

However, I’ll break it down into simple steps to help you understand the process. Remember, if you’re unsure at any point, it’s always a good idea to consult a professional mechanic.

### Tools and Materials Needed:
– Basic hand tools (wrenches, sockets, screwdrivers)
– Torque wrench
– Gasket scraper or putty knife
– New gasket set
– Engine oil (for lubricating gaskets)
– Clean rags
– Engine coolant (if applicable)
– Safety glasses and gloves

### Steps for Engine Gasket Replacement:

1. **Preparation:**
– **Safety First:** Make sure to wear safety glasses and gloves.
– **Disconnect the Battery:** Remove the negative terminal from the battery to prevent any electrical issues.

2. **Drain Fluids:**
– **Coolant:** If you’re replacing a head gasket, drain the engine coolant. Look for a drain valve on the radiator or remove the lower hose.
– **Oil:** If you’re working on the oil pan gasket, drain the engine oil.

3. **Remove Components:**
– **Intake and Exhaust Manifolds:** Depending on which gasket you are replacing (e.g., head gasket, intake gasket), you may need to remove the intake and exhaust manifolds. This involves disconnecting various sensors, vacuum hoses, and bolts.
– **Timing Belt or Chain:** If necessary, remove the timing belt or chain, taking note of how it is aligned for reassembly.
– **Other Accessories:** Remove any other components that may be in the way, such as the alternator, air conditioning compressor, or power steering pump.

4. **Access the Gasket:**
– Once all obstructing components are removed, you’ll have access to the gasket that needs to be replaced.

5. **Remove the Old Gasket:**
– Carefully scrape off the old gasket material from the engine block and cylinder head using a gasket scraper or putty knife. Be gentle to avoid scratching surfaces.
– Clean the surfaces thoroughly with a rag to ensure a good seal with the new gasket.

6. **Install the New Gasket:**
– Place the new gasket onto the engine block or cylinder head in the correct position. Make sure it aligns perfectly with the bolt holes and passages.
– For added protection, you can lightly oil the gasket surfaces to help with sealing.

7. **Reassemble Components:**
reinstall any parts you removed earlier, such as the intake and exhaust manifolds, timing belt/chain, and other accessories.
– Make sure to follow the manufacturer’s torque specifications when tightening the bolts. Use a torque wrench for accuracy.

8. **Refill Fluids:**
– Refill the engine with oildownload Mitsubishi Nimbus workshop manual and coolant as needed. Make sure to check for any leaks.

9. **Reconnect the Battery:**
– Reattach the negative terminal of the battery.

10. **Start the Engine:**
– Turn on the engine and let it run for a few minutes. Check for any leaks or unusual noises.

11. **Final Checks:**
– After running the engine, check the oil and coolant levels again. Top them off if necessary.

### Important Tips:
– **Keep Everything Organized:** Label parts and bolts as you remove them to make reassembly easier.
– **Consult the Manual:** If you have access to a service manual for the Mitsubishi Nimbus, it can provide specific torque specifications and assembly instructions.

### Conclusion:
Replacing an engine gasket can be a challenging but rewarding task. If at any point you feel overwhelmed, don’t hesitate to reach out to a professional mechanic for help. Good luck!
A temperature sensor is a crucial component in automotive systems, designed to monitor and regulate the temperature of various fluids and components within a vehicle. These sensors play a vital role in ensuring optimal performance, efficiency, and safety of the engine and other systems. There are several types of temperature sensors used in cars, including thermocouples, thermistors, and resistance temperature detectors (RTDs), each with specific applications and characteristics.

One of the most common uses of temperature sensors in vehicles is in the engine cooling system. The engine coolant temperature sensor (ECT sensor) monitors the temperature of the coolant circulating through the engine. This information is relayed to the engine control unit (ECU), which adjusts fuel injection, ignition timing, and other parameters to optimize engine performance and reduce emissions. If the coolant temperature is too high, the ecu can trigger cooling fans or adjust the engine operation to prevent overheating, which can lead to engine damage.

In addition to the ECT sensor, temperature sensors are also employed in other areas, such as monitoring the transmission fluid temperature to ensure efficient shifting and longevity of the transmission system. They can also be found in the climate control system, helping to regulate cabin temperature for passenger comfort. Overall, temperature sensors are integral to modern automotive technology, contributing to vehicle reliability, efficiency, and safety.

Download 2008 Mercedes-Benz E-Class E320 Owners Manual –

online
Certainly! click here for more details on the download manual…..


    Rear Installation: Mercedes E320 4Matic Suspension Conversion Kit By Strutmasters This video highlights installation of a Strutmasters suspension conversion kit on the REAR two wheels of a Mercedes E 320 model …

    2003 Mercedes Benz E320 (W211) Review & Test Drive | Is The E320 a Bargain or Burden? In this video, I review and test drive a 2003 Mercedes-Benz E320. This is the first model year of the W211 E-Class generation that …

Here’s a reverse order guide for replacing spark plugs on a Mercedes-Benz E-Class E320:

### Step 7: Reconnect Battery
Reconnect the negative terminal of the battery to restore power to the vehicle.

### Step 6: Reinstall Engine Covers
– If you removed any engine covers, reinstall them by securing them with the appropriate screws or clips.

### Step 5: Reinstall Ignition Coils
– Place the ignition coils back in their respective positions and secure them with the bolts you removed earlier. Ensure they are seated properly.

### Step 4: Install New Spark Plugs
– Carefully thread the new spark plugs into the cylinder head by hand to avoid cross-threading. Use a torque wrench to tighten them to the manufacturer’s specified torque (typically around 15-20 lb-ft, but check your specific manual).

### Step 3: Remove Old Spark Plugs
– Using a spark plug socket and ratchet, unscrew and remove the old spark plugs from the engine. Inspect them for wear or damage.

### Step 2: Remove Ignition Coil Connectors
– Disconnect the electrical connectors from the ignition coils. This may involve pressing a tab and pulling the connector off.

### Step 1: Prepare the Vehicle
– Ensure the vehicle is parked on a flat surface, the engine is cool, and the ignition is turned off. Open the hood and disconnect the negative terminal of the battery.

### Additional Tips (not in reverse order):
– **Gap the Spark Plugs**: Before installation, check the gap on the new spark plugs using a gap tool and adjust if necessary according to the specifications for your engine.
– **Use Anti-Seize**: Consider applying a small amount of anti-seize compound on the threads of the new spark plugs to facilitate future removal.
– **Check for Vacuum Leaks**: After replacing spark plugs, it’s a good idea to check for any vacuum leaks around the ignition coilsdownload Mercedes Benz E Class E320 workshop manual and other areas.

By following these steps in reverse order, you can ensure a successful spark plug replacement on your Mercedes-Benz E-Class E320. Always refer to your vehicle’s service manual for specific instructions and torque specifications, as they may vary.
The emission control valve, often referred to as the evaporative emissions (EVAP) vent valve or purge valve, is a critical component in modern automotive emission control systems. Its primary function is to manage and reduce the release of harmful vapors from the fuel system into the atmosphere, thereby helping vehicles comply with stringent environmental regulations.

The valve operates within the broader EVAP system, which captures fuel vapors from the fuel tank and routes them to the engine for combustion. When the engine is running, the emission control valve opens, allowing these captured vapors to enter the intake manifold. This process not only prevents harmful emissions but also improves fuel efficiency by utilizing fuel vapors that would otherwise be wasted.

The valve is typically controlled by the vehicle’s engine control unit (ECU), which monitors various engine parameters to determine the optimal time for vapor purging. When the engine reaches a certain temperature or load condition, the ECU signals the valve to open, initiating the transfer of vapors. Conversely, during conditions that could lead to excessive emissions or engine performance issues, the valve remains closed.

Failure of the emission control valve can lead to a host of issues, including increased emissions, reduced fuel efficiency, and the illumination of the check engine light. Regular maintenance and inspection of this component are essential for ensuring compliance with environmental standards and maintaining optimal vehicle performance.

Download DAEWOO DOOSAN MEGA 200- Wheeled Loader Service Parts Catalogue Manual –

online
Performing a transmission fluid flush on a Daewoo Doosan Mega 200 Wheeled Loader involves several steps that should be executed in reverse order for clarity. click here for more details on the download manual…..


    DOOSAN MEGA 250, 2006 wheeled loader DOOSAN MEGA 250V, Year: 2006, Hours: 945 only, in top condition for sale. Ask for an offer: info@ikran.eu.

    Dead Doosan Excavator Forced To Work | Excavator Working Video Welcome to our new Excavator video of Handicapped Excavator working in Mining. Excavators are massive and used for mass …

Here’s a detailed guide in reverse order:

### 8. Final Steps
– **Reconnect the Battery**: After ensuring everything is secure and all connections are checked, reconnect the battery.
– **Check Fluid Level**: start the engine and allow it to idle for a few minutes. With the engine running, check the transmission fluid level using the dipstick or level indicator. Add more fluid if necessary.

### 7. Clean Up
– **Dispose of Old Fluid**: Properly dispose of the old transmission fluid and any used filters according to local regulations.
– **Store Tools**: Gather and store all tools and equipment used during the process.

### 6. Replace the Transmission Filter (if applicable)
– **Install New Filter**: If your model has a transmission filter, remove the old filter and install the new one according to manufacturer specifications.
– **Secure Filter**: Ensure the filter is properly sealed and secured to prevent leaks.

### 5. Drain Old Transmission Fluid
– **Remove Drain Plug**: Place a drain pan under the transmission and remove the drain plug to allow the old fluid to drain completely.
– **Wait for Complete Drainage**: allow sufficient time for all fluid to drain out.

### 4. Flush the Transmission
– **Add Flush Solution**: If using a transmission flush machine, follow the manufacturer’s instructions to add the flush solution. If doing it manually, you might run the vehicle for a short time while the fluid circulates.
– **Run Engine**: If doing a manual flush, start the engine and let it run for a few minutes to circulate the flush solution.

### 3. Prepare for the Flush
– **Gather Necessary Tools and Materials**: Have the required tools, new transmission fluid, a new filter (if applicable), a drain pan, and any flush solutions ready.
– **Safety Precautions**: Ensure the loader is parked on a flat surface, and the engine is cool. Use proper safety equipment, such as gloves and goggles.

### 2. Access the Transmission
– **Lift the Loader**: If necessary, lift the loader using jacks or ramps to gain access to the undercarriage.
– **Locate the Transmission Components**: Identify the transmission fluid drain plug and filter location (if applicable).

### 1. Prepare the Work Area
– **Ensure Adequate Space**: Make sure you have enough room to work around the loader.
– **Safety Measures**: Ensure the area is well-ventilateddownload DAEWOO DOOSAN MEGA 200 Wheeled Loader ue workshop manual and that any hazards are cleared.

### Important Notes
– Always refer to the specific operator’s manual for your Daewoo Doosan Mega 200 Wheeled Loader for any manufacturer-specific procedures or recommendations.
– It’s crucial to use the correct type of transmission fluid specified for your loader to prevent damage.
– If you’re not comfortable performing this procedure, consider hiring a qualified mechanic or technician.

Following these steps in reverse order will help ensure a comprehensive understanding of the process involved in flushing the transmission fluid.
A brake light bulb is a crucial component of a vehicle’s lighting system, specifically designed to signal when a driver is applying the brakes. Located at the rear of the vehicle, brake light bulbs serve an essential safety function by alerting other drivers to the vehicle’s deceleration or stopping action. This communication is vital for preventing rear-end collisions, as it provides a clear indication of the vehicle’s intentions to those following behind.

Brake light bulbs come in various types, including incandescent, halogen, and LED options. Incandescent bulbs, typically the traditional choice, emit light through a filament that heats up when electricity passes through it. Halogen bulbs are a more advanced version of incandescent bulbs, offering improved brightness and longevity. LED brake light bulbs have gained popularity due to their energy efficiency, longer lifespan, and faster response time when activated. This means they illuminate more quickly than traditional bulbs, providing a more immediate warning to drivers behind.

The installation of brake light bulbs is generally straightforward, with most vehicles allowing easy access to the light housing. However, regular maintenance is essential, as burnt-out bulbs can go unnoticed, compromising safety. Therefore, drivers should routinely check their brake lights to ensure they are functioning correctly, contributing to overall road safety for everyone.

Download Land Rover Range Rover Workshop Repair Manual 2003 –

bookstore
Replacing the clutch slave cylinder on a Land Rover Range Rover is a task that requires a good understanding of automotive mechanics, as well as a set of tools and safety precautions. click here for more details on the download manual…..


    Customizing Your Land Rover Dash Learn how easy it is to customize the Dash cluster on your 2020 Land Rover to choose your driver assistance features, enhance …

    I BOUGHT A WRECKED RANGE ROVER SVR & ATTEMPTED TO REBUILD IT IN 7 DAYS To grab a Yfood taster pack with 10% exclusive discount click here USE CODE “MAT-YOUTUBE” …

Below is a detailed guide on how to perform this replacement. Please note that the specifics can vary depending on the model year of your Range Rover, so always refer to the vehicle’s service manual for any model-specific instructions.

### Tools and Materials Needed

#### Tools
1. **Socket Set**: Metric sockets to fit bolt sizes (commonly 10mm, 12mm, and 14mm).
2. **Wrench Set**: Open-end and box-end wrenches.
3. **Torque Wrench**: To ensure bolts are tightened to the manufacturer’s specifications.
4. **Pliers**: For hose clamps and other components.
5. **Screwdrivers**: Flat and Phillips head.
6. **Brake Bleeder Kit**: For bleeding the hydraulic system after installation.
7. **Fluid Catch Pan**: To catch any spilled fluid.
8. **Funnel**: For fluid refilling.
9. **Jack and Jack Stands**: To lift the vehicle safely.

#### Materials
1. **New clutch Slave Cylinder**: Ensure it matches the specifications for your model.
2. **Clutch Fluid (DOT 3 or DOT 4)**: Check the owner’s manual for the correct type.
3. **Brake Cleaner**: For cleaning surfaces.
4. **Rags or Shop Towels**: For cleaning and wiping down components.
5. **Thread Sealant or Teflon Tape**: If required for the hydraulic connections.

### Safety Precautions
– Make sure the vehicle is on a flat surface.
– Use jack stands to secure the vehicle after lifting it.
– Wear gloves and safety goggles, especially when dealing with brake fluid, as it can damage paint and is harmful to skin.

### Step-by-Step Replacement Process

#### 1. Preparation
– Park the vehicle on a level surface and engage the parking brake.
– Disconnect the negative battery terminal to prevent any electrical issues while working on the vehicle.

#### 2. Remove the Old clutch Slave Cylinder
– **Access the Slave Cylinder**: Depending on the model, you may need to remove the transmission cover or access panel to reach the clutch slave cylinder. This might require removing the center console or other surrounding panels.
– **Locate the Slave Cylinder**: It is typically mounted on the transmission bell housing and will have a hydraulic line connected to it.
– **Disconnect the Hydraulic Line**: Use a wrench to carefully loosen and disconnect the hydraulic line from the slave cylinder. Be prepared for some brake fluid to leak out, so have your catch pan in place.
– **Remove the Slave Cylinder Bolts**: Using the appropriate socket or wrench, remove the bolts securing the slave cylinder to the transmission.
– **Take Out the Old Cylinder**: Once the bolts are removed, gently pull the slave cylinder away from the transmission. Be cautious not to damage the surrounding components.

#### 3. install the New clutch Slave Cylinder
– **Prepare the New Cylinder**: Before installation, compare the new slave cylinder with the old one to ensure they are identical. If necessary, apply thread sealant to the threads of the hydraulic line fitting.
– **Position the New Cylinder**: Align the new slave cylinder with the mounting holes on the transmission.
– **Secure the Slave Cylinder**: install the bolts and tighten them to the manufacturer’s specifications using a torque wrench.
– **Reconnect the Hydraulic Line**: Carefully reattach the hydraulic line to the new slave cylinderdownload Land Rover Range Rover workshop manual and tighten it securely.

#### 4. Bleed the clutch System
– **Fill the clutch Reservoir**: Locate the clutch fluid reservoir and fill it with new fluid.
– **Bleed the System**: Using a brake bleeder kit, have an assistant pump the clutch pedal while you open and close the bleeder valve on the slave cylinder. This will remove any air from the system. Repeat this process until the fluid runs clear without bubbles.
– **Check Fluid Level**: Ensure the fluid level in the reservoir is at the correct level after bleeding.

#### 5. Reassemble and Test
– **Reassemble Any Removed Components**: If you removed parts to access the slave cylinder, reinstall them now.
– **Reconnect the Battery**: Reattach the negative battery terminal.
– **Test the Clutch**: Start the vehicle and test the clutch pedal. It should feel firm and engage/disengage smoothly.

#### 6. Final Checks
– **Check for Leaks**: After a test drive, inspect the area around the slave cylinder and hydraulic line for any signs of leaking fluid.
– **Dispose of Old Fluids Properly**: Ensure you dispose of any used brake fluid and old components according to local regulations.

### Conclusion
Replacing the clutch slave cylinder on a Land Rover Range Rover can be a challenging task, but with the right tools, materials, and attention to detail, it can be accomplished. Always consult your vehicle’s service manual for specific information related to your model year, and if you’re ever unsure, consider seeking professional assistance.
The glove box light is a small yet essential component found in many vehicles, designed to illuminate the glove compartment, which is typically located in the dashboard on the passenger side. This light serves a practical purpose by enhancing visibility within the glove box, allowing passengers and drivers to easily locate and access items stored inside, especially in low-light conditions or at night.

The glove box light is usually a simple incandescent bulb or an LED, mounted on the interior of the glove compartment door or the surrounding area. Its activation is typically linked to the opening of the glove box; when the door is opened, a switch is triggered, turning the light on. Conversely, when the glove box is closed, the switch is released, turning the light off to conserve battery life.

In addition to its functional role, the glove box light contributes to the overall user experience of the vehicle’s interior. By providing adequate illumination, it helps prevent frustration when searching for essential items like vehicle registration papers, insurance documents, or emergency kits in dim conditions. Over time, this component can sometimes fail due to bulb burnout or electrical issues, but it is generally straightforward to replace, ensuring that drivers continue to benefit from this small yet significant feature.

Download 1997 Ford Contour Service & Repair Manual Software –

diy
Certainly! click here for more details on the download manual…..


    Contour svt turbo Dyno Mondeo Here is my other toy turbo charged Contour Svt with the 2.5l motor 397whp 348wtq.

    1996 Ford Contour GL|17759M http://www.communitychrysler.com | 855-533-7163 Located at: Community Chrysler 555 State Rd. 37 S. Martinsville, IN Less than …

Here’s a step-by-step guide for replacing the fuel pump on a Ford Contour, presented in reverse order:

### Step 10: Reconnect the Battery
– Reattach the negative battery cable and ensure it is securely fastened.

### Step 9: Test the Fuel Pump
– Turn the ignition to the “ON” position without starting the engine to allow the fuel pump to prime.
– Check for fuel leaks around the fuel pump and connections.
– Start the engine to ensure it runs smoothly.

### Step 8: Reinstall the Fuel Tank
– Carefully position the fuel tank back into place, aligning it with the mounting points.
– Secure the tank by reinstalling the straps and bolts.

### Step 7: Reconnect Fuel Lines and Electrical Connectors
– Reattach the fuel lines to the fuel pump assembly, ensuring they are tight and secure.
– Reconnect the electrical connector to the fuel pump.

### Step 6: Lower the Vehicle
– If the vehicle was raised, lower it back to the ground.

### Step 5: Install the Fuel Pump Assembly
– Carefully insert the new fuel pump assembly into the fuel tank.
– Secure it according to the manufacturer’s specifications.

### Step 4: Remove the Old Fuel Pump
– Disconnect the fuel lines and electrical connectors from the old fuel pump.
– Remove the retaining ring or clips that hold the pump assembly in place, and carefully take out the old pump.

### Step 3: Access the Fuel Pump
– Depending on the model year, either remove the rear seat to access the fuel pump through an access panel or lower the fuel tank to reach the pump from underneath.
– If accessing through the tank, support it with a jack and remove the necessary bolts and straps.

### Step 2: Relieve Fuel System Pressure
– Before starting, relieve the fuel system pressure by removing the fuel pump fuse and running the engine until it stalls.

### Step 1: Gather Toolsdownload Ford Contour workshop manual and Materials
– Obtain a new fuel pump, necessary tools (like wrenches, screwdrivers, and a jack), safety glasses, and gloves.

By following these steps in reverse, you can get a clear understanding of the process involved in replacing the fuel pump on a Ford Contour. Always refer to a repair manual for specific torque specifications and safety precautions.
A subwoofer is a specialized speaker designed to reproduce low-frequency sounds, typically within the range of 20 Hz to 200 Hz. These frequencies correspond to the bass notes of music and are crucial for providing depth and richness to the audio experience. In automotive sound systems, subwoofers are essential components that enhance the overall sound quality by delivering powerful bass that standard speakers often cannot produce effectively.

Subwoofers come in various sizes, usually measured in inches, with common sizes being 8, 10, 12, and 15 inches. The size of the subwoofer is a significant factor in its ability to produce deep bass; larger subwoofers can move more air, creating more significant sound waves and, therefore, deeper bass. They can be housed in different types of enclosures, such as sealed, ported, or bandpass designs, each affecting the sound characteristics. A sealed enclosure provides tight, accurate bass, while a ported enclosure enhances efficiency and output at certain frequencies.

In cars, subwoofers are typically powered by dedicated amplifiers that provide the necessary power to achieve high sound levels without distortion. The installation of a subwoofer can significantly improve the listening experience, making music feel more immersive and engaging. Many car enthusiasts and audiophiles invest in high-quality subwoofers to ensure their sound systems deliver a balanced and powerful audio performance, especially for genres of music that emphasize low-frequency sounds, such as hip-hop, electronic, and rock.

Download 2004 Nissan Frontier Service & Repair Manual –

shop
Suspension spring seat repair on a Nissan Frontier involves several steps, and it’s important to have a good understanding of the components involved and the tools required. click here for more details on the download manual…..


    2023 Nissan Frontier PRO-4X Review Shop for a new Frontier on CarGurus: https://cargur.us/Ymkpg The 2023 Nissan Frontier Pro-4x, a mid-sized pickup truck, …

    The 2022 Nissan Frontier Keeps its Character with Modern Upgrades | MotorWeek Road Test In case you haven’t noticed, we’re currently in a midsize pickup truck resurgence, with the return of the Ford Ranger and the …

The suspension spring seat, also known as a spring perch, is a critical part of the suspension system, providing a resting place for the coil spring. Over time, this component can wear out or become damaged, leading to issues such as noise, poor ride quality, or even suspension failure. Below is a detailed guide on how to perform this repair.

### Tools and Materials Needed:

1. **Tools:**
– Jack and jack stands
– Socket set (including deep sockets)
– Wrench set
– Torque wrench
– Coil spring compressor
– Hammer
– Pry bar
– Screwdrivers (flathead and Phillips)
– Pliers
– Safety glasses
– Gloves

2. **Materials:**
– Replacement spring seat (OEM or aftermarket)
– New coil spring (if necessary)
– New strut assembly (if necessary)
– Lubricant or anti-seize compound
– New hardware (if needed)

### Step-by-Step Repair Process:

#### 1. **Safety First:**
park the vehicle on a level surface and engage the parking brake.
– Wear safety glasses and Gloves to protect yourself during the repair.

#### 2. **Lift the Vehicle:**
– Use a jack to lift the front or rear of the vehicle, depending on where you’re working.
– Secure the vehicle with jack stands to ensure it doesn’t fall while you’re working.

#### 3. **Remove the Wheel:**
– Use a socket and wrench to remove the lug nuts and take off the wheel.

#### 4. **Access the Suspension Components:**
– Depending on whether you are working on the front or rear suspension, you may need to remove the brake caliper and rotor (front) or the axle (rear).
– Disconnect any components that are in the way of accessing the strut (e.g., sway bar link, lower control arm).

#### 5. **Remove the strut Assembly:**
– Locate the strut assembly, which consists of the strut, coil spring, and spring seat.
– Remove the top strut mounting bolts (located under the hood or in the trunk for rear struts).
– Remove the lower strut mounting bolts where it connects to the knuckle.
– Carefully slide the strut out of its position.

#### 6. **Compress the Coil Spring:**
– Use a coil spring compressor to safely compress the coil spring before removing it from the strut. This is critical for safety, as the spring is under tension.
place the coil spring compressor on the coil spring, ensuring it is evenly spaced.
– Gradually tighten the compressor until the spring is loose enough to remove.

#### 7. **Remove the Spring and Spring Seat:**
– Once the coil spring is compressed, remove the retaining nut at the top of the strut shaft using a socket.
– Carefully remove the coil spring from the strut.
– Inspect the spring seat for damage; if it’s worn or broken, it needs to be replaced.
– Remove the spring seat from the strut assembly.

#### 8. **Install the New Spring Seat:**
place the new spring seat onto the strut, ensuring it sits in the correct orientation. Some spring seats have a specific alignment feature.
– If necessary, apply a light coating of lubricant to the mating surfaces to prevent squeaking.

#### 9. **Reinstall the Coil Spring:**
– Carefully reposition the coil spring onto the new spring seat.
– Use the coil spring compressor to exdownload Nissan Frontier workshop manualpand the spring back into position, ensuring it seats correctly.

#### 10. **Reassemble the strut Assembly:**
– Reinstall the top retaining nut onto the strut shaft, ensuring it is tightened to the manufacturer’s specifications using a torque wrench.
– Remove the coil spring compressor.

#### 11. **Reinstall the strut Assembly:**
– Position the strut back into its mounting location, securing the bottom bolts first.
– Align the top of the strut and install the mounting bolts.
– Torque all bolts to the manufacturer’s specifications.

#### 12. **Reinstall Other Components:**
– Reattach any components that were removed, such as the brake caliper, rotor, sway bar link, and axle.
– Ensure that all bolts and nuts are torqued to specifications.

#### 13. **Reinstall the Wheel:**
place the wheel back on the hub and hand-tighten the lug nuts.
– Lower the vehicle back to the ground and fully tighten the lug nuts in a crisscross pattern.

#### 14. **Final Checks:**
– Inspect the area for any tools left behind.
– Test the vehicle’s suspension by gently bouncing the corners and ensuring that everything feels stable.
– If applicable, take the vehicle for a short test drive to confirm that the repair was successful.

### Conclusion:
Suspension spring seat repair on a Nissan Frontier requires careful attention to detail and safety precautions. Ensure you follow all steps precisely and consult the vehicle’s service manual for specific torque specifications and guidelines. If at any point you feel uncomfortable with the task, consider seeking professional assistance.
A spoiler is an aerodynamic device found on various types of vehicles, particularly sports cars and high-performance automobiles. Its primary purpose is to improve the vehicle’s stability and handling at higher speeds by manipulating airflow over the car’s body. Spoilers can be mounted on the rear, front, or even on the sides of a vehicle, but they are most commonly associated with the rear of the car.

The design of a spoiler is crucial; it typically features an angled surface that disrupts the airflow, creating a downward force, known as downforce. This downforce helps to increase tire grip on the road, allowing for better cornering and reducing the likelihood of lift during high-speed maneuvers. In essence, a spoiler acts as a means of enhancing traction, which is particularly beneficial during aggressive driving or competitive racing scenarios.

Spoilers also serve an aesthetic purpose, often adding a sporty, aggressive look to a vehicle. Manufacturers and aftermarket suppliers offer a wide range of designs, from subtle lip spoilers to larger wing-style spoilers that can significantly alter the vehicle’s appearance.

In addition to performance benefits, spoilers can contribute to fuel efficiency by reducing drag at high speeds, although this effect is more pronounced in well-designed aerodynamic vehicles. Ultimately, while spoilers can enhance a car’s performance, they also reflect the vehicle’s character and the driver’s personal style.

Download DATSUN PICKUP 250 Series Service Repair Manual –

workshop
Replacing the planetary gear in the gearbox of a Datsun Pickup 250 can seem daunting, but with careful steps and some basic tools, you can tackle this project. click here for more details on the download manual…..


    SYMPTOMS OF A BAD ECM (ENGINE CONTROL MODULE) In this video, you will learn 4 symptoms of a bad or failing engine control module. Watching this video will help you diagnose to …

    1992 Nissan Datsun Pickup AX For Sale | Northeast Auto Imports 1992 Nissan Datsun Pickup AX For Sale | Northeast Auto Imports 1992 Nissan Datsun Pickup AX review …

Here’s a straightforward guide to help you through the process:

### Tools and materials Needed:
– Socket set and wrenches
– Screwdrivers (flathead and Phillips)
– Pliers
– Torque wrench
– Replacement planetary gear set
– Gasket sealant or new gasket (if needed)
– Oil for the gearbox (check your vehicle’s manual for specifications)
– Clean rags
– Drain pan

### Safety Precautions:
1. **Work in a well-ventilated area** to avoid inhaling fumes.
2. **Wear safety glasses and gloves** to protect yourself.
3. **Ensure the vehicle is securely lifted** on jack stands if you’re working underneath it.

### Step-by-Step Guide:

#### 1. **Preparation:**
– **Disconnect the Battery:** Start by disconnecting the negative terminal of the battery to prevent any electrical issues.
– **Gather Your Tools:** Have all your tools and replacement parts ready.

#### 2. **Drain the Gearbox Oil:**
– Place a drain pan under the gearbox.
– Remove the drain plug (usually at the bottom of the gearbox) and let the oil completely drain out.

#### 3. **Remove the Gearbox:**
– **Disconnect the Gear Shifter:** Depending on the design, you may need to remove the gear shifter or linkage to access the gearbox.
– **Unbolt the Gearbox:** Locate the bolts holding the gearbox to the engine and remove them. There may also be bolts securing it to the frame or crossmember.
– **Support the Gearbox:** Use a jack to support the gearbox as you remove it.
– Carefully slide the gearbox out from the vehicle.

#### 4. **Disassemble the Gearbox:**
– **Remove the Cover:** Use the appropriate screwdriver or socket to remove the bolts holding the gearbox cover. Be cautious as there may be springs or components under pressure.
– **Take Note of Assembly:** As you remove parts, take pictures or notes to Remember how everything fits together.
– **Remove the Planetary Gear Set:** Locate the planetary gear set within the gearbox. Carefully remove it, noting how it is positioned.

#### 5. **Install the New Planetary Gear Set:**
– Place the new planetary gear set into the gearbox in the same position as the old one.
– Make sure it rotates freely and is seated properly.

#### 6. **Reassemble the Gearbox:**
– Reattach the gearbox cover, ensuring any gaskets are in good condition or replaced.
– Tighten the bolts securely but be careful not to overtighten, as this could damage the cover.

#### 7. **Reinstall the Gearbox:**
– Carefully lift the gearbox back into position under the vehicle.
– Reattach any bolts, ensuring everything is aligned properly and secured.
– Reconnect the gear shifter or linkage as necessary.

#### 8. **Refill Gearbox Oil:**
– Replace the drain plug and refill the gearbox with the appropriate oil. Check your vehicle’s manual for the correct typedownload DATSUN PICKUP 250 workshop manual and amount.

#### 9. **Reconnect the Battery:**
– Reconnect the negative terminal of the battery.

#### 10. **Test Drive:**
– Start the vehicle and let it idle for a few minutes. Check for any leaks around the gearbox.
– Take the vehicle for a short test drive to ensure everything is functioning properly.

### Final Tips:
– **Take Your Time:** Don’t rush through the process. Ensure each step is done correctly.
– **Consult a Manual:** If you have access to a service manual for your Datsun Pickup 250, it can provide specific torque specifications and additional details about your gearbox.
– **Ask for Help:** If you feel unsure at any stage, consider asking a friend with more mechanical experience for assistance.

By following these steps, you should be able to replace the planetary gear in your Datsun Pickup 250’s gearbox with confidence!
The dipstick tube is a crucial component of an internal combustion engine’s lubrication system, serving as a guide for the dipstick, which is used to check the engine oil level. Typically constructed from metal or durable plastic, the dipstick tube is a vertical or angled tube that extends from the oil pan to the engine’s top. Its primary function is to provide a pathway for the dipstick to slide in and out, allowing for easy access to the oil reservoir.

The dipstick itself is marked with graduated measurements, indicating the oil level within the engine. When the engine is off and allowed to settle, the dipstick is removed from the tube, wiped clean, and then reinserted to obtain an accurate reading of the oil level. Proper oil levels are essential for maintaining engine health, as insufficient oil can lead to inadequate lubrication, increased friction, overheating, and potential engine damage.

In addition to facilitating oil level readings, the dipstick tube can also play a role in the overall design and efficiency of the engine. Its placement and design can affect oil circulation and ensure that the dipstick remains securely in place during operation. Furthermore, some dipstick tubes are designed to minimize the risk of oil leaks, ensuring that the engine remains clean and free of contaminants. Regular checks using the dipstick and tube are vital for vehicle maintenance, promoting longevity and performance.

Download 2001 Mercedes-Benz C-Class C200 Kompressor T-Modell (W203) OEM Download Service & Repair Manual Software –

book shop
Replacing the blower motor on a Mercedes-Benz C-Class C200 Kompressor T Modell W203 can be a detailed process. click here for more details on the download manual…..


    MERCEDES-BENZ C 300 – ADDING COOLANT – WHERE TO How to add coolant in a Mercedes-Benz C 300 is essential for your mechanic to know. Do not add coolant to your own car instead …

    How to change front wheel bearing on MERCEDES-BENZ W203 C-Class [TUTORIAL AUTODOC] How to change front wheel bearing / hub bearing / wheel bearing kit on MERCEDES-BENZ C240 2 (W203) 2.6 Saloon …

Below are the steps outlined in reverse order to help you understand the procedure clearly.

### 8. Reassemble the Dashboard and Components
– **Reconnect Battery**: Reconnect the negative terminal of the battery.
– **Reattach Dashboard**: If you removed any parts of the dashboard, reattach them, ensuring all screws and clips are securely fastened.
– **Replace Trim Panels**: Reinstall any trim panels or covers that were removed during the process.

### 7. Final Checks
– **Test the Blower Motor**: Before reassembling everything, turn on the vehicle and check that the blower motor operates correctly at all speed settings.
– **Check for Leaks**: Look for any signs of air leaks or unusual noises that may indicate improper installation.

### 6. Reinstall the New Blower Motor
– **Position the New Motor**: Insert the new blower motor into the housing, ensuring it is seated properly.
– **Secure with Screws**: Using the screws you removed earlier, securely attach the blower motor to the housing.

### 5. Disconnect the Old Blower Motor
– **Unplug Electrical Connector**: Carefully disconnect the electrical connector from the old blower motor.
– **Remove the Old Motor**: Unscrew and remove the old blower motor from its housing.

### 4. Access the Blower Motor
– **Remove the Glove Compartment**: Open the glove compartment and remove any screws or clips to take it out, giving you access to the blower motor housing.
– **Remove Any Obstructing Panels**: Depending on the model, you may need to take off other panels or components to reach the blower motor.

### 3. Prepare the work Area
– **Gather Tools and Parts**: Collect necessary tools such as screwdrivers, wrenches, and the new blower motor.
– **Disconnect Battery**: Always start by disconnecting the negative terminal of the battery to avoid electrical issues.

### 2. Safety Precautions
– **Wear Safety Gear**: Use gloves and safety glasses to protect yourself during the replacement process.
– **Ensure a Safe Environment**: work in a well-ventilated area, preferably on a flat surface.

### 1. Gather Information
– **Get the Right Replacement Part**: Ensure you have the correct OEM blower motor for the W203 model. It’s important to check compatibility before beginning the replacement.

By following these steps in reverse order, you can effectively undersdownload Mercedes Benz C Class C200 Kompressor T Modell W203 OEM workshop manualtand the process of replacing the blower motor in a Mercedes-Benz C-Class C200 Kompressor T Modell W203. Always consult the vehicle’s service manual for specific details and torque specifications.
A shift boot is an essential component found in vehicles equipped with manual or automatic transmissions. It serves several important purposes, both functional and aesthetic. Primarily, the shift boot is a protective cover that surrounds the gear shifter or gear lever. Its primary function is to conceal the internal mechanisms of the transmission, preventing dirt, dust, and debris from entering the shifting assembly. This protection helps to ensure smooth operation and longevity of the transmission components.

Typically made from flexible materials such as leather, vinyl, or rubber, the shift boot can come in various styles and designs to complement the interior of the vehicle. The material choice often reflects the overall design and luxury level of the car, with higher-end models featuring leather boots that enhance the tactile experience of shifting gears.

In addition to its protective role, the shift boot contributes to the overall aesthetic of the vehicle’s interior. It can come in different colors, patterns, and stitching styles, allowing for customization and personalization. A well-designed shift boot can enhance the look of the center console and contribute to a cohesive design within the cockpit.

Furthermore, the shift boot often incorporates a ring or trim piece that secures it to the base of the shift lever, ensuring that it stays in place during operation. In some vehicles, it may also include a mechanism to dampen vibrations, providing a more comfortable driving experience. Overall, the shift boot is a small yet significant component that plays a vital role in both functionality and style within a vehicle’s interior.