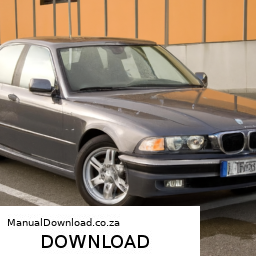
Replacing the EGR (Exhaust Gas Recirculation) valve on a BMW 525i can seem daunting, but with a little patience and attention to detail, you can do it yourself. click here for more details on the download manual…..
- 2007 BMW 525i Long Term Review In this video I’ll be showing you a 2007 BMW 525i with the 3.0L engine. Throughout the video we will go over the cars history, …
- HOW TO BLEED THE COOLING SYSTEM ON BMW E60 E61 530i 525i 530xi 525xi HOW TO BLEED THE COOLING SYSTEM ON BMW E60 E61 530i 525i 530xi 525xi. It might cover BMW 520i 523i 535i 520d …
Here’s a step-by-step guide to help you through the process. Please remember to always consult your vehicle’s manual for specific details related to your model.
### Tools and Materials Needed:
– Socket set (including extensions)
– Wrench set
– Screwdrivers (flathead and Phillips)
– Pliers
– Gasket scraper or razor blade
– New EGR valve
– New gasket (if required)
– Clean rags
– Safety gloves and goggles
### Steps to Replace the EGR Valve:
1. **Safety First**:
– Make sure the engine is off and cool. Disconnect the negative battery cable to prevent any electrical issues while you work.
2. **Locate the EGR Valve**:
– The EGR valve is typically located near the engine’s intake. It may be mounted on the intake manifold or near the exhaust manifold. You may need to refer to a diagram or your vehicle’s manual to find it.
3. **Remove Engine Cover (if necessary)**:
– If your BMW has a plastic engine cover, you might need to remove it to access the EGR valve. This usually involves unscrewing a few bolts or clips.
4. **Disconnect Electrical Connectors**:
– Carefully unplug any electrical connectors attached to the EGR valve. You may need to press a tab or use a small screwdriver to release the connector.
5. **Remove Vacuum Hoses**:
– If there are any vacuum hoses connected to the EGR valve, gently pull them off. Take note of their positions for reinstallation.
6. **Unbolt the EGR Valve**:
– Use the appropriate socket to remove the bolts that hold the EGR valve in place. Keep these bolts as you will need them for the new valve. Be careful not to drop them.
7. **Remove the Old EGR Valve**:
– Once the bolts are removed, gently pull the EGR valve away from its mounting location. If it’s stuck, you may need to wiggle it a bit or use a gasket scraper to break the seal.
8. **Clean the Mounting Surface**:
– Use a gasket scraper or a razor blade to carefully clean the mounting surface on the intake or exhaust manifold. Make sure there’s no old gasket material left, as this can cause leaks.
9. **Install the New EGR Valve**:
– Place the new gasket (if required) on the mounting surface. Position the new EGR valve over the mounting holes and align it properly.
10. **Bolt the EGR Valve in Place**:
– Insert and hand-tighten the bolts to hold the EGR valve in position. Then, use the socket wrench to fully tighten them, but be careful not to overtighten as this can damage the valve or the mounting surface.
11. **Reconnect Vacuum Hoses and Electrical Connectors**:
– Reattach any vacuum hoses you removed earlier, ensuring they are firmly connected. Plug in the electrical connectors to the EGR valve.
12. **Reinstall Engine Cover**:
– If you removed the engine cover, place it back and secure it with the bolts or clips you removed earlier.
13. **Reconnect the Battery**:
– Reconnect the negative battery cable.
14. **Test the Vehicle**:
– Start the vehicle to ensure everything is working correctly. Check for any unusual sounds or warning lights on the dashboard.
### Conclusion:
Congratulations! You’ve replaced the EGR valve on your BMW 525i. If you notice any issues after the installation, such as a check engine light, it’s a good idea to have the vehicle scanned for error codes. If you’re ever unsure about any step, don’t hesitate to consult a professional mechanic for assistance.
An oil cooler line is a critical component in a vehicle’s lubrication system, primarily designed to regulate the temperature of the engine oil. Engine oil plays a vital role in ensuring the smooth operation of the engine by reducing friction, minimizing wear, and facilitating heat dissipation. However, as the engine operates, especially under demanding conditions such as towing or high-speed driving, the oil can become excessively hot. This is where the oil cooler line comes into play.
The oil cooler line is essentially a conduit that transports engine oil to and from the oil cooler, a specialized radiator-like device that dissipates heat from the oil. Typically, these lines are constructed from durable materials like rubber or metal to withstand the high pressures and temperatures associated with engine operation. The lines are designed to be flexible enough to accommodate engine movements while being robust enough to prevent leaks or ruptures.
In operation, hot oil is pumped from the engine through the oil cooler line to the cooler, where it passes through a series of tubes or fins that allow air to circulate and cool the oil down. Once cooled, the oil returns to the engine through another line, ensuring optimal operating temperatures. Proper functioning of the oil cooler line is crucial for maintaining engine efficiency, longevity, and performance, as overheating can lead to decreased lubrication effectiveness and potential engine damage. Regular inspection and maintenance of these lines are essential to prevent leaks and ensure the overall health of the vehicle’s engine.