
Replacing the gearbox on a JCB JS220 Tracked Excavator Tier 3 Auto is a complex task that requires careful planning, appropriate tools, and a thorough understanding of the machinery. click here for more details on the download manual…..
Below is a detailed outline of the process, including the necessary tools and equipment.
### Preparation and Safety
– **Personal Protective Equipment (PPE)**: Ensure you are wearing safety gloves, goggles, steel-toed boots, and hard hats.
– **Work Area Setup**: Clear the area around the excavator to have ample space for the operation. Ensure proper lighting is available.
– **Disconnect Power Source**: Turn off the engine and disconnect the battery to prevent accidental starts during the procedure.
### Tools Required
– **Wrenches and Sockets**: A complete set of metric wrenches and sockets (both standard and deep sockets) for loosening and tightening bolts.
– **Torque Wrench**: For ensuring that all bolts are tightened to the manufacturer’s specifications.
– **Pry Bars**: To help in removing the gearbox from its housing if it’s stuck.
– **Hoist or Crane**: To lift the gearbox safely, as it can be heavy and awkward to handle.
– **Oil Drain Pan**: To collect any oil that may leak out during the process.
– **Sealant and Gasket Scraper**: To ensure a proper seal when installing the new gearbox.
– **Impact Wrench**: To speed up the removal of larger bolts.
– **Magnetic Tray**: For holding nuts and bolts to prevent loss during the procedure.
– **Cleaning Supplies**: Rags, degreasers, and brushes to clean surfaces before reassembly.
### Removal of the Old Gearbox
– **Drain Fluids**:
– Use an oil drain pan to drain hydraulic fluid from the gearbox and transmission. Ensure all fluids are disposed of according to local regulations.
– **Remove Covers and Shields**:
– Take off any protective covers or shields that obstruct access to the gearbox. This may include removing the engine cover, access panels, or side covers.
– **Disconnect Linkages**:
– Detach any linkages or cables connected to the gearbox. This may include throttle cables, shift levers, and electrical connectors.
– **Unbolt Gearbox Mountings**:
– Use the appropriate wrenches to unbolt the gearbox from its mounts. Keep all bolts organized in a magnetic tray for easy reinstallation.
– **Support the Gearbox**:
– Attach the hoist or crane to the gearbox securely. Ensure that it is balanced and can be lifted safely.
– **Remove the Gearbox**:
– Carefully lift the gearbox out of its housing. Use pry bars if necessary to help dislodge it from any sticky spots. Ensure that no connections are left Attached before fully removing it.
### Installation of the New Gearbox
– **Prepare the New Gearbox**:
– Inspect the new gearbox for any shipping damage and ensure it is clean and free of debris.
– **Apply Sealant**:
– If applicable, apply the appropriate sealant to the mounting surfaces to ensure a tight seal upon installation.
– **Position the New Gearbox**:
– Use the hoist or crane to position the new gearbox into place, aligning it with the mounting points.
– **Bolt the Gearbox in Place**:
– Hand-tighten the bolts initially to hold the gearbox in position before using the torque wrench to tighten them to the manufacturer’s specifications.
– **Reconnect Linkages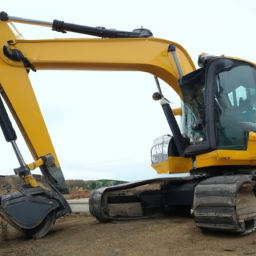 and Cables**:
– Reattach all previously disconnected linkages, cables, and electrical connectors.
### Final Steps
– **Refill Fluids**:
– Replace any hydraulic fluid that was drained during the removal process. Use the correct type and specification of fluid as per the service manual.
– **Check for Leaks**:
– Before starting the engine, inspect the area around the gearbox for any potential leaks or loose connections.
– **Reconnect Battery**:
– Reconnect the battery terminals and ensure all electrical connections are secure.
– **Start the Engine**:
– Start the excavator and allow it to idle for a few minutes. Monitor the operation of the new gearbox and ensure everything is functioning correctly.
– **Test Run**:
– Conduct a test run to check for proper operation. Listen for unusual noises and observe the performance of the gearbox.
### Post-Installation Checks
– **Inspect Again**:
– After a brief period of operation, perform another inspection for leaks and ensure all bolts are still secure.
– **Documentation**:
– Update maintenance logs with details of the gearbox replacement, including dates, part numbers, and any observations made during the process.
By following these detailed steps and using the correct tools, you can successfully replace the gearbox on a JCB JS220 Tracked Excavator Tier 3 Auto. Always refer to the manufacturer’s service manual for specific instructions and torque specifications.
A tire iron, also known as a lug wrench or wheel brace, is a crucial automotive tool designed for the removal and installation of lug nuts on a vehicle’s wheels. Typically constructed from durable materials such as steel or chrome vanadium, the tire iron features a long handle that provides the necessary leverage to loosen or tighten the lug nuts securely, which are the fasteners that hold the wheel in place.
Tire irons come in various designs, including the cross-shaped or “X” style, which offers multiple socket sizes at each end for different lug nut dimensions. This versatility makes it a practical tool for a wide range of vehicles. Some tire irons may also include a telescoping handle, allowing for easier storage and enhanced leverage when needed.
In addition to its primary function, a tire iron is often an essential part of a vehicle’s emergency roadside kit. Should a driver experience a flat tire, the tire iron enables them to change the tire quickly and safely, ensuring they can get back on the road without the need for professional assistance.
Overall, the tire iron is not just a simple tool; it plays a vital role in vehicle maintenance and safety, empowering drivers to handle tire-related issues independently. Its importance in everyday driving situations underscores the necessity of having a well-equipped vehicle, particularly for those who often travel long distances or in remote areas.