Download KOMATSU PC400-6,PC400LC-6,PC450-6,PC450LC-6 Hydraulic Excavator Service Repair Shop Manual –

australia
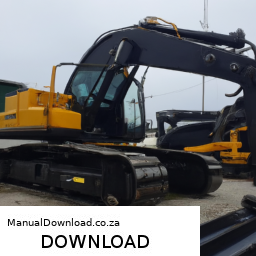
Wheel alignment for hydraulic excavators like the KOMATSU PC400-6, PC400LC-6, PC450-6, and PC450LC-6 is not a standard process similar to that of passenger vehicles, as excavators do not have traditional wheels but rather tracks. click here for more details on the download manual…..


    Used 2004 – Komatsu PC450LC-7K for sale | Used tracked excavator | equippo.com | EQUIPPO. The easiest way to buy used equipment For more information on this machine visit …

However, the concept of alignment in the context of an excavator typically involves ensuring that the undercarriage components, such as the track system, are functioning properly and are aligned correctly to ensure optimal operation and prevent excessive wear.

### Overview of Components Involved

1. **Track System**: The tracks provide the mobility of the excavator. They consist of:
– **Track Links**: The individual links that make up the continuous track.
– **Track Shoes**: The part of the track that makes contact with the ground.
– **Idler**: A wheel at the front of the track that helps guide the track.
– **Drive Sprocket**: The gear that drives the track, located at the rear.
– **Rollers**: These support the weight of the excavator and keep the track aligned.

2. **Undercarriage**: This includes all components that support the excavator’s upper structure and provide mobility:
– **Frame**: The main structural component that supports all other parts.
– **Suspension System**: Helps absorb shocks and maintain stability.
– **Track Tensioning System**: Adjusts the tension of the track for optimal operation.

### Steps for Wheel Alignment (Track Alignment) on KOMATSU Excavators

1. **Preparation**:
– **Safety Precautions**: Ensure to wear appropriate personal protective equipment (PPE) and ensure the excavator is on a level surface.
– **Gather tools and Equipment**: You will need:
– A track tension gauge
– Wrenches and sockets
– Alignment tools or a straight edge
– Measuring tape
– Hydraulic jacks (if necessary)

2. **Inspect the Undercarriage**:
– Check for any signs of wear or damage on the track, rollers, idlers, and sprockets.
– Look for any debris that may be lodged in the tracks or undercarriage components.

3. **Check Track Tension**:
– Measure the tension of the track using a track tension gauge. Proper tension is critical for effective track alignment.
adjust the tension using the hydraulic tensioning system if necessary. Typically, the tension should be within the manufacturer’s specifications.

4. **Align the Tracks**:
– Use a straight edge or a measuring tape to measure the distance between the track shoes on both sides of the excavator. This is to ensure that both tracks are at an equal distance from the centerline of the machine.
– If the tracks are misaligned, you may need to adjust the position of the idler or the track adjusters to bring them back into alignment.

5. **Adjust Track Rollers and Idlers**:
– Inspect the track rollers and idlers for proper alignment and wear. They should be aligned parallel to the track.
– If rollers or idlers are misaligned, adjust or replace them as necessary.

6. **Check Sprocket Alignment**:
– Ensure that the drive sprocket is properly aligned with the track. Misalignment can cause excessive wear on the sprocketdownload KOMATSU PC400 6 PC400LC 6 PC450 6 PC450LC 6 Hydraulic Excavator Shop workshop manual and track.
adjust the position of the sprocket if needed.

7. **Final Inspection**:
– After adjustments, perform a visual inspection of the entire undercarriage system to confirm all components are operating correctly.
– Run the excavator at low speed to check for any irregularities in track movement and listen for unusual sounds.

8. **Documentation**:
– Document any findings and adjustments made during the alignment process for future reference.
– Keep a maintenance log for track tension and alignment checks.

### Conclusion

Proper track alignment on a KOMATSU PC400-6, PC400LC-6, PC450-6, and PC450LC-6 excavator is crucial for efficient operation and longevity of the machine. Regular inspections and maintenance of the undercarriage components will help prevent misalignment issues and ensure optimal performance. Always refer to the manufacturer’s service manual for specific torque settings, adjustment procedures, and maintenance schedules.
The throttle cable is a critical component in both traditional and modern internal combustion engine vehicles, playing a pivotal role in controlling the engine’s power output and performance. It connects the accelerator pedal to the throttle body, which regulates the amount of air entering the engine. When a driver presses down on the accelerator pedal, the throttle cable transmits this input to the throttle body, opening the throttle plate and allowing more air to mix with fuel in the combustion chamber. This process increases engine power and speed.

Typically made from a flexible steel wire encased in a protective sheath, the throttle cable is designed to withstand tension and friction as it moves in response to the driver’s input. In older vehicles, this mechanical system provides a direct connection between the pedal and the throttle, offering a tactile response that many drivers find satisfying. However, in modern vehicles, particularly those equipped with electronic throttle control (ETC) systems, the traditional throttle cable has often been replaced by electronic sensors and actuators. In these systems, the accelerator pedal position is detected by sensors, and the throttle is controlled electronically, providing improved fuel efficiency and emissions control.

Regardless of the system used, the throttle cable or its electronic equivalent is essential for the smooth operation of the vehicle, directly affecting acceleration, drivability, and overall performance. Regular maintenance of this component is crucial to ensure proper functioning and avoid issues such as throttle lag or sticking, which can lead to unsafe driving conditions.

Download 2008 MAGNUM All Models Service and Repair Manual –

repair
To perform a Synchro replacement on MAGNUM models, you’ll need to follow a series of steps using specific tools. click here for more details on the download manual…..


    Plus Size Fashion – Maui Beaches Skirt Set #plussizefashion #shorts Welcome to Purpose Plus Size where we talk all about plus size fashion and give you the latest updates on what’s in and trending!

    Metra 70-6504 Amplifier Bypass Harness for Select 2005-2009 Dodge Durango & Dodge Magnum mode… Metra 70-6504 Amplifier Bypass Harness for Select 2005-2009 Dodge Durango & Dodge Magnum models Amazon Product Link: …

Here’s a detailed guide with bullet points:

### Tools Required:

– **Socket Set**:
– Use a complete socket set that includes various sizes. This is essential for loosening and tightening bolts in different areas of the MAGNUM model.

– **Wrench Set**:
– A combination of open-end and box-end wrenches will be necessary to access tight spaces and provide leverage on stubborn bolts.

– **Screwdrivers**:
– A set of flathead and Phillips screwdrivers for removing paneling or any screws securing the Synchro components.

– **Pliers**:
– Needle-nose pliers can be particularly useful for gripping small components or wires that need to be manipulated during the replacement process.

– **Torque Wrench**:
– This tool ensures that all bolts are tightened to the manufacturer’s specifications, crucial for the proper functioning of the Synchro after installation.

– **Replacement Synchro Unit**:
– Ensure you have the correct replacement part that matches the specifications of your MAGNUM model.

– **Sealant or Gasket Maker**:
– Depending on the model and design, you may need a sealant to ensure a proper seal between components.

– **Shop Towels**:
– For cleaning surfaces and wiping off any grease or fluid during the replacement process.

– **Safety Gear**:
– Safety glasses and gloves are crucial to protect yourself from debris and sharp edges during the replacement.

### Procedure:

– **Preparation**:
– Disconnect the battery to ensure safety while working on electrical components.
– Gather all tools and replacement parts before starting to minimize downtime.

– **Accessing the Synchro**:
– Remove any panels or coverings that obstruct access to the Synchro unit. Use screwdrivers and the socket set as necessary.
– Take note of the arrangement of any wiring or components that you may need to disconnect.

– **Disconnecting the Old Synchro**:
– Carefully disconnect any electrical connectors attached to the Synchro.
– Use the appropriate wrench or socket to remove any bolts securing the Synchro in place. Keep all hardware organized for reinstallation.

– **Removing the Old Synchro**:
– Gently pull the old Synchro unit from its housing. Ensure you do not damage surrounding components or wiring.

– **Preparing for Installation**:
– Clean the mounting surface thoroughly to remove any old gasket material or sealant. This will help create a good seal with the new Synchro.
– If required, apply a thin layer of sealant or install a new gasket.

– **Installing the New Synchro**:
– Position the new Synchro in place, ensuring it aligns correctly with the mounting holes.
– Reinstall boltsdownload MAGNUMModels workshop manual and secure them using the torque wrench to the specified torque settings from the manufacturer.

– **Reconnecting Electrical Connections**:
– Reattach any electrical connectors, ensuring they click into place securely.

– **Testing**:
– Before closing everything up, reconnect the battery and perform a test to ensure the new Synchro is functioning correctly.
– Check for any unusual noises or warning lights on the dashboard during this test.

– **Final Assembly**:
– Once confirmed that everything is functioning properly, reattach any panels or coverings that were removed.
– Ensure all tools are accounted for and the work area is clean.

– **Documentation**:
– Consider documenting the replacement process for future reference or maintenance records.

By following these steps and using the described tools, you can successfully replace the Synchro on MAGNUM models. Always refer to the specific service manual for your model for any unique instructions or specifications.
The pressure plate is a critical component in a vehicle’s clutch system, playing a vital role in the engagement and disengagement of the engine’s power to the transmission. Located within the clutch assembly, the pressure plate works in conjunction with the clutch disc and the flywheel. Its primary function is to apply pressure to the clutch disc, which is situated between the pressure plate and the flywheel. This pressure is essential for transmitting the engine’s torque to the transmission when the clutch is engaged.

When the driver presses the clutch pedal, a release mechanism (such as a hydraulic or cable system) disengages the pressure plate from the clutch disc. This action allows the clutch disc to rotate freely, enabling smooth gear shifts without grinding. The pressure plate is typically made from durable materials such as steel or aluminum to withstand the high temperatures and forces encountered during operation.

There are various types of pressure plates, including diaphragm and coil spring designs, each offering different characteristics that affect the clutch’s feel and performance. A well-functioning pressure plate is crucial for efficient power transfer, providing smooth engagement and disengagement while minimizing wear on the clutch components. regular maintenance and inspection of the pressure plate are important, as wear or damage can lead to clutch slippage, difficulty in shifting gears, or complete failure of the clutch system.

Download 2021 RAM 1500 Pickup 3.6L V6 24v VVT ETorque UPG I Service & Repair Manual –

service manual
Certainly! click here for more details on the download manual…..


    Ram 1500 E-TORQUE HYBRID System *Heavy Mechanic Review* | Does It ACTUALLY Work?? I Review the RAM 1500 5.7L hemi/3.6L pentastar ETorque Hybrid Engines and explain the pros and cons of this electric hybrid …

    RAM 1500 V6 3.6L Pentastar (E-Torque) **Heavy Mechanic Review** | Is It a Good Engine ?? Is the RAM 1500 V6 3.6L Pentastar a good engine? I review this V6 RAM engine as a Heavy Duty Mechanic and give you my …

below is a reverse order explanation of how to replace the wheel bearing on a RAM 1500 Pickup with a 3.6L V6 engine. Please remember that this is a general guide and may not cover all specifics for your model year. Always consult your vehicle’s service manual for detailed instructions.

### Reverse Order steps for Wheel Bearing Replacement

1. **Reinstall the Wheel and Tire**:
– Place the wheel onto the hub.
– Hand-tighten the lug nuts.
– Lower the vehicle from the jack stands.
– Use a torque wrench to tighten the lug nuts to the manufacturer’s specified torque.

2. **Reinstall the brake Caliper**:
– Align the brake caliper over the brake rotor.
– Install the caliper bolts and tighten to the manufacturer’s specifications.
– Reconnect the brake line if it was disconnected.

3. **Reattach the Hub Assembly**:
– If applicable, position the new hub assembly onto the steering knuckle.
– Insert the bolts and tighten them to the specified torque.

4. **Install New Wheel Bearing**:
– Press the new wheel bearing into the hub assembly using a bearing press or appropriate tool.
– Ensure it is seated correctly.

5. **Remove Old Wheel Bearing**:
– Using a bearing puller, remove the old wheel bearing from the hub assembly.
– Clean the hub area thoroughly to prepare for the new bearing.

6. **Disconnect the brake Components**:
– Remove the brake caliper by unbolting it from the bracket.
– Hang it with a wire to avoid putting stress on the brake line.
– Remove the brake rotor if necessary.

7. **Remove the Wheel**:
– Loosen the lug nuts using a lug wrench.
– Lift the vehicle using a jack and secure it with jack stands.
– Remove the lug nuts completely and take off the wheel.

8. **Prepare the Vehicle**:
– Park the vehicle on a level surfacedownload RAM 1500 Pickup 3.6L V6 24v VVT ETorque UPG I workshop manual and set the parking brake.
– Gather all necessary tools and parts (new wheel bearing, hub assembly, brake cleaner, torque wrench, etc.).

### Important Notes
– Always wear safety gear, including Gloves and safety glasses.
– Ensure the vehicle is secure on jack stands before starting work.
– Follow all safety and torque specifications as per the vehicle’s service manual.

This reverse guide should help you understand the steps involved in replacing the wheel bearing on your RAM 1500. If you’re not confident performing this task, consider consulting a professional mechanic.
A seatbelt retractor is a critical safety component of automotive seatbelt systems, designed to manage the seatbelt’s length and ensure that it functions effectively during both normal use and in the event of a collision. The primary function of a seatbelt retractor is to allow for the smooth extension and retraction of the seatbelt webbing. This mechanism is typically housed within a compact unit mounted to the vehicle’s seat or frame.

When a passenger sits in the vehicle and fastens their seatbelt, the retractor allows the webbing to extend to accommodate the individual’s size and seating position. The retractor is equipped with a spool, which is connected to a spring mechanism. When the seatbelt is pulled, the spool unwinds, allowing the belt to extend. However, if the force on the belt increases suddenly—such as during a crash—the retractor engages a locking mechanism. This can be achieved through various methods, including a pendulum or inertia reel, which locks the belt in place, preventing additional movement and helping to secure the occupant in their seat.

The design and functionality of seatbelt retractors have evolved significantly over the years, with modern systems incorporating features such as pretensioners, which tighten the belt upon collision, further enhancing occupant safety. Overall, the seatbelt retractor plays a vital role in the overall effectiveness of seatbelt systems, contributing to the reduction of injuries and fatalities in automotive accidents.

Download 2003-2017 Ford C-Max Service & Repair Manual Software –

diy
Replacing the shock absorbers on a Ford C-Max involves several steps and requires specific tools and safety precautions. click here for more details on the download manual…..


    SYMPTOMS OF BAD CV AXLE SHAFT demonstrated FORD C-MAX SYMPTOMS OF BAD CV AXLE SHAFT demonstrated FORD C-MAX If you have Ford C-MAX and you want to know the symptoms …

    KYB FORD C Max – Rear Fitting video showing the correct fitment of shock absorbers to the rear of: C-MAX II 04.2010 – 06.2019 FOCUS III 07.2010 …

Here’s a detailed guide with bullet points outlining the process and tools needed:

### Tools Required:
– **Jack and Jack Stands**: Essential for lifting the vehicle safely and securely.
– **Lug Wrench**: For removing wheel nuts.
– **Socket Set**: Includes various sizes, typically 10mm to 21mm sockets.
– **Ratchet and Extensions**: For easy access to bolts in tight spaces.
– **Torque Wrench**: To ensure bolts are tightened to manufacturer specifications.
– **Pry Bar**: Useful for separating components if they are stuck.
– **Spring Compressor**: If you’re replacing struts, this tool compresses the coil spring safely.
– **Impact Wrench (optional)**: Speeds up the removal of bolts but requires caution.
– **Pliers**: For removing clips or stubborn components.
– **Rust Penetrant (e.g., WD-40)**: Helps loosen rusted bolts.
– **Gloves and Safety Glasses**: Personal protective equipment to ensure safety during the process.
– **Shop Manual or Repair Guide**: For specific torque settings and diagrams if needed.

### Replacement Process:
– **Preparation**:
– Park the vehicle on a flat, stable surface.
– Engage the parking brake and place wheel chocks behind the rear wheels for added safety.

– **Loosen Wheel Nuts**:
– Use the lug wrench to slightly loosen the nuts on the wheel where you’ll be replacing the shock absorber.

– **Lift the Vehicle**:
– Position the jack under the designated lift point and raise the vehicle.
– Secure the vehicle with jack stands to ensure stability.

– **Remove the Wheel**:
– Fully remove the loosened wheel nuts and take off the wheel to expose the suspension components.

– **Locate the Shock Absorber**:
– Identify the shock absorber attached to the suspension system. The C-Max typically has a damper on each side of the rear axle.

– **Remove the Shock Absorber**:
– At the top mount: Use a socket and ratchet to remove the bolt securing the top of the shock absorber.
– At the bottom mount: Remove the bolt at the bottom of the shock absorber using the appropriate socket.
– If necessary, use a pry bar to detach the shock from the mounting points if it’s stubborn.

– **Install the New Shock Absorber**:
– Position the new shock absorber in place, aligning it with the mounting points.
– Insert and hand-tighten the bolts at both the top and bottom to hold it in place.

– **Torque the Bolts**:
– Use a torque wrench to tighten the bolts to the manufacturer’s specified torque settings. Refer to a repair manual for exact figures.

– **Reattach the Wheel**:
– Replace the wheel and hand-tighten the lug nuts.
– Lower the vehicle off the jack stands using the jack.

– **Final Tightening**:
– Once the vehicle is on the ground, use the lug wrench to fully tighten the wheel nuts in a crisscross pattern for even distribution.

– **Repeat for Other Side**:
– If replacing all shock absorbers, repeat the above steps for the opposite side.

– **Test Drive**:
– After replacing the shocks, take the car for a short drive to ensure everything is functioning properly. Listen for any unusual noises that may indicate improper installation.

### Safety Tips:
– Always wear glovesdownload Ford C Max workshop manual and safety glasses to protect against debris and sharp edges.
– Ensure the vehicle is stable and secure on jack stands before working underneath it.
– Be cautious when using the spring compressor, as compressed springs can be dangerous if released improperly.

By following these steps carefully and using the right tools, you can successfully replace the shock absorbers on a Ford C-Max.
The drive belt, often referred to as the serpentine belt in modern vehicles, is a crucial component of an internal combustion engine’s accessory drive system. Its primary function is to transfer power from the engine’s crankshaft to various peripheral devices, such as the alternator, power steering pump, water pump, air conditioning compressor, and sometimes the cooling fan. This belt is typically made from a durable rubber composite, which is designed to withstand the rigors of heat, friction, and environmental exposure.

The design of the drive belt has evolved over the years. Older vehicles often employed multiple belts for different accessories, but modern vehicles predominantly use a single serpentine belt that winds around multiple pulleys, maximizing efficiency and reducing space under the hood. This configuration simplifies maintenance, as it is easier to replace a single belt than multiple ones.

Regular inspection of the drive belt is essential, as wear and tear can lead to cracking, fraying, or stretching. A failing drive belt can result in a loss of power to vital components, which may lead to issues such as overheating, loss of steering assistance, and electrical failures. Most manufacturers recommend checking the drive belt at regular intervals and replacing it according to the vehicle’s maintenance schedule to ensure optimal performance and avoid potential breakdowns on the road.

Download DODGE RAM Truck 3.7L 4.7L 5.7L 5.9L Diesel 6.7L Service Repair Manual 2008 –

book shop
Replacing a control arm on a Dodge Ram truck can seem daunting if you have little mechanical experience, but with some patience and the right guidance, you can do it. click here for more details on the download manual…..


    Engine Cylinder Numbering Explained This covers inline and v8 style engines(Ford and everyone else)

    Top 5 Problems Dodge Ram Truck 3rd Generation 2002-08 Shop for New Auto Parts at 1AAuto.com http://1aau.to/c/240/L/evap-emission-control-system-parts This top problems features the …

Below is a simplified step-by-step guide to help you understand the process. Remember to take safety precautions, and if you’re unsure at any step, consider asking a more experienced friend or a professional for help.

### Tools and Materials Needed:
– Safety glasses and gloves
– Jack and jack stands
– Lug wrench
– Socket set (including metric sizes)
– Wrench set
– Hammer
– Prying tool or screwdriver
– Torque wrench
– Replacement control arm
– New bolts (if necessary)

### Steps to Replace a Control Arm:

1. **Preparation:**
– Park the truck on a flat surface and engage the parking brake.
– Wear safety glasses and gloves to protect yourself.

2. **Lift the Truck:**
– Use the lug wrench to loosen the lug nuts on the wheel where you’ll be replacing the control arm (do not remove them completely yet).
– Use the jack to lift the truck and secure it with jack stands. Never work under a vehicle supported only by a jack.

3. **Remove the Wheel:**
– Finish removing the lug nuts and take off the wheel to expose the suspension components.

4. **Locate the Control Arm:**
– The control arm is the component that connects the wheel hub assembly to the vehicle’s frame. It looks like a “V” shape and has bushings at both ends.

5. **Remove the Old Control Arm:**
– Locate the bolts securing the control arm to the frame and the ball joint that connects it to the steering knuckle (the part that holds the wheel).
– Use the appropriate socket and wrench to remove these bolts. You may need to use a hammer to free up any rusted or stuck bolts.
– If the ball joint is difficult to remove, you can use a prying tool or a ball joint separator tool.

6. **Install the New Control Arm:**
– Position the new control arm in place. Align it with the mounting holes in the frame and the ball joint.
– Insert the bolts and hand-tighten them to hold the control arm in place.

7. **Tighten the Bolts:**
– Using the torque wrench, tighten the bolts to the manufacturer’s specifications (check your vehicle’s service manual for specific torque settings). This ensures that everything is secure and safe.

8. **Reattach the Wheel:**
– Place the wheel back on the hub and hand-tighten the lug nuts.
– Lower the truck back to the ground using the jack and then fully tighten the lug nuts in a crisscross pattern to ensure even pressure.

9. **Check Your Work:**
– Inspect the control armdownload DODGE RAM Truck 3.7L 4.7L 5.7L 5.9L 6.7L workshop manual and ensure everything is securely fastened.
– Make sure there are no leftover parts and that everything is in order.

10. **Test Drive:**
– Take the truck for a short test drive in a safe area to ensure everything feels right. Listen for any unusual noises or handling issues.

### Final Notes:
– Replacing a control arm is a crucial job that affects your vehicle’s handling and suspension. If you’re ever in doubt, it’s a good idea to consult with a professional mechanic.
– Always refer to your vehicle’s service manual for specific instructions and torque specifications tailored to your model and year.

Safety is the most important factor, so take your time and ensure everything is done correctly. Good luck!
A battery cable is a crucial component in a vehicle’s electrical system, serving as the conduit for electrical energy between the battery and other components of the vehicle. Typically made from copper or aluminum, battery cables are designed to efficiently conduct electrical current while minimizing resistance and heat generation. They are often coated with a durable insulation material, usually PVC or rubber, to protect against environmental factors such as moisture, heat, and mechanical abrasion.

Battery cables come in two main types: positive and negative. The positive battery cable connects the positive terminal of the battery to the vehicle’s starter and other electrical systems, while the negative cable connects the negative terminal to the vehicle’s chassis or engine block, creating a ground connection. This grounding is essential for the proper operation of the vehicle’s electrical systems, as it helps to complete the electrical circuit.

The gauge of the battery cable is also significant, as it determines the amount of current the cable can safely carry. Thicker cables (lower gauge numbers) can handle higher currents, making them essential for high-performance vehicles or those with significant electrical demands. Over time, battery cables can corrode, fray, or become damaged, leading to poor electrical connections, which can result in starting issues or electrical failures. Regular inspection and maintenance of battery cables are vital for ensuring reliable vehicle performance and safety.

Download 2002 SUBARU IMPREZA CAR Service & Repair Manual – ! –

australian
Replacing the water pump on a Subaru Impreza can be a bit challenging, especially if you have little mechanical experience, but I will guide you through the process step-by-step. click here for more details on the download manual…..


    Top 5 Problems Subaru Impreza Hatchback 5th Generation 2017-21 For More Info visit us at: http://1aau.to/h/cog/ Do you own a 2017 to 2021 Subaru Impreza? The 5th generation of this model is not …

    #1 Upgrade for STI Transmissions If you own an STI with a 6-speed transmission, you may have experienced gear lockouts and grinds due to worn-out OEM …

Before we begin, please make sure you have the necessary tools and materials:

### tools and Materials Needed:
1. **Tools:**
– Socket set (including extensions)
– Wrenches
– Screwdrivers (flathead and Phillips)
– Pliers
– Torque wrench
– Gasket scraper or razor blade (if needed)
– Funnel
– Drain pan
– Rags or paper towels

2. **Materials:**
– New water pump
– New gasket or gasket sealant (if needed)
– New coolant
– New timing belt (optional but recommended if applicable)

### Steps to Replace the water Pump:

#### 1. **Preparation:**
– **Safety First:** Make sure the engine is cool and the car is parked on a flat surface. Engage the parking brake.
– **Disconnect the Battery:** To avoid any electrical issues, disconnect the negative terminal of the battery.

#### 2. **Drain the Coolant:**
– **Locate the Drain Plug:** Under the radiator, there should be a drain plug. Place the drain pan underneath it.
– **Open the Drain Plug:** Carefully open the drain plug to let the coolant flow out. Once it’s drained, close the plug.

#### 3. **Remove Components:**
– **Remove the Timing Belt Cover (if applicable):** Locate the cover that protects the timing belt. Remove the screws or bolts holding it in place.
– **Remove the Timing Belt (if applicable):** If your water pump is driven by the timing belt, you will need to remove it. Take note of how the belt is positioned. You might need to loosen the tensioner to do this.
– **Remove any Obstructions:** Depending on your engine layout, you may need to remove other components like the alternator, power steering pump, or other belts to access the water pump.

#### 4. **Remove the water Pump:**
– **Locate the water Pump:** It’s usually located on the front of the engine.
– **Unbolt the water Pump:** Remove the bolts securing the water pump using the socket set. Keep track of where each bolt goes.
– **Take off the Old water Pump:** Once the bolts are removed, gently pull the water pump off. If it’s stuck, you can gently tap it with a rubber mallet.

#### 5. **Install the New water Pump:**
– **Clean the Surface:** Use a gasket scraper or razor blade to clean any old gasket material off the engine block.
– **Install the New Pump:** Place the new water pump onto the engine, making sure it aligns correctly with the bolt holes.
– **Bolt it Down:** Reinstall the boltsdownload SUBARU IMPREZA CAR workshop manual and tighten them to the manufacturer’s specifications (you can find this in a repair manual). Be careful not to overtighten.

#### 6. **Reassemble:**
– **Reinstall Timing Belt (if applicable):** If you removed the timing belt, install it back in the correct orientation. Ensure proper tension as per specifications.
– **Reinstall Components:** Put back any components you removed (like the timing belt cover, alternator, etc.).

#### 7. **Refill Coolant:**
– **Add New Coolant:** Open the radiator cap and use a funnel to pour in new coolant. Fill it to the recommended level.
– **Bleed the System:** If necessary, run the engine with the radiator cap off to let air bubbles escape. Keep an eye on the coolant level and add more if needed.

#### 8. **Reconnect the Battery:**
– Reconnect the negative terminal of the battery.

#### 9. **Test:**
– Start the engine and let it run for a few minutes. Check for leaks around the water pump and ensure the engine is not overheating.

### Additional Tips:
– If you’re unsure about any step, consult your vehicle’s service manual or look for online tutorials specific to your Subaru Impreza model.
– It’s a good idea to replace the timing belt if it’s due, as it’s often necessary to remove it to access the water pump.
– Always dispose of old coolant and parts properly.

### Conclusion:
Replacing the water pump requires patience and attention to detail. Make sure to work carefully, and don’t hesitate to ask for help if needed. Good luck with your water pump replacement!
A shift cable is a critical component in the transmission system of a vehicle, responsible for facilitating the operation of the gear shift mechanism. Typically made of a flexible metal or plastic-coated wire, the shift cable connects the gear shifter inside the cabin to the transmission itself, which is usually located in the engine compartment or under the vehicle. When the driver moves the gear shifter, the shift cable transmits that motion to the transmission, allowing for the selection of different gears, whether in automatic or manual vehicles.

The shift cable operates by translating the linear motion of the gear lever into the angular motion required for the transmission to engage or disengage the selected gear. In automatic transmissions, the cable may also be linked to the vehicle’s computer systems, providing feedback on the gear selection and enabling smooth transitions between gears.

Over time, shift cables can experience wear and tear, which can lead to issues such as difficulty in shifting gears, unintended gear changes, or complete inability to change gears. Regular inspections can help identify problems early, and replacement of a faulty shift cable is often necessary to ensure smooth gear operation. Overall, the shift cable plays a vital role in the drivability and performance of a vehicle, making it an essential component for safe and efficient driving.

Download New Holland 30 Operators Service Manual –

do your own repairs
Installing a suspension lift kit on a Holland 30S (or any vehicle) can seem daunting, especially for someone with little mechanical experience. click here for more details on the download manual…..


    We have a New Holland LS55 with a 52" SD deck. The belt(s) From https://www.justanswer.com/ythi JustAnswer Customer: We have a New Holland LS55 with a 52″ SD deck. JustAnswer …

    New holland workmaster 50 no start issue , here’s what I did to fix the issue

However, I’ll break it down into simpler steps to help you understand the process. Please note that it’s essential to follow the specific instructions provided with your lift kit and consult a professional if you feel unsure at any point. Here’s a basic overview:

### What You’ll Need:
– Suspension lift kit (designed for Holland 30S)
– Basic hand tools (wrenches, sockets, ratchet, screwdrivers)
– Jack and jack stands
– Torque wrench
– Safety glasses and gloves
– Possibly a friend to help

### Steps for Installation:

1. **Preparation:**
– **Read the Instructions:** Before starting, carefully read the installation instructions that come with your lift kit. Different kits may have different requirements.
– **Gather Tools:** Make sure you have all the necessary tools ready.
– **Safety First:** Wear safety glasses and gloves to protect yourself.

2. **Lift the Vehicle:**
– Use a jack to lift the Holland 30S off the ground. Place jack stands under the vehicle for added safety. Ensure the vehicle is stable before proceeding.

3. **Remove the Wheels:**
– Using a wrench or socket, remove the lug nuts and take off the wheels. This will give you access to the suspension components.

4. **Remove Old Suspension Components:**
– Depending on the lift kit, you may need to remove parts like shocks, struts, or springs. Use your wrench to loosen and remove these components. Keep track of any hardware (like bolts) as you’ll need them later.

5. **Install Lift Kit Components:**
– Follow the specific instructions for your lift kit to install the new components. This usually includes:
– **New Springs:** Replace the old springs with the new ones that come with the kit.
– **Shocks or Struts:** Install the new shocks or struts according to the instructions. Make sure they are securely fastened.
– **Additional Parts:** Some kits might come with spacers or brackets that also need to be installed.

6. **Reassemble the Suspension:**
– Once the new components are in place, reassemble any parts you removed earlier, making sure everything is tightened properly.

7. **Reinstall the Wheels:**
– Put the wheels back on and hand-tighten the lug nuts.

8. **Lower the Vehicle:**
– Carefully lower the vehicle back to the ground using the jack, then remove the jack stands.

9. **Tighten Everything:**
– Once the vehicle is back on the ground, use a torque wrench to ensure all boltsdownload Holland 30 s workshop manual and nuts are tightened to the manufacturer’s specifications. This step is crucial for safety.

10. **Alignment Check:**
– After installing the lift kit, it’s recommended to get a professional wheel alignment. Lifting the suspension can change the alignment settings, and proper alignment ensures better handling and tire wear.

11. **Test Drive:**
take the vehicle for a short test drive to ensure everything feels right. Listen for any unusual noises and check that the suspension is functioning properly.

### Conclusion:
Installing a suspension lift kit can enhance the look and performance of your Holland 30S, but it’s important to do it correctly. If at any point you feel unsure about the process, don’t hesitate to seek help from a professional mechanic. Safety is the top priority, so make sure everything is properly installed and checked before hitting the road!
The trunk seal is a crucial component of a vehicle’s design, primarily positioned around the perimeter of the trunk lid. Its primary function is to ensure a tight seal between the trunk lid and the body of the vehicle when closed, preventing water, dust, dirt, and noise from entering the trunk compartment. Typically made from rubber or a similar elastomeric material, trunk seals are designed to be durable and resilient, capable of withstanding various environmental conditions, including extreme temperatures, UV exposure, and moisture.

One of the essential features of the trunk seal is its ability to compress when the trunk lid is closed, forming a barrier that helps maintain the integrity of the trunk space. This not only keeps the contents dry and clean but also contributes to the overall comfort of the cabin By minimizing road noise and vibrations from the outside. Over time, trunk seals may degrade due to wear, exposure to the elements, or chemical contaminants, leading to issues such as water leaks, unpleasant odors, or increased cabin noise. Regular inspection and maintenance of the trunk seal are vital for vehicle owners to ensure optimal performance and protect the trunk and its contents. In some cases, a damaged or worn seal may need to be replaced to restore the vehicle’s functionality and prevent further issues.

Download 2005 Dodge Dakota Factory Complete Service Repair Manual –

repair
Replacing the shift fork on a Dodge Dakota involves several steps and requires a good understanding of manual transmission components. click here for more details on the download manual…..


    Checking Codes Without A Scanner | Dodge Dakota/Durango A quick tip showing you how to check for fault codes without needing a scan tool.

    Engine Disabled! Melted Wiring Harness! Dodge Dakota 3.7 An electrical short caused the wiring harness to melt together on this pickup truck. The shorted wires harness damaged the 5v …

The shift fork is crucial as it helps in engaging and disengaging gears. Below is a detailed guide for replacing the shift fork on a Dodge Dakota.

### Required Tools and Materials

1. **Tools:**
– Socket set (including metric sizes)
– Wrench set
– Screwdrivers (flat and Phillips)
– Pliers
– Torque wrench
– Pry bar
– Transmission jack or a way to support the transmission
– Safety glasses
– Gloves

2. **Materials:**
– Replacement shift fork
– New transmission fluid (if needed)
– Gasket sealant (if applicable)
– Clean rags
– Clean container for old fluid

### Step-by-Step Replacement Process

#### 1. Safety First
– **Disconnect the Battery:** Remove the negative terminal from the battery to prevent any electrical shorts.
– **Lift the Vehicle:** Use a jack to lift the front of the vehicle and secure it with jack stands. Ensure the vehicle is stable before working underneath it.

#### 2. Remove the Transmission
– **Drain the Transmission Fluid:** Place a clean container underneath the transmission. Remove the drain plug (if equipped) or the bottom pan bolts and let the fluid drain completely.
– **Disconnect Linkages:** Remove the shift linkage connected to the transmission. This usually involves unscrewing a couple of bolts and sliding the linkage off.
– **Remove the Driveshaft:** If the Dakota has a rear-wheel drive setup, you will need to remove the driveshaft. Unbolt the U-joint from the differential, and then unbolt it from the transmission. Support the driveshaft with a jack.
– **Unbolt the Transmission:** Remove the bolts that secure the transmission to the engine. There are typically several bolts located around the bell housing.
– **Lower the Transmission:** Use a transmission jack to support the transmission and slowly lower it from the vehicle. Be cautious as the transmission can be heavy.

#### 3. Disassemble the Transmission
– **Remove the Transmission Case:** Once the transmission is on a solid surface, remove the bolts securing the transmission case. Carefully separate the two halves of the case.
– **Inspect Internal Components:** Before reaching the shift fork, take a moment to inspect the other components for wear or damage.

#### 4. replace the Shift Fork
– **Locate the Shift Fork:** The shift fork is usually located near the input shaft and is responsible for shifting the gears.
– **Remove the Old Shift Fork:** Depending on the design, you may need to unbolt the shift fork from its mounting point or remove retaining clips. take Note of how it is positioned for proper installation of the new fork.
– **Install the New Shift Fork:** Position the new shift fork in the same orientation as the old one. Secure it with them back together. Follow the manufacturer’s torque specifications for the bolts.
– **Reinstall the Transmission:** Lift the transmission back into place using the transmission jack and align it with the engine. Secure it with the bolts removed earlier.

#### 6. Reinstall Other Components
– **Reattach the Driveshaft:** Secure the driveshaft back to the transmission and differential, making sure to align it properly.
– **Reconnect Linkages:** Reattach the shift linkage to the transmission.
– **Refill Transmission Fluid:** Refill the transmission with the appropriate type and amount of fluid. Refer to the owner’s manual for specifications.

#### 7. Final Steps
– **Reconnect the Battery:** Reattach the negative terminal to the battery.
– **Test Drive:** Lower the vehicle and take it for a test drive to ensure the shift fork is functioning properly. Check for any leaks or issues.

### Conclusion
Replacing the shift fork on a Dodge Dakota can be a labor-intensive process, but with the right tools, parts, and careful attention to detail, it can be accomplished successfully. Always consult the vehicle’s service manual for specific instructions and torque specifications. If you’re unsure at any point, consider seeking assistance from a professional mechanic to avoid any potential damage to the vehicle.
A catalytic converter is a crucial component of a vehicle’s exhaust system, designed to reduce harmful emissions produced by the engine. It plays a vital role in meeting environmental regulations and improving air quality. Typically made of a ceramic or metallic substrate coated with precious metals such as platinum, palladium, and rhodium, the catalytic converter facilitates chemical reactions that convert toxic gases into less harmful substances.

When the engine burns fuel, it generates exhaust gases containing pollutants like carbon monoxide (CO), hydrocarbons (HC), and nitrogen oxides (NOx). The catalytic converter works by initiating two main types of reactions: oxidation and reduction. During the oxidation process, carbon monoxide and unburned hydrocarbons are converted into carbon dioxide (CO2) and water (H2O). In the reduction process, nitrogen oxides are transformed back into nitrogen (N2) and oxygen (O2).

The efficiency of a catalytic converter is influenced by factors such as engine temperature, exhaust flow, and the condition of the converter itself. Over time, catalytic converters can become clogged or damaged, leading to reduced performance and increased emissions. Many modern vehicles are equipped with oxygen sensors that monitor the exhaust gases and help optimize the operation of the catalytic converter. Overall, this component is essential for promoting cleaner emissions and is a key element in the fight against air pollution.

Download 2002 Mercedes-Benz C-Class 240 (W203) 4MATIC OEM Download Service & Repair Manual Software –

buy
Adjusting the clutch on a Mercedes-Benz C-Class 240 (W203) can be a bit technical, but I’ll break it down into simple steps. click here for more details on the download manual…..


    2002 Mercedes C240 axle stub LH REAR SPINDLE 203TYPE – mbiparts.com Used OEM Mercedes Parts -… … Buy parts for 2002 Mercedes C240! Call us at 1-916-638-6748 for a free quote! http://mbiparts.com 2002 Mercedes C240 axle …

    start problem Mercedes w203 – bad ecu. This can be a fix for you if the ECU failed and need a sta… Start problem w203 mercedes. This can be a fix if your car ecu is not working well. This video shows a car with broken engine …

However, it’s important to note that most modern vehicles, including the W203, come with hydraulic clutches which typically do not require manual adjustment. Instead, they self-adjust. If you’re experiencing problems like slipping or difficulty shifting gears, it might be due to wear or a hydraulic issue rather than needing an adjustment.

That said, I’ll provide a general overview of what you might need to check if you’re having clutch issues, and how to ensure things are working properly.

### Tools and materials Needed:
– Basic hand tools (wrenches, sockets)
– Jack and jack stands (if you need to get under the car)
– A mechanic’s manual for specific torque settings and details
– Brake cleaner (optional)
– Replacement clutch components (if necessary)

### Steps to Check and Maintain the Clutch:

1. **Safety First**:
– Make sure the car is parked on a flat surface.
– Turn off the engine and engage the parking brake.
– If you need to get under the car, use a jack to lift it and secure it with jack stands.

2. **Check the Clutch Fluid**:
– Locate the clutch master cylinder. It’s usually found near the brake fluid reservoir.
– Check the fluid level. It should be between the “min” and “max” lines. If it’s low, fill it with the recommended fluid (usually DOT 4).

3. **Inspect for Leaks**:
– Look under the car and around the clutch master and slave cylinders for any signs of fluid leaks. A leak could indicate a problem that needs to be addressed.

4. **Check the Clutch Pedal**:
– Press the clutch pedal down and check for any unusual resistance or a spongy feel.
– If the pedal feels too loose or doesn’t return properly, you may have a hydraulic issue.

5. **Test Drive**:
– Take the car for a short drive to see if you experience any slipping (the engine revs but the car doesn’t accelerate properly) or difficulty shifting.

6. **Look for Additional Problems**:
– If you still have issues, it may be due to worn clutch components or the need for a clutch replacement. This is a more involved process that typically requires more mechanical experiencedownload Mercedes Benz C Class 240 W203 4MATIC OEM workshop manual and tools.

### When to Seek Professional Help:
If you’re not comfortable with the above steps or if you find issues that you can’t resolve, it’s best to take your vehicle to a qualified mechanic. Clutch systems can be complex, and a professional will have the tools and experience to diagnose and fix problems safely.

In summary, while manual adjustments are not typically needed on hydraulic clutches, maintaining the system and checking for fluid levels and leaks are essential steps. If you’re experiencing persistent issues, consulting a mechanic is the best course of action.
The fuel tank is a critical component of an internal combustion engine vehicle, responsible for storing fuel that powers the engine. Typically made from materials such as steel or high-density polyethylene (HDPE), the tank is designed to withstand the harsh conditions of automotive environments, including exposure to heat, chemicals, and physical stress. Positioned usually at the rear of the vehicle, the fuel tank plays a crucial role in the overall fuel delivery system.

The tank features various components, including an inlet for refueling, a vent system to manage pressure and prevent fuel vapors from escaping, and a fuel gauge that provides the driver with information about the remaining fuel level. Most modern fuel tanks are equipped with safety features, such as anti-siphoning devices and collision-resistant designs, which help minimize the risk of leaks or ruptures in the event of an accident.

Fuel tanks also often include baffles to reduce fuel slosh during movement, ensuring a consistent fuel supply to the engine, especially during turns and acceleration. Moreover, advancements in design and engineering have led to the development of lightweight and more efficient fuel tanks, contributing to improved fuel economy and reduced emissions. In summary, the fuel tank not only serves as a reservoir for fuel but also plays a vital role in the overall safety, efficiency, and functionality of a vehicle.

Download BMW 525 525i 1999 Service Repair Workshop Manual –

bookshop
Replacing the EGR (Exhaust Gas Recirculation) valve on a BMW 525i can seem daunting, but with a little patience and attention to detail, you can do it yourself. click here for more details on the download manual…..


    2007 BMW 525i Long Term Review In this video I’ll be showing you a 2007 BMW 525i with the 3.0L engine. Throughout the video we will go over the cars history, …

    HOW TO BLEED THE COOLING SYSTEM ON BMW E60 E61 530i 525i 530xi 525xi HOW TO BLEED THE COOLING SYSTEM ON BMW E60 E61 530i 525i 530xi 525xi. It might cover BMW 520i 523i 535i 520d …

Here’s a step-by-step guide to help you through the process. Please remember to always consult your vehicle’s manual for specific details related to your model.

### Tools and Materials Needed:
– Socket set (including extensions)
– Wrench set
– Screwdrivers (flathead and Phillips)
– Pliers
– Gasket scraper or razor blade
– New EGR valve
– New gasket (if required)
– Clean rags
– Safety gloves and goggles

### Steps to Replace the EGR Valve:

1. **Safety First**:
– Make sure the engine is off and cool. Disconnect the negative battery cable to prevent any electrical issues while you work.

2. **Locate the EGR Valve**:
– The EGR valve is typically located near the engine’s intake. It may be mounted on the intake manifold or near the exhaust manifold. You may need to refer to a diagram or your vehicle’s manual to find it.

3. **Remove Engine Cover (if necessary)**:
– If your BMW has a plastic engine cover, you might need to remove it to access the EGR valve. This usually involves unscrewing a few bolts or clips.

4. **Disconnect Electrical Connectors**:
– Carefully unplug any electrical connectors attached to the EGR valve. You may need to press a tab or use a small screwdriver to release the connector.

5. **Remove Vacuum Hoses**:
– If there are any vacuum hoses connected to the EGR valve, gently pull them off. Take note of their positions for reinstallation.

6. **Unbolt the EGR Valve**:
– Use the appropriate socket to remove the bolts that hold the EGR valve in place. Keep these bolts as you will need them for the new valve. Be careful not to drop them.

7. **Remove the Old EGR Valve**:
– Once the bolts are removed, gently pull the EGR valve away from its mounting location. If it’s stuck, you may need to wiggle it a bit or use a gasket scraper to break the seal.

8. **Clean the Mounting Surface**:
– Use a gasket scraper or a razor blade to carefully clean the mounting surface on the intake or exhaust manifold. Make sure there’s no old gasket material left, as this can cause leaks.

9. **Install the New EGR Valve**:
– Place the new gasket (if required) on the mounting surface. Position the new EGR valve over the mounting holes and align it properly.

10. **Bolt the EGR Valve in Place**:
– Insert and hand-tighten the bolts to hold the EGR valve in position. Then, use the socket wrench to fully tighten them, but be careful not to overtighten as this can damage the valve or the mounting surface.

11. **Reconnect Vacuum Hoses and Electrical Connectors**:
– Reattach any vacuum hoses you removed earlier, ensuring they are firmly connected. Plug in the electrical connectors to the EGR valve.

12. **Reinstall Engine Cover**:
– If you removed the engine cover, place it backdownload BMW 525 525i workshop manual and secure it with the bolts or clips you removed earlier.

13. **Reconnect the Battery**:
– Reconnect the negative battery cable.

14. **Test the Vehicle**:
– Start the vehicle to ensure everything is working correctly. Check for any unusual sounds or warning lights on the dashboard.

### Conclusion:
Congratulations! You’ve replaced the EGR valve on your BMW 525i. If you notice any issues after the installation, such as a check engine light, it’s a good idea to have the vehicle scanned for error codes. If you’re ever unsure about any step, don’t hesitate to consult a professional mechanic for assistance.
An oil cooler line is a critical component in a vehicle’s lubrication system, primarily designed to regulate the temperature of the engine oil. Engine oil plays a vital role in ensuring the smooth operation of the engine by reducing friction, minimizing wear, and facilitating heat dissipation. However, as the engine operates, especially under demanding conditions such as towing or high-speed driving, the oil can become excessively hot. This is where the oil cooler line comes into play.

The oil cooler line is essentially a conduit that transports engine oil to and from the oil cooler, a specialized radiator-like device that dissipates heat from the oil. Typically, these lines are constructed from durable materials like rubber or metal to withstand the high pressures and temperatures associated with engine operation. The lines are designed to be flexible enough to accommodate engine movements while being robust enough to prevent leaks or ruptures.

In operation, hot oil is pumped from the engine through the oil cooler line to the cooler, where it passes through a series of tubes or fins that allow air to circulate and cool the oil down. Once cooled, the oil returns to the engine through another line, ensuring optimal operating temperatures. Proper functioning of the oil cooler line is crucial for maintaining engine efficiency, longevity, and performance, as overheating can lead to decreased lubrication effectiveness and potential engine damage. Regular inspection and maintenance of these lines are essential to prevent leaks and ensure the overall health of the vehicle’s engine.