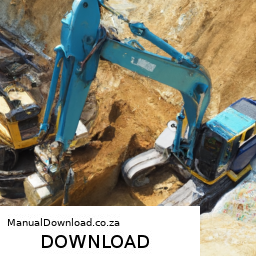
Repairing the gear shift linkage on a Komatsu PC308USLC-3 hydraulic excavator involves several steps and components. click here for more details on the download manual…..
- BMW 330xi Radiator Upgrade DIY (1999-2006 BMW E46 330i, 330Ci, 325i, 325xi, 325Ci, 328i, 328xi) Notorious for cooling system woes, the BMW E46 is just a few choice upgrades away from good reliability. One of the best things …
- KOMATSU PC308USLC-3 H48647 I created this video with the YouTube Video Editor (http://www.youtube.com/editor)
Below is a detailed guide on how to carry out this repair. Please ensure to follow all safety guidelines and refer to the official Komatsu service manual for specific procedures and torque specifications.
### Safety Precautions:
1. **Personal protective equipment (PPE)**: Wear gloves, safety glasses, and steel-toed boots.
2. **Isolation**: Ensure the machine is turned off, the key is removed, and the hydraulic system is depressurized.
3. **Stability**: Use appropriate support stands if the excavator is raised.
### Tools and Materials Needed:
– **Tools**: Wrench set, socket set, screwdrivers, pliers, torque wrench, and possibly a gear puller.
– **Replacement Parts**: New shift linkage components (if worn or damaged), gaskets, seals, and lubricants as necessary.
– **Cleaning Supplies**: Degreaser, rags, and a small brush.
### Components of Gear Shift Linkage:
1. **Gear Shift Lever**: The lever that the operator uses to change gears.
2. **Linkage Rods**: These connect the gear shift lever to the transmission. They transmit the operator’s input to the transmission.
3. **Ball Joints/Couplings**: Allow for movement between the linkage rods and the gear shift lever/transmission.
4. **Mounting Brackets**: Secure the linkage components to the excavator chassis.
5. **Bushings and Bearings**: Facilitate smooth movement of the linkage.
6. **Return Springs**: Ensure the gear shift lever returns to its original position after shifting.
### Step-by-Step Repair Process:
#### 1. **Inspect the Gear Shift Linkage:**
– **Visual Inspection**: Check for any visible damage, wear, or loose connections in the gear shift linkage.
– **Function Test**: Move the gear shift lever through its range of motion to identify any binding or unusual resistance.
#### 2. **Remove the Gear Shift Lever:**
– **Access the Lever**: Depending on the machine’s configuration, you may need to remove a cover or panel to access the gear shift lever.
– **Detach the Lever**: Unscrew the mounting bolts holding the lever in place. Carefully lift the lever out, noting any washers or spacers used.
#### 3. **Disconnect Linkage Rods:**
– **Identify Linkage Points**: Locate the points where the rods connect to the gear shift lever and transmission.
– **Remove the Couplings**: Use pliers or a wrench to detach the ball joints or couplings. Be mindful of any retaining clips that may need to be removed first.
– **Take Note of Orientation**: Document the orientation and configuration of the linkage rods for reinstallation.
#### 4. **Inspect and Replace Components:**
– **Examine each Component**: Look for wear or damage on the rods, bushings, and joints. If any parts are damaged, replace them with new ones.
– **Clean Parts**: Use a degreaser to clean all components before reassembly.
#### 5. **Reassemble the Linkage:**
– **Install New Components**: If any components were replaced, install them in the reverse order of removal.
– **Reconnect Linkage Rods**: Attach the rods back to the gear shift lever and transmission, ensuring they are secured tightly.
– **Check Alignment**: Make sure that all components are aligned correctly to prevent binding.
#### 6. **Reinstall the Gear Shift Lever:**
– **Position the Lever**: place the lever back in its original position, ensuring any spacers or washers are correctly placed.
– **Secure the Lever**: Tighten the mounting bolts to the specified torque using a torque wrench.
#### 7. **Test the Gear Shift Mechanism:**
– **Function Check**: Before starting the excavator, manually move the gear shift lever to ensure it shifts smoothly through all positions.
– **Start the Engine**: With the machine in neutral, start the engine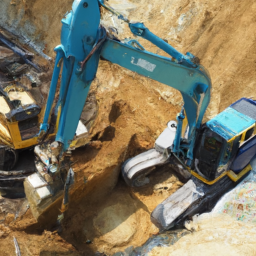 and test the gear shifting under operational conditions.
– **Observe for Issues**: Pay attention to any unusual noises or resistance during operation.
#### 8. **Final Inspection:**
– **Check for Leaks**: After testing, check around the gear shift linkage area for any fluid leaks.
– **Ensure Proper Operation**: confirm that the gear changes are smooth and responsive.
### Conclusion:
Repairing the gear shift linkage on a Komatsu PC308USLC-3 requires attention to detail and a systematic approach. Proper inspection, replacement of components, and reassembly according to specifications are crucial for ensuring the excavator operates efficiently. Always consult the manufacturer’s service manual for detailed instructions tailored to your specific model.
The hood release is a crucial component in automotive design, functioning as a mechanism that allows the driver or a technician to open the vehicle’s hood with ease. Typically located inside the passenger compartment, often near the driver’s seat, the hood release consists of a lever or a pull cord connected to a latch on the hood itself. When the driver pulls the lever or cord, it activates the latch mechanism that secures the hood, disengaging it and allowing it to be lifted for access to the engine compartment.
The design and placement of the hood release are important for both convenience and safety. It is usually designed to be easily accessible, allowing for quick access when checking engine fluids, inspecting the battery, or performing routine maintenance. In many vehicles, an additional safety catch is integrated into the hood release system to prevent accidental opening while driving, requiring a second action to fully lift the hood.
In modern vehicles, the hood release mechanism may also include electronic components, particularly in cars with advanced features such as remote start systems or keyless entry. Regular maintenance of the hood release is essential, as wear or corrosion can impede its functionality, making it difficult to open the hood when necessary. Overall, the hood release plays a significant role in vehicle maintenance and functionality, ensuring that drivers and technicians can easily access the engine compartment for necessary inspections and repairs.