Replacing the CV joint (Constant Velocity joint) on a Renault Alpine is a complex task that requires mechanical knowledge and appropriate tools. click here for more details on the download manual…..
Remote locking on Renault Alpine GTA Turbo
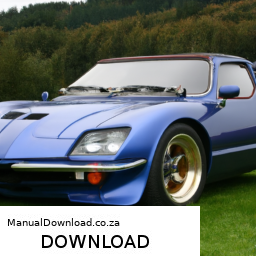
1972 Renault-Alpine A110 1600S: Fetching, Ferocious, French By the end of the very first official season of the World Rally Championship in 1973, Renault-Alpine emerged victorious, with the …
Here’s a detailed guide broken down into bullet points, describing each step and the necessary tools.
### Tools and equipment Needed:
– **Jack and Jack Stands**
– Used to lift and support the vehicle securely while you work underneath it.
– **Lug Wrench**
– For removing the wheel nuts.
– **Socket Set**
– A comprehensive socket set (including metric sizes) for various bolts and nuts.
– **Torque Wrench**
– To ensure that all nuts and bolts are tightened to the manufacturer’s specifications.
– **Pliers**
– Needle-nose and standard pliers for various clips and retaining rings.
– **Flathead and Phillips Screwdrivers**
– For removing screws and clips that may be securing components.
– **Hammer**
– To help dislodge parts that may be stuck, such as the CV joint from the axle.
– **CV Joint Puller/Separator Tool**
– To safely separate the CV joint from the axle without damaging components.
– **Grease**
– High-quality CV joint grease for lubrication during reassembly.
– **Replacement CV Joint Kit**
– Ensure you have the correct CV joint kit specific to the Renault alpine model.
– **Safety Glasses and Gloves**
– For personal protection during the replacement process.
### Step-by-Step Replacement Process:
– **Preparation**
– Park the vehicle on a flat surface and engage the handbrake.
– Wear safety glasses and gloves to protect yourself from debris.
– **Lifting the Vehicle**
– Use the lug wrench to loosen the wheel nuts slightly while the vehicle is still on the ground.
– Lift the vehicle using the jack and securely place jack stands under the appropriate lifting points.
– **Removing the Wheel**
– Fully remove the loosened wheel nuts and take off the wheel to expose the CV joint assembly.
– **Accessing the CV Joint**
– Locate the CV joint at the end of the axle shaft near the wheel.
– If necessary, remove any components obstructing access, such as brake calipers or shields, using the appropriate tools.
– **Removing the CV Joint**
– Use the CV joint puller tool to separate the CV joint from the axle. This may require some wiggling or tapping with a hammer if the joint is stuck.
– Carefully detach the joint from the hub assembly, ensuring not to damage any surrounding components.
– **Inspecting Components**
– Examine the axle shaft and the surrounding area for any signs of wear or damage. Replace any damaged parts as necessary.
– **Installing the New CV Joint**
– Apply a liberal amount of CV joint grease to the new joint as per manufacturer specifications.
– Slide the new CV joint onto the axle shaft, ensuring it is seated correctly.
– **Reassembling the Hub**
– Reattach the CV joint to the hub assembly, ensuring it is securely fastened.
– Reinstall any components that were removed for access, ensuring all bolts are tightened to the correct torque specifications.
– **Reinstalling the Wheel**
– Place the wheel back onto the hub and hand-tighten the lug nuts.
– lower the vehicle off the jack stands using the jack.
– **Finalizing the Installation**
– Once the vehicle is on the ground, use the torque wrench to tighten the lug nuts to the specified torque in a crisscross pattern.
– Recheck all connections and ensure everything is secure.
– **Testing the Vehicle**
– Start the vehicle and perform a test drive to ensure that there are no unusual noises or vibrations coming from the CV joint area.
### Safety Precautions:
– Always work in a well-ventilated area and ensure you have sufficient lighting.
– Double-check that the vehicle is securely supported on jack stands before working underneath it.
– Dispose of old CV joint components and grease according to local regulations.
By following this guide and using the appropriate tools and techniques, you should be able to successfully replace the CV joint on a Renault Alpine. However, if you’re unsure about any step, it’s advisable to consult with a professional mechanic.
A shock absorber is a vital component of a vehicle’s suspension system, designed to enhance ride comfort and vehicle handling by controlling the impact and rebound movement of the vehicle’s springs and suspension. When a vehicle travels over uneven surfaces, the springs compress and expand, which can lead to excessive bouncing or swaying. The shock absorber dampens this motion, ensuring that the contact between the tires and the road remains consistent, which is crucial for maintaining traction and stability.
Shock absorbers work by converting kinetic energy from the suspension’s movement into thermal energy through hydraulic fluid. When the vehicle encounters a bump, the shock absorber compresses, allowing fluid to flow through internal valves, which slows down the compression process. This resistance helps to absorb the energy from the impact, preventing the vehicle from bouncing excessively. During the rebound phase, the shock absorber controls the expansion of the spring, allowing for a smoother return to the original position.
There are two main types of shock absorbers: twin-tube and monotube. Twin-tube designs are more common and consist of an inner and outer tube, while monotube designs feature a single, high-pressure tube for improved performance. Over time, shock absorbers can wear out, leading to reduced effectiveness, which can compromise safety and driving comfort. Regular maintenance and timely replacement of shock absorbers are crucial to ensure optimal vehicle performance and safety on the road.