Shifting the drum on a Komatsu PC600LC-6 Hydraulic Excavator involves several steps and requires specific tools and equipment. click here for more details on the download manual…..
- Komatsu PC 650-8 LC Hydraulic Excavator Walkaround & Inside Cab Conexpo Report The Komatsu PC 650-8 LC is the new Komatsu Excavator presentend at Conexpo 2011. In Las Vegas Komatsu revealed the all …
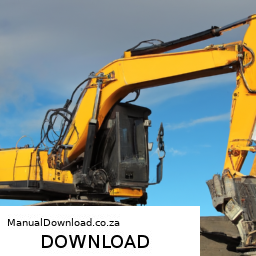
- KOMATSU pc600lc-6 Hydraulic Excavator with Concrete Pulveriser Not something you see everyday. Looks like a fun job.
Below is a detailed breakdown of the procedure and the tools needed for a successful drum repair:
– **Safety Gear**:
– **Safety Glasses**: Protect your eyes from debris and hydraulic fluid.
– **Gloves**: Use heavy-duty gloves to protect your hands from sharp edges and heavy components.
– **Steel-Toed Boots**: Wear protective footwear to prevent injury from falling objects.
– **Basic Tools**:
– **Socket Set**: A comprehensive set of sockets (including deep sockets) for loosening and tightening bolts on the drum assembly.
– **Wrenches**: Adjustable and fixed wrenches to handle various bolt sizes, especially for hydraulic fittings.
– **Pry Bar**: For maneuvering heavy components and gaining leverage when shifting the drum.
– **Hammer**: A ball-peen or sledgehammer for tapping components into place or breaking rusted parts loose.
– **Specialized Tools**:
– **Hydraulic Jack**: A hydraulic jack is necessary for lifting the excavator securely to access the drum. Ensure it has the capacity to handle the excavator’s weight.
– **Jack Stands**: Use jack stands to support the excavator once raised; never rely solely on the hydraulic jack for support.
– **Drum Alignment Tool**: This tool helps ensure the drum is correctly aligned during installation.
– **Torque Wrench**: For tightening bolts to manufacturer specifications, ensuring a secure and safe assembly.
– **Preparation**:
– **Inspect the Work Area**: Clear the area around the excavator of any debris and ensure it is safe to work.
– **Consult the Manual**: Refer to the Komatsu PC600LC-6 service manual for specific guidelines and torque specifications.
– **Drain Fluids**: If necessary, drain hydraulic fluids to avoid spills when disconnecting the hydraulic lines.
– **Lifting the Excavator**:
– **Position the Hydraulic Jack**: Place the hydraulic jack under a solid lifting point on the excavator.
– **Lift the Excavator**: Raise the excavator to a safe working height.
– **Secure with Jack Stands**: Once lifted, place jack stands under the machine to ensure stability.
– **Removing the Drum**:
– **Disconnect Hydraulic Lines**: Using wrenches, carefully disconnect hydraulic lines from the drum assembly. Be prepared for some fluid leakage.
– **Unfasten Bolts**: Use the socket set to remove the bolts securing the drum to the excavator. Keep track of all hardware for reassembly.
– **Remove the Drum**: Carefully lift the drum off the excavator frame. It may require assistance due to its weight.
– **Inspecting the Drum**:
– **Check for Damage**: Look for cracks, wear, or any damage on the drum surface and components.
– **Clean the Area**: Remove any dirt or debris from the drum mounting area to ensure a good seal during reinstallation.
– **Installing the New or Repaired Drum**:
– **Align the Drum**: Position the drum back onto the excavator frame, ensuring it is aligned correctly using the drum alignment tool.
– **Secure the Drum**: Replace and tighten the specifications provided in the service manual.
– **Reconnect Hydraulic Lines**: Reattach the hydraulic lines and ensure they are secure to prevent leaks.
– **Final Checks**:
– **Double-Check Tightness**: Go through all bolts and connections to ensure everything is tightened properly.
– **Refill Fluids**: If hydraulic fluids were drained, refill them to the appropriate levels.
– **Lower the Excavator**: Carefully remove jack stands and lower the hydraulic jack.
– **Testing**:
– **Start the Excavator**: Run the engine and operate the hydraulic systems to ensure everything is functioning correctly.
– **Check for Leaks**: Inspect all hydraulic connections for leaks during operation.
– **Perform a Test Run**: Conduct a short test run to confirm that the drum is operating smoothly without any unusual noises or issues.
By following these steps and utilizing the proper tools and safety precautions, you can efficiently shift the drum on a Komatsu PC600LC-6 Hydraulic Excavator. Always refer to the manufacturer’s guidelines for specific details related to your model.
The fuel return line is an essential component in a vehicle’s fuel delivery system, primarily found in fuel-injected engines. Its primary function is to manage the flow of excess fuel that is not used by the engine during the combustion process. When fuel injection occurs, the fuel pump sends gasoline or diesel from the fuel tank to the engine at a specific pressure. However, not all of the fuel delivered to the injectors is consumed; some of it is returned back to the fuel tank via the fuel return line.
This return line plays a critical role in maintaining optimal fuel pressure within the fuel rail, ensuring that the injectors receive a consistent supply of fuel. It helps to prevent fuel from becoming too hot and ensures that the fuel system operates efficiently, minimizing the risk of vapor lock, which can occur if fuel evaporates due to excessive heat. The return line is typically made of durable materials resistant to corrosion and pressure fluctuations, such as rubber or reinforced plastic.
In addition to regulating fuel pressure, the return line contributes to the overall efficiency of the vehicle’s fuel system. By allowing excess fuel to flow back to the tank, it reduces the chances of fuel wastage and helps maintain the engine’s performance. Proper maintenance and inspection of the fuel return line are crucial, as leaks or blockages can lead to fuel system malfunctions, reduced engine performance, and increased emissions.