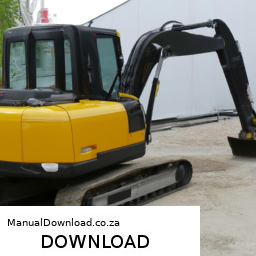
Here’s a detailed guide on how to replace the anti-roll bar on a JCB 8014, 8016, 8018, or 8020 Mini Excavator. click here for more details on the download manual…..
This process involves several steps and specific tools, which are outlined below.
### Tools and Equipment Needed:
– **Socket Set**: A variety of socket sizes, typically metric, to remove bolts and nuts.
– **Torque Wrench**: To ensure that all fasteners are tightened to manufacturer specifications.
– **Wrenches**: Both open-end and box-end wrenches for loosening and tightening bolts.
– **Pry Bar**: For leverage when removing the old anti-roll bar.
– **Jack and Jack Stands**: To lift and secure the excavator Safely while working underneath.
– **Safety Glasses**: To protect your eyes from debris.
– **Gloves**: To protect your hands while handling tools and components.
– **Replacement Anti-Roll Bar**: Ensure it is compatible with your specific JCB model.
– **Grease or Lubricant**: For the installation of new components.
### Step-by-Step Replacement Process:
– **Safety First**:
– Park the excavator on a flat, stable surface.
– Turn off the engine and engage the parking brake.
– Ensure the hydraulic system is depressurized to prevent accidental movement.
– **Lift the Excavator**:
– Use a jack to lift the rear of the excavator.
– Secure it with jack stands to ensure stability while you work underneath.
– **Access the Anti-Roll Bar**:
– Locate the anti-roll bar, which is typically mounted between the left and right sides of the chassis.
– Remove any covers or panels that may obstruct access to the bar.
– **Remove the Old Anti-Roll Bar**:
– Use the socket set to remove the bolts securing the anti-roll bar to the chassis and the suspension links.
– Depending on the model, there may also be bushings that need to be detached.
– If the bar is stuck, use a pry bar gently to help free it without damaging surrounding components.
– **Inspect Components**:
– Check the condition of mounting brackets, bushings, and any associated hardware.
– Replace any worn or damaged parts as they can affect the performance of the new anti-roll bar.
– **Install the New Anti-Roll Bar**:
– Position the new anti-roll bar in place, aligning it with the mounting points.
– Secure it with the bolts removed earlier, ensuring that bushings are properly seated.
– Use the torque wrench to tighten the bolts to the manufacturer’s specifications. This ensures that the installation is secure and prevents loosening during operation.
– **Reassemble Any Removed Components**:
– Reattach any covers or panels that were removed to access the anti-roll bar.
– Ensure all fasteners are tightened.
– **Lower the Excavator**:
– Carefully remove the jack s tands and lower the excavator back to the ground.
– **Test the Installation**:
– Start the engine and perform a short test run to ensure that the anti-roll bar is functioning correctly.
– Listen for any unusual noises and check for any signs of excessive movement or play.
– **Final Inspection**:
– After a short test run, recheck all fasteners to ensure they remain tight.
– Inspect the installation area for any tools or debris that may have been left behind.
### Conclusion:
Replacing the anti-roll bar on a JCB 8014, 8016, 8018, or 8020 Mini Excavator requires careful attention to detail and safety precautions. Following the steps above will help ensure a successful replacement, restoring proper handling and stability to the excavator. always refer to the manufacturer’s service manual for specific torque settings and additional guidance.
A battery hold down is a crucial component in automotive engineering designed to secure the vehicle’s battery in place, preventing movement during operation. Typically made from materials like metal or durable plastic, the battery hold down ensures that the battery remains stable, which is essential for both safety and functionality.
The primary purpose of the battery hold down is to keep the battery securely fastened to the battery tray within the engine compartment or trunk. Without proper restraint, the battery could shift or bounce, especially during driving over rough terrain or in the event of sudden stops. This movement can lead to damage to the battery terminals, cables, or even the battery itself, potentially causing electrical failures or hazardous leaks.
In addition to providing physical support, the battery hold down also plays a role in maintaining the integrity of the electrical connections. A properly secured battery ensures that the connections remain tight and free from corrosion, which is vital for optimal performance. Furthermore, many battery hold downs are designed to accommodate specific battery sizes and types, ensuring a snug fit that enhances vibration resistance.
Overall, the battery hold down is a small but vital component that contributes significantly to the safe and reliable operation of a vehicle’s electrical system. Regular inspection and maintenance of this part are essential, as a faulty or missing hold down can lead to serious mechanical issues or safety hazards on the road.