
Replacing the radiator on an Audi A4 is a moderately complex task that requires a good understanding of automotive systems and some mechanical skills. click here for more details on the download manual…..
- Audi a4 b8 2.0tdi cjcb "oil pressure too low" new oil pump, new pressure sensor New oil pump, new pressure sensor, new oil (5w30 Liqui molly), new oil filter. Oil pressure is good. Problem come when engine is …
- Secret compartment every Volkswagen vehicle has 👀 #shorts vw #lifehacks #shorts.
Below, I’ll provide a step-by-step guide for replacing the radiator, including detailed descriptions of each component involved. Note that the specific details may vary slightly depending on the model year and engine type, so it’s always best to refer to the specific Electronic Workshop Manual (EWD) for your model year.
### Tools and materials Needed:
– **Tools:**
– socket set (including 10mm, 13mm, and 17mm sockets)
– Ratchet and extensions
– Torque wrench
– Screwdrivers (flat and Phillips)
– Pliers
– Hose clamp pliers
– Hose cutter (optional)
– Coolant catch pan
– Funnel
– Safety glasses and gloves
– **Materials:**
– New radiator
– New coolant (check specifications for Audi A4)
– Hose clamps (if necessary)
– New O-rings for hoses (if applicable)
– RTV silicone sealant (if required)
### Step-by-Step Radiator Replacement:
#### 1. Preparation
– **Safety First:** Ensure the engine is cool. Disconnect the negative battery terminal to prevent any electrical issues.
– **Gather Tools and Materials:** Have all your tools and new parts ready.
#### 2. Drain the Coolant
– **Locate the Drain Plug:** The radiator will have a drain plug at the bottom. Place a coolant catch pan underneath.
– **Open the Drain Plug:** Use a socket or screwdriver to open the drain plug and allow the coolant to drain completely. Be cautious as the coolant may be hot if the engine was recently running.
#### 3. Remove the Front Bumper (if necessary)
– **Remove Screws and Clips:** Depending on the model year, you may need to remove screws and clips securing the bumper. This often requires removing screws in the wheel wells and under the front of the bumper.
– **Disconnect Fog Lights:** If applicable, disconnect any fog light connectors.
#### 4. Remove the Upper Radiator Support
– **Locate the Support Brackets:** These are typically held in place with 10mm bolts.
– **Remove Bolts:** Use a socket to remove the bolts securing the upper support.
#### 5. Disconnect Hoses
– **Upper Radiator Hose:** Use pliers to remove the hose clamp and slide it back along the hose. Pull the hose off the radiator.
– **Lower Radiator Hose:** Repeat the same process for the lower radiator hose.
– **Transmission Cooler Lines (if equipped):** If your Audi A4 is equipped with an automatic transmission, you will have cooler lines connected to the radiator. Use a wrench to disconnect these lines, and be prepared for fluid spillage.
#### 6. Remove the Radiator
– **Disconnect Electrical Connectors:** Unplug any fans or temperature sensors connected to the radiator.
– **Remove Radiator Mounting Bolts:** These are typically located on the sides of the radiator. Remove them with a socket.
– **Lift the Radiator Out:** Carefully lift the radiator out of the engine bay. Be cautious of the fan blades and other components.
#### 7. Install the New Radiator
– **Position the New Radiator:** Place the new radiator into position, ensuring it aligns with the mounting points.
– **Reinstall Mounting Bolts:** Secure the radiator with the mounting bolts and torque them to the manufacturer’s specifications.
– **Reconnect Electrical Connectors:** Reattach any connectors for fans or sensors.
#### 8. Reconnect Hoses
– **Upper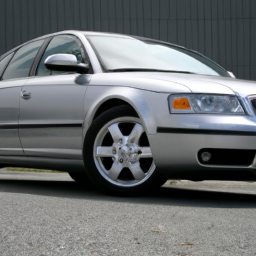 and Lower Hoses:** Reattach the upper and lower radiator hoses, ensuring the clamps are tight.
– **Transmission Cooler Lines:** If applicable, reconnect the transmission cooler lines and ensure they are secure.
#### 9. Reinstall the Upper Radiator Support
– **Position the Support:** Reinstall the upper radiator support and secure it with the previously removed bolts.
#### 10. Reinstall the Front Bumper
– **Reattach Clips and Screws:** Secure the bumper back in place, reconnect any fog lights, and ensure everything is aligned correctly.
#### 11. Refill Coolant
– **Check for Leaks:** Before refilling, inspect all hose connections and fittings for any signs of leaks.
– **Fill the Radiator:** Use a funnel to pour new coolant into the radiator. Fill until you reach the recommended level.
– **Burp the System:** Start the engine and let it run with the heater on high. This will help remove air pockets from the cooling system. Keep an eye on the coolant level and add more if necessary.
#### 12. Final Checks
– **Reconnect the Battery:** Reattach the negative battery terminal.
– **Inspect for Leaks:** After the engine has warmed up, inspect for any leaks around the radiator and hoses.
– **Check Coolant Level:** Once the engine has cooled down, verify the coolant level and top off as necessary.
### Conclusion
Replacing the radiator on an Audi A4 can be a rewarding task if done correctly. Always consult the specific Electronic Workshop Manual (EWD) for your model year to ensure you follow the precise torque specifications and procedures. If you’re unsure or uncomfortable with any of the steps, it may be best to consult with a professional mechanic.
The timing gear is a crucial component in an internal combustion engine that plays a vital role in synchronizing the movement of the engine’s camshaft and crankshaft. This synchronization is essential for ensuring that the engine’s valves open and close at the correct intervals concerning the position of the pistons. The timing gear system typically consists of a combination of gears, belts, or chains, depending on the engine design.
In a typical setup, the timing gear is mounted on the crankshaft and is connected to the camshaft via a timing belt or chain. As the crankshaft rotates due to the engine’s combustion process, the timing gear transmits this rotational motion to the camshaft, which in turn controls the opening and closing of the intake and exhaust valves. Proper timing is critical for optimal engine performance, fuel efficiency, and emissions control.
If the timing gear fails or becomes misaligned, it can lead to a condition known as “timing belt slip,” which can cause significant engine damage, including bent valves, damaged pistons, or even complete engine failure. Regular maintenance, including timely replacement of the timing belt or chain, is essential to ensure the longevity and reliability of the engine. Overall, the timing gear is an integral part of the engine’s timing system, ensuring that all components work harmoniously for optimal performance.