
Flushing the brake fluid in a BMW Z4 E85 is an important maintenance task that helps ensure your braking system works effectively. click here for more details on the download manual…..
- 3 SERIOUS COMMON ISSUES – BMW Z4 (e85) | 2003 – 2008 production years
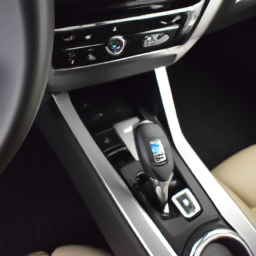
- Remove Automatic Shift Knob | BMW Z4 2003-2008 A/T Knobs LCI Black: https://geni.us/UkXo LCI Beige: https://geni.us/ujk1hga LCI Black Chrome: https://geni.us/E3SbXA LCI Beige …
Brake fluid can absorb moisture over time, which can reduce its effectiveness and potentially cause brake failure. Here’s a step-by-step guide to performing a brake fluid flush on your BMW Z4 E85, explained in simple terms:
### What You’ll Need:
1. **New Brake Fluid**: Make sure to use the correct type of brake fluid, typically DOT 4 for BMW vehicles. Check your owner’s manual to confirm.
2. **Brake Bleeder Kit**: This can be a one-person bleeder or a traditional two-person setup.
3. **Wrench**: A 10mm or the size that fits your brake bleeder screws.
4. **Clear Tubing**: To connect to the bleeder valve and collect old fluid.
5. **Container**: To catch the old brake fluid.
6. **Rags/Paper Towels**: For cleaning up spills.
7. **Jack and Jack Stands**: To lift the car safely if needed.
8. **Safety Glasses and Gloves**: To protect your eyes and skin from brake fluid.
### Steps to Flush Brake Fluid:
#### 1. **Safety First**
– park the car on a flat surface and engage the parking brake.
– Put on safety glasses and gloves.
#### 2. **Access the Brake System**
– If necessary, lift the car with a jack and secure it with jack stands.
#### 3. **Locate the Brake Fluid Reservoir**
– Open the hood and find the brake fluid reservoir. It’s usually located near the back of the engine bay, towards the driver’s side.
#### 4. **Remove Old Brake Fluid**
– Use a turkey baster or squeeze bulb to remove as much old brake fluid from the reservoir as possible. This will make it easier to replace with the new fluid.
#### 5. **Add New Brake Fluid**
– Fill the reservoir with new brake fluid up to the “max” line. This ensures that the system has enough fluid to work with during the flush.
#### 6. **Bleed the Brakes**
– **Start with the Wheels Farthest from the Brake Master Cylinder**: Typically, this means starting with the right rear wheel, then left rear, right front, and finally left front.
– **Locate the Bleeder Valve**: This is usually a small screw on the brake caliper.
– **Attach the Clear Tubing**: Put one end of the tubing over the bleeder valve and place the other end in the container to catch the old fluid.
#### 7. **Open the Bleeder Valve**
– Use the wrench to turn the bleeder valve counterclockwise to open it slightly. This will allow old brake fluid to escape.
– **Have a Helper Pump the Brake Pedal**: If you have someone to help, have them pump the brake pedal several times and then hold it down.
– **Close the Bleeder Valve**: While they’re holding the pedal down, quickly close the valve to prevent air from entering the system.
– **Repeat**: Open the valve again, and let them pump the brakes. Repeat this process until you see clear, new brake fluid in the tubing. Keep an eye on the reservoir and top it off as needed to avoid running it dry.
#### 8. **Finish Up**
– Once all wheels have been bled and you see clean fluid coming out, close all bleeder valves tightly.
– Refill the brake fluid reservoir to the “max” line.
– Clean up any spills immediately, as brake fluid can damage paint and other surfaces.
#### 9. **Test the Brakes**
– Before driving, pump the brake pedal a few times to ensure the brakes feel firm.
– Check the fluid level one last time and make sure there are no leaks around the calipers or bleeder valves.
#### 10. **Dispose of Old Brake Fluid Properly**
– Take the old brake fluid to a local auto parts store or recycling center for proper disposal.
### Final Notes:
Performing a brake fluid flush is a straightforward process, but if at any point you feel uncomfortable or unsure, it’s best to consult a professional mechanic. Regular maintenance of your braking system is vital for your safety on the road.
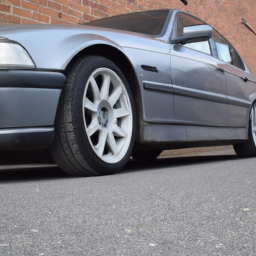
A fender is a crucial component of a vehicle’s body, primarily designed to cover the wheel wells and provide protection to the car’s bodywork and passengers from road debris, mud, and water that may be kicked up by the tires. Typically made from materials such as steel, aluminum, or composite plastics, fenders play both functional and aesthetic roles in automotive design.
Functionally, fenders help to safeguard the vehicle’s body from scratches, dents, and other forms of damage caused by stones or other debris that can be thrown up while driving. They also serve to reduce the amount of dirt and water that can be splashed onto the vehicle and its passengers, enhancing safety and comfort. In addition, fenders contribute to the overall aerodynamics of a vehicle, influencing airflow and reducing drag, which can improve fuel efficiency.
Aesthetically, fenders are integral to the car’s design language and style. They can be shaped and styled in various ways to complement the vehicle’s overall look, contributing to its visual appeal. In performance cars, fenders are often designed to be wider to accommodate larger tires and to hint at the vehicle’s sporty capabilities.
In modern automotive design, fenders can also house various components, including turn signals and other lighting elements, and may be designed to facilitate airflow to the brakes or engine. Overall, the fender is an essential component that balances protection, functionality, and aesthetics in vehicle design.

 and clean the injectors.
 and in place, including any electrical connections.
 and secure it to the chassis using the original or new bolts.
 and tighten it securely.
 and bolt it down securely.
 and lower the vehicle.
 and
and 
 and tighten the bolts to secure the anti-roll bar in place. Ensure that the bushings are seated properly in the brackets.
 and place it on jack stands to ensure safety while you work underneath.