Download BMW 520i 1988-1991 Service Repair Workshop Manual –

australia
Repairing an exhaust manifold on a BMW 520i can be a complex task, but I’ll break it down into simple steps to help you understand the process. click here for more details on the download manual…..


    How To Replace The Radiator On A BMW 528i-535i (f10) Brian Eslick from How to Automotive http://www.howtoautomotive.com takes you step-by-step through the process of replacing the …

    BMW 520i E28: proviamola su strada… #bmw #bmwlove #bmwcar #germany #engineering #oldisgold #vin… Benvenuti in una nuova puntata di test in compagnia di questa splendida BMW 520i. www.gasishop.com Instagram: …

Keep in mind that if you’re not comfortable with car repairs, it’s always best to consult a professional mechanic. Here’s a general guide:

### Tools and Materials Needed:
– Basic hand tools (wrenches, sockets, ratchet)
torque wrench
– Screwdrivers
– Pliers
– Gasket scraper or razor blade
– New exhaust manifold gasket
– New exhaust manifold (if damaged)
– High-temperature anti-seize compound (optional)
– Shop manual for specific torque settings and procedures

### Step-by-Step Guide:

#### 1. **Safety First:**
– **Disconnect the Battery:** Start by disconnecting the negative terminal of the battery to prevent any electrical issues.
– **Let the Engine Cool:** make sure the engine is completely cool before you start working.

#### 2. **Raise the Vehicle:**
– Use a jack to lift the front of the car and secure it with jack stands. This will give you access to the underside of the engine.

#### 3. **Remove the Engine Cover:**
– If your BMW has an engine cover, you may need to remove it. Use the appropriate tools (usually a socket or wrench) to take off the bolts.

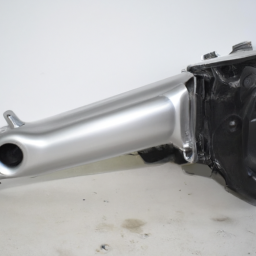
#### 4. **Locate the Exhaust Manifold:**
– The exhaust manifold is typically located on the side of the engine block. It collects exhaust gases from the engine and directs them to the exhaust system.

#### 5. **Remove components as Necessary:**
– Depending on the layout, you might need to remove various components like the air intake, heat shields, or other parts to access the manifold. Take photos or notes so you remember how to reassemble everything.

#### 6. **Disconnect the Exhaust Manifold:**
– **Unbolt the Manifold:** Use a socket wrench to remove the bolts that hold the manifold in place. Keep track of these bolts as you will need them for reinstallation.
– **Disconnect Exhaust Pipes:** If the manifold is connected to the exhaust pipes, you may need to unbolt these as well.
– **Remove the Manifold:** Carefully lift the manifold off the engine. If it’s stuck, gently wiggle it to free it.

#### 7. **Inspect and Clean:**
– Check the manifold and the engine surface for cracks or damage. If the manifold is damaged, it will need to be replaced.
– Use a gasket scraper or razor blade to clean the old gasket material off the surface where the manifold attaches to the engine.

#### 8. **Install the New Gasket:**
– Place a new exhaust manifold gasket onto the engine block. make sure it’s aligned properly.

#### 9. **Reinstall the Exhaust Manifold:**
– Carefully position the manifold onto the new gasket. make sure it fits snugly.
– **Bolt it Down:** Reinstall the bolts and tighten them to the manufacturer’s specifications using a torque wrench. If you don’t have a manual, tighten them in a crisscross pattern to ensure even pressure.

#### 10. **Reconnect Exhaust Pipes:**
– If you disconnected the exhaust pipes, reattach themdownload BMW 520i workshop manual and make sure they are secure.

#### 11. **Reassemble Other Components:**
– Reinstall any parts you removed earlier, ensuring everything is put back in its original position.

#### 12. **Reconnect the Battery:**
– Once everything is back in place, reconnect the negative terminal of the battery.

#### 13. **Start the Engine:**
– Start the engine and listen for any unusual noises. Check for exhaust leaks around the manifold area. If everything sounds good, you’re done!

### Final Tips:
– Always refer to the vehicle’s manual for specific instructions and torque specifications.
– Take your time and don’t rush. Proper installation is key to preventing future issues.
– If you encounter any problems or feel unsure at any step, it’s wise to consult with or hire a professional mechanic.

By following these steps, you should have a clearer understanding of how to repair an exhaust manifold on a BMW 520i. Good luck!
An engine cover, often referred to as a valve cover or engine cover assembly, is a protective component that sits atop the engine block in an internal combustion engine. Its primary function is to shield the internal components of the engine, including the valves, camshaft, and timing chain or belt, from dirt, debris, and other external contaminants. This protective casing is usually made from materials such as plastic, aluminum, or magnesium, which provide durability and resistance to heat and corrosion.

In addition to its protective role, the engine cover also serves aesthetic purposes, offering a polished look to the engine bay. Many manufacturers design engine covers with branding and styling that aligns with the overall design of the vehicle, enhancing its visual appeal. Moreover, some modern engine covers are engineered to reduce noise and vibrations, contributing to a quieter cabin experience for the occupants.

Furthermore, engine covers can incorporate ventilation systems to facilitate proper airflow and cooling, helping to maintain optimal operating temperatures. They may also house various components, such as ignition coils or sensors, integrating functionality with protection. Overall, the engine cover is a vital component that not only enhances the aesthetics and protection of the engine but also plays a role in its performance and efficiency.

Download BMW 518I E28 Service Repair Manual 1985-1988 –

repairs
Replacing the timing chain on a BMW 518i E28 is a complex task that typically requires a good understanding of automotive mechanics. click here for more details on the download manual…..


    1987 BMW E28 seat operation

    BMW E28 Engine Compartment Fuse box diagram with location Details old model#shorts#bmw#fuse#box website link for India visitors ÷ https://sites.google.com/view/best-automobile-products/home website link for (United states) …

However, I’ll break it down into simple steps for you, assuming you have very little mechanical experience. Please keep in mind that this is a high-level overview and working on a car can be dangerous. If you’re not comfortable, it’s best to seek help from a professional mechanic.

### Tools and Materials Needed:
– Basic hand tools (wrenches, sockets, screwdrivers)
– Torque wrench
– Timing chain kit (includes chain, sprockets, guides, etc.)
– Oil and oil filter
– Gasket sealant
– Clean cloths

### steps to Replace the Timing Chain:

1. **Preparation:**
– Ensure the car is parked on a level surface and the engine is cool.
Disconnect the battery to prevent any electrical issues while you work.

2. **Remove the Engine Components:**
– **Remove the Air Intake:** Start by taking off the air filter housing and the intake hose to access the engine.
– **Remove the Valve Cover:** Take out the bolts securing the valve cover and carefully lift it off to expose the timing chain.
– **Remove other components:** Depending on access, you may need to remove additional components like the alternator, power steering pump, and any brackets blocking your path to the timing chain.

3. **Align the Engine:**
– Rotate the crankshaft (the large pulley at the bottom of the engine) using a wrench until the timing marks on the crankshaft and camshaft sprockets are aligned. This ensures the engine is at top dead center (TDC) for the number one cylinder.

4. **Remove the Old Timing Chain:**
– Remove the tensioner and guides. These parts hold the chain in place and maintain tension.
– Carefully take off the timing chain from the sprockets. Be cautious not to let any debris fall into the engine.

5. **Install the New Timing Chain:**
– Place the new timing chain over the sprockets, ensuring it follows the correct path (refer to a service manual for specific routing).
– Reinstall the tensioner and guides to secure the new chain in place.

6. **Reassemble the Engine:**
– Replace the valve cover with a new gasket or sealant to ensure a good seal.
– Reinstall any other components you took off earlier, such as the air intake and accessories.
– Double-check that all bolts and components are securely fastened.

7. **Refill Engine Oil:**
– Replace the oil filter and refill the engine with new oil. This is important because the timing chain operates in an oil-lubricated environment.

8. **Reconnect the Battery:**
– Once everything is back in place, reconnect the battery.

9. **Start the Engine:**
– Start the enginedownload BMW 518I E28 workshop manual and listen for any unusual noises. It should run smoothly if everything was done correctly.

10. **Final Checks:**
– After running the engine for a few minutes, check for any leaks around the valve cover and other components you removed.

### important Tips:
– Always refer to a service manual specific to the BMW 518i E28 for detailed diagrams and specifications.
– If at any point you feel unsure, it’s wise to consult with a more experienced mechanic or a professional shop.
– Make sure to work in a clean environment to avoid any dirt or debris getting into the engine.

### Safety Precautions:
– Use safety glasses to protect your eyes.
– Ensure the car is securely supported on jack stands if you need to lift it.
– Keep your work area organized to avoid losing small parts.

This task can be quite involved, and it’s important to proceed carefully and methodically. Good luck!
A wiper blade is an essential component of a vehicle’s windshield wiper system, designed to provide clear visibility for the driver by removing rain, snow, dirt, and debris from the windshield. Typically made of a rubber or silicone material, the wiper blade consists of a long, flat strip that is attached to a metal or plastic frame. The frame is connected to the wiper arm, which is powered by an electric motor to move the blade across the windshield in a back-and-forth motion.

Wiper blades come in various sizes and shapes to fit different vehicle models, and they are often categorized into two main types: traditional frame-style blades and more modern beam blades. The traditional blades feature a metal frame that holds the rubber strip, while beam blades offer a sleeker design without an external frame, allowing for better contact with the windshield surface.

Regular maintenance and timely replacement of wiper blades are crucial for optimal performance. Worn or damaged blades can lead to streaking, skipping, or even scratching the windshield, which compromises driver visibility and safety. Most manufacturers recommend changing wiper blades every six to twelve months, depending on the climate and usage conditions. Overall, wiper blades play a vital role in ensuring a safe driving experience, especially in adverse weather conditions.

Download 1995 BMW 323 (E36) 3 Series Compact OEM Download Service & Repair Manual Software –

online
Replacing the gearbox planetary gears on a BMW 323 E36 Compact involves several detailed steps. click here for more details on the download manual…..


    BMW E39/E46 Manual Shifter Bushing Refresh with Turner Motorsports Kit

    BMW E36 3-Series Buying Guide – 90s Icon Turned Classic Investment! WIN With Lancaster Insurance: https://bit.ly/3BUKBKb The third-generation ‘E36’ BMW 3-Series was launched in 1991 and took …

Here’s a reverse order summary of the process:

### Reverse Order Steps for Gearbox Planetary Gear Replacement:

1. **Reinstall the Gearbox**: Secure the gearbox back into the vehicle, ensuring all bolts are tightened to the manufacturer’s specifications.

2. **Reconnect Electrical Connections**: Attach any electrical connectors related to the gearbox, including sensors and wiring harnesses.

3. **Reconnect the Driveshaft**: Reattach the driveshaft to the gearbox, ensuring it is properly aligned and secured with the appropriate bolts.

4. **Fill Transmission Fluid**: Refill the gearbox with the correct type and amount of transmission fluid as specified in the BMW service manual.

5. **Reinstall the Gearbox Mounts**: Secure the gearbox mounts to the vehicle’s chassis, ensuring everything is tight and secure.

6. **Reattach the Exhaust (if applicable)**: If any part of the exhaust system was removed for access, reinstall it now.

7. **Remove the Old Gearbox**: If not already done, detach the gearbox from the engine by removing the bolts connecting it to the engine block.

8. **Drain Transmission Fluid**: Drain the existing fluid from the gearbox to prevent spills during the disassembly process.

9. **Remove the Transmission Pan**: If applicable, unbolt and remove the transmission pan to access the internal components of the gearbox.

10. **Take Out the Valve Body**: Carefully unbolt and remove the valve body to gain access to the planetary gears.

11. **Remove the Planetary Gear Assembly**: Take out the planetary gear set by unbolting it from the gearbox housing.

12. **Inspect and Replace Gears**: Check the planetary gears for wear and damage, and replace them with new OEM parts as necessary.

13. **Clean the Gearbox Components**: Clean any gasket surfaces and components that will be reused to ensure a proper seal and function.

14. **Reassemble the Gearbox**: Reassemble the gearbox in reverse order, ensuring all components are properly seated and torqued to specifications.

15. **Prepare the Vehicle**: Lift the vehicle securely and remove any underbody panels or covers needed to access the gearbox.

### Additional Tips:
– Always refer to the specific service manual for your BMW 323 E36 for detailed specificationsdownload BMW 323 E36 3 Compact OEM workshop manual and torque settings.
– Ensure you have all necessary tools and parts before beginning the replacement process.
– Consider the use of a transmission jack to assist with the removal and installation of the gearbox.
– Work in a clean environment to prevent contamination of gearbox components.

This reverse order summary provides a high-level overview of the steps involved in replacing the planetary gears in the gearbox of a BMW 323 E36 Compact. Always consult a professional or detailed service manual for comprehensive guidance.
A torque converter is a crucial component in an automatic transmission system, primarily serving to transfer power from the engine to the transmission while also allowing for a smooth transition of power during vehicle operation. It functions by using a fluid coupling mechanism that transmits torque from the engine to the transmission, allowing for a seamless connection without the need for a manual clutch.

The torque converter consists of three main components: the impeller, turbine, and stator. The impeller is connected to the engine’s flywheel and spins with the engine’s RPM. As the impeller rotates, it draws in transmission fluid, which is then directed toward the turbine. The turbine, connected to the transmission, captures the fluid’s energy and converts it back into rotational motion, thereby driving the vehicle. The stator, located between the impeller and turbine, redirects the fluid returning from the turbine, enhancing efficiency and increasing torque at low speeds.

One of the key advantages of a torque converter is its ability to multiply torque, particularly during acceleration, making it easier for the vehicle to start moving from a complete stop. Additionally, it allows for smooth gear shifting, as it can adjust the power delivery based on driving conditions without the driver needing to manually disengage or engage gears. Overall, the torque converter plays a vital role in enhancing performance, fuel efficiency, and driving comfort in vehicles equipped with automatic transmissions.

Download 1987 BMW 750iL (E32) 7 Series OEM Download Service & Repair Manual Software –

books
Repairing the exhaust manifold on a BMW 750iL E32 is a complex process that requires some mechanical knowledge and tools, but I’ll do my best to break it down into simple steps. click here for more details on the download manual…..


    BMW 750iL E32 Transmission Fluid Change, Throttle Body Rebuild, Test Drive, and Blown Fuse Find The diagnostics continue as we try to figure out what broke on the 750iL; changing the transmission fluid, rebuilding and cleaning …

    The BMW 750iL Was BMW's V12 Flagship Luxury Sedan From 30 Years Ago CHECK OUT CARS & BIDS! https://carsandbids.com The E32 BMW 750iL was BMW’s flagship luxury sedan from 30 years ago …

Before starting, please ensure you have the right tools and safety equipment, like gloves and safety glasses. Here’s a general guide to help you understand the process:

### tools and Materials Needed:
1. **Tools:**
– Socket set (metric)
– Wrenches (metric)
– Torque wrench
– Screwdrivers
– Pliers
– Gasket scraper
Engine degreaser
– Hammer
– Pry bar (if needed)
– Ratchet extensions

2. **Materials:**
– New exhaust manifold gasket(s)
– Replacement bolts (if necessary)
– Anti-seize compound (optional for bolts)
– High-temperature sealant (if needed)

### Steps for Exhaust Manifold Repair:

#### 1. **Safety First:**
– Ensure the car is parked on a level surface.
– Disconnect the battery to prevent any electrical issues.
– Allow the Engine to cool completely if it has been running.

#### 2. **Access the Exhaust Manifold:**
– Depending on the condition of the vehicle, you may need to remove various components to access the exhaust manifold. This could include:
– The Engine cover
– Air intake components
– Heat shields
– Any other parts blocking access to the manifold.

#### 3. **Inspect the Manifold:**
– Look for cracks, loose bolts, or signs of exhaust leaks. If the manifold is cracked, it may need to be replaced rather than just repaired.

#### 4. **Remove the Old Exhaust Manifold:**
– **Disconnect the Exhaust System:**
– Remove any bolts connecting the exhaust pipe to the manifold. This may require some force if the bolts are rusted.
– **Unbolt the Manifold:**
– Using the socket set, remove the bolts that hold the manifold to the Engine block. Keep track of the bolts and their positions.
– **Carefully Remove the Manifold:**
– Gently pull the manifold away from the engine. If it’s stuck, you can lightly tap it with a hammer or use a pry bar to help loosen it.

#### 5. **Clean the Surface:**
– Use a gasket scraper to clean the surface of the Engine block where the manifold sits. Make sure there are no remnants of the old gasket, as this can cause leaks.

#### 6. **Install the New Gasket:**
– Place the new exhaust manifold gasket onto the Engine block. Make sure it’s aligned properly with the holes.

#### 7. **Install the New or Repaired Manifold:**
– Carefully place the manifold onto the Engine block over the gasket.
– Align the bolt holes and start threading the bolts by hand to avoid cross-threading.

#### 8. **Tighten the Bolts:**
– Use a torque wrench to tighten the bolts to the manufacturer’s specifications. This is important to ensure a proper sealdownload BMW 750iL E32 7 OEM workshop manual and avoid future leaks. Make sure to follow the correct sequence when tightening to distribute pressure evenly.

#### 9. **Reconnect the Exhaust System:**
– Reattach any components you removed earlier, including the exhaust pipes, heat shields, and air intake parts.

#### 10. **Recheck Everything:**
– Double-check all connections and make sure everything is secure.

#### 11. **Reconnect the Battery and Test:**
– Reconnect the battery and start the engine. Listen for any unusual sounds or leaks. Let the Engine reach operating temperature and check for any exhaust leaks around the new gasket.

### Conclusion:
If everything sounds good and there are no leaks, congratulations! You’ve successfully repaired the exhaust manifold on your BMW 750iL E32. If you encounter any problems or feel unsure at any step, it’s always a good idea to consult a professional mechanic. Working on vehicles can be complex and safety is very important.
Fog lights are specialized automotive lighting devices designed to enhance visibility during adverse weather conditions, such as fog, rain, snow, or dust. Positioned lower on the vehicle than standard headlights, fog lights project a wide, flat beam of light that illuminates the road immediately in front of the car without causing glare or reflection from the moisture in the air. This is crucial in foggy conditions where traditional headlights can create a blinding effect, making it difficult for drivers to see properly.

Fog lights typically emit a yellow or white light, with yellow being preferred in foggy conditions due to its ability to penetrate moisture more effectively than white light. The design of fog lights often includes a housing that is specifically shaped to minimize the scattering of light, ensuring that it focuses on the area just ahead of the vehicle, which is where visibility is most critical.

In many vehicles, fog lights are an optional feature, often found in higher-end models or as part of a package. They can usually be activated independently of the headlights and are intended for use only in low-visibility conditions to prevent blinding other drivers. Overall, fog lights are an essential safety feature that enhances driving safety in challenging weather conditions, providing drivers with better control and awareness of their surroundings.

Download 2002 BMW 525I Service and Repair Manual –

stores
Replacing the clutch plate on a BMW 525i involves several steps and requires specific tools and components. click here for more details on the download manual…..


    BMW DENTS FIXED IN MINUTES! BMW 5 Series – 100% Glue Pull Dent Repair (Paintless Dent Removal) Paintless dent removal carried out by Ben at Dents Inc – Cheshire UK This video perfectly demonstrates how important it is to be …

    E30 Progress + E34 525i OVERHEATED! Time to remove the Cylinder Head… While I did say that we get to make the AN lines for the 86 E30 today I completely underestimated the cooler assembly so that will …

Below is a detailed guide, including descriptions of the tools needed for this task.

### Tools and Equipment Needed:

– **Socket Set**: A complete socket set (metric) will be required, including:
– **Ratchet**: For turning the sockets.
– **Extensions**: To reach fasteners in tight spaces.
– **Universal Joint**: For accessing bolts at angles.

– **Torque Wrench**: For tightening bolts to the manufacturer’s specifications.

– **Pliers**: For removing clips and holding components.

– **Screwdrivers**: Both flat-head and Phillips for various fasteners.

– **Clutch Alignment Tool**: This tool is crucial for aligning the new clutch disc with the flywheel during installation.

– **Transmission Jack or floor Jack**: To safely support and lower the transmission.

– **Creeper or Mechanic’s Mat**: For comfort while working underneath the vehicle.

– **Brake Cleaner**: To clean the surfaces of the flywheel and clutch components.

– **Rags or Shop Towels**: For cleaning and wiping away any spilled fluids.

– **Drip Pan**: To catch any fluids that may leak during the process.

– **Replacement Clutch Kit**: Ensure you have a complete kit that includes:
– **Clutch Disc**: The actual friction plate.
– **Pressure Plate**: The component that presses the clutch disc against the flywheel.
– **Release Bearing (Throw-out Bearing)**: The bearing that disengages the clutch when the pedal is pressed.

### Steps for Clutch Plate Replacement:

– **Preparation**:
– Park the vehicle on a flat surface and engage the parking brake.
Disconnect the negative battery terminal to prevent any electrical shorts.

– **Remove the Drive Shaft**:
– Depending on your model, locate and remove the bolts securing the drive shaft to the transmission.
– Carefully slide the drive shaft out and set it aside.

– **Access the Transmission**:
– Remove any components obstructing access to the transmission. This may include the exhaust system, heat shield, or crossmembers.
– Support the transmission using a transmission jack or floor jack.

– **Unbolt the Transmission**:
– Locate the bolts securing the transmission to the engine and remove them using the socket set.
– Carefully lower the transmission from the engine block. You may need to wiggle it free due to the input shaft being engaged in the clutch.

– **Remove the Old Clutch Assembly**:
– Once the transmission is removed, you will have access to the clutch assembly. Remove the pressure plate by unbolting it from the flywheel.
– Carefully pull off the clutch disc and inspect the flywheel for damage or excessive wear.

– **Clean the Flywheel**:
– Use brake cleaner and a rag to clean the surface of the flywheel, removing any debris or oil.

– **Install the New Clutch Kit**:
– Position the new clutch disc onto the flywheel. Use the clutch alignment tool to ensure it is centered.
– Install the new pressure plate over the clutch disc and tighten the bolts in a star pattern to ensure even pressure. Use the torque wrench to apply the correct torque as specified in the manufacturer’s manual.

– **Replace the Release Bearing**:
– Install the new release bearing onto the transmission input shaft If applicable.

– **Reinstall the Transmission**:
– Carefully lift the transmission back into position, ensuring the input shaft aligns with the clutch disc.
– Bolt the transmission back to the engine block securely.

– **Reinstall the Drive Shaft**:
– Reattach the drive shaft to the transmission, ensuring it is secured with the appropriate bolts.

– **Reassemble Any Removed Components**:
– Reinstall any components that were removed to access the transmission, such as the exhaust system or heat shields.

– **Reconnect the Battery**:
– Reconnect the negative battery terminal.

– **Test the Clutch**:
– Start the vehicledownload BMW 525I workshop manual and test the clutch operation. Ensure that the pedal feels normal and the clutch engages and disengages properly.
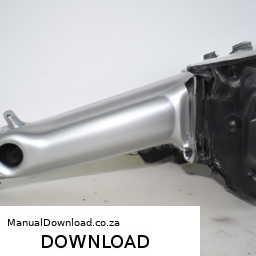
### Safety Tips:

– Always wear safety glasses and gloves when working on your vehicle.
– Make sure the vehicle is securely raised and supported with jack stands If you need to work underneath it.
If at any point you feel unsure about a step, consult a professional mechanic or refer to the vehicle’s service manual for additional guidance.

This guide should provide a comprehensive overview of the clutch plate replacement process for a BMW 525i. Always refer to the specific service manual for your vehicle for torque specifications and any model-specific procedures.
The fan clutch is a crucial component in a vehicle’s cooling system, designed to regulate the operation of the engine’s cooling fan. It plays a vital role in maintaining optimal engine temperatures, ensuring efficiency and preventing overheating. The fan clutch connects the engine’s cooling fan to the water pump shaft and is typically located between the fan blade and the engine.

There are two common types of fan clutches: thermal and electronic. A thermal fan clutch uses a bi-metallic strip that expands or contracts based on temperature. When the engine reaches a certain temperature, the bi-metallic strip activates a mechanism that engages the fan, allowing it to spin faster and increase airflow through the radiator. This helps dissipate heat more effectively. Conversely, when the engine cools down, the fan clutch disengages, allowing the fan to spin more slowly, which reduces drag on the engine and improves fuel efficiency.

Electronic fan clutches, on the other hand, utilize electronic sensors and signals from the engine control unit (ECU) to manage fan operation. This allows for more precise control over the cooling system, adapting to varying engine loads and temperatures.

A malfunctioning fan clutch can lead to overheating, reduced engine performance, and increased fuel consumption. Therefore, regular inspection and maintenance of this component are essential for optimal vehicle operation.

Download 2004 BMW 760Li (E65/E66) 7 Series OEM Download Service & Repair Manual Software –

service manual
Replacing the engine gasket on a BMW 760Li (E65/E66) is a complex task that requires a good understanding of automotive mechanics, as well as some specialized tools. click here for more details on the download manual…..


    bmw e65 760i custom exhaust Sound check after exhaust being modified on my 760i.

    DIY BMW E65 E66 7 series hidden dash menu Dash Camera: http://amzn.to/1Tci2uP UK Shoppers: http://amzn.to/1Slc5wS ******************************************************* All …

Below is a detailed guide to help you through the process, though it’s important to note that this is a high-level overview. Always refer to a service manual specific to your vehicle for precise instructions and torque specifications.

### Tools and Equipment Needed
1. **Basic Hand Tools**:
– Socket set (metric)
– Wrenches (metric)
– Screwdrivers (flat and Phillips)
– Torque wrench
– Pliers

2. **Specialized Tools**:
– Engine hoist (if necessary)
– Gasket scraper or razor blade
– Torque angle gauge
– Oil filter wrench
– Vacuum pump (for vacuum lines)

3. **Consumables**:
– New gaskets (OEM recommended)
– Engine oil
– Coolant
– Brake cleaner
– RTV silicone (if applicable)
– Engine degreaser

### Components Involved
1. **Engine Gaskets**:
– **Head Gasket**: Seals the cylinder head to the engine block.
– **Intake Manifold Gasket**: Seals the intake manifold to the cylinder head.
– **Exhaust Manifold Gasket**: Seals the exhaust manifold to the cylinder head.
– **Valve Cover Gasket**: Seals the valve cover to the cylinder head.
– **Oil Pan Gasket**: Seals the oil pan to the engine block.

2. **Engine Components**:
– **Cylinder Head**: Contains the combustion chambers, valves, and camshafts.
– **Intake Manifold**: Directs air and fuel into the engine.
– **Exhaust Manifold**: Directs exhaust gases out of the engine.
– **Valve Cover**: Covers the top of the engine cylinder head.
– **Oil Pan**: Holds the engine oil.

### Steps for Engine Gasket Replacement

#### 1. Preparation
– **Disconnect the Battery**: Ensure safety by disconnecting the negative terminal.
– **Drain Fluids**: Drain engine oil and coolant to prevent spills.

#### 2. Remove Components
– **Intake Manifold**:
– Disconnect throttle body, vacuum lines, and electrical connectors.
– Unbolt the intake manifold and carefully remove it.

– **Exhaust Manifold**:
– Disconnect exhaust pipes and associated sensors.
– Unbolt and remove the exhaust manifold.

– **Valve Covers**:
– Remove ignition coils and spark plugs (if applicable).
– Unbolt the valve covers and lift them off.

– **Cylinder Head**:
– Remove any remaining components attached to the cylinder head (e.g., camshaft timing chain, sensors).
– Unbolt the cylinder head in the correct sequence (refer to service manual).
– Carefully lift the cylinder head off the engine block.

#### 3. Clean Surfaces
– **Gasket Removal**: Use a gasket scraper or razor blade to remove old gaskets. Be careful not to scratch the mating surfaces.
– **Clean Surfaces**: Use brake cleaner and a clean rag to remove oil and debris from the mating surfaces.

#### 4. Install New Gaskets
– **Head Gasket**: Place the new head gasket onto the engine block, ensuring it’s aligned properly.
– **Intake and Exhaust Gaskets**: Install the new gaskets for the intake manifold and exhaust manifold.
– **Valve Cover Gasket**: Place the new gasket on the valve cover.

#### 5. Reassemble Components
– **Cylinder Head**: Carefully lower the cylinder head onto the block, ensuring the gasket stays in place.
– **Torque Head Bolts**: Torque the cylinder head bolts in the specified sequence and to the specified torque settings (refer to service manual).

– **Reinstall Valve Covers**: Bolt the valve covers back into place.
– **Reattach Exhaust Manifold**: Position the exhaust manifold with new gasketsdownload BMW 760Li E65 E66 7 OEM workshop manual and bolt it down.
– **Reattach Intake Manifold**: Position and bolt the intake manifold.

#### 6. Reconnect Components
– Reconnect all electrical connections, vacuum lines, and any other components that were removed.

#### 7. Fill Fluids
– **Engine Oil**: Replace the oil filter and fill the engine with the appropriate type and amount of engine oil.
– **Coolant**: Refill the cooling system with the recommended coolant.

#### 8. Final Steps
– **Reconnect Battery**: Reconnect the negative battery terminal.
– **Start the Engine**: Check for leaks and ensure the engine runs smoothly.
– **Check Systems**: Monitor for any warning lights and check fluid levels again after running the engine for a short period.

### Important Notes
– **Safety First**: Always wear safety glasses and gloves when working on a vehicle.
– **Consult Manual**: Refer to the BMW service manual for specific torque values and sequences.
– **Consider Professional Help**: If you lack experience, consider seeking help from a professional mechanic, as mistakes can lead to severe engine damage.

This guide provides an overview of the engine gasket replacement process for a BMW 760Li E65/E66. Proper care and attention to detail are essential for a successful repair.
A brake disc, also known as a brake rotor, is a critical component of a vehicle’s braking system, designed primarily to slow down or stop the vehicle by converting kinetic energy into thermal energy through friction. Typically made from cast iron or carbon composite materials, brake discs are circular plates that are mounted to the wheel hub. When the driver presses the brake pedal, hydraulic pressure is applied to brake calipers, which contain brake pads that clamp down onto the surface of the brake disc. This contact generates friction, which slows the rotation of the wheel and ultimately brings the vehicle to a stop.

Brake discs come in various designs, including vented, slotted, and drilled types, each engineered to improve performance under different conditions. Vented discs feature internal cooling channels that enhance heat dissipation, reducing the risk of brake fade during prolonged use. Slotted or drilled discs have grooves or holes that allow for better gas and moisture dissipation, further improving grip and performance, especially in wet conditions.

The maintenance of brake discs is paramount for vehicle safety. Over time, they can wear down or become warped due to excessive heat, necessitating regular inspections and replacements. High-performance vehicles may use upgraded brake discs to enhance stopping power and minimize fade during extreme driving conditions. Overall, the brake disc is an essential element in ensuring effective braking performance and vehicle safety.

Download 2008 BMW 1-Series COUPE E82 Service and Repair Manual –

workshop manual
Replacing the transmission fluid sensor on a BMW 1 Series Coupe (E82) can seem daunting, especially if you have little mechanical experience. click here for more details on the download manual…..


    BMW 1 Series Hidden Features!

    CHEAP APPLE CARPLAY HEAD UNIT FOR MY BMW 1 SERIES 135i E82 In this video, I’m showing you how to install an Apple Carplay/Android Auto head unit into a BMW 1 series E82. This unit is a great …

However, with the right tools and a step-by-step approach, you can tackle this task. Here’s a simplified guide to help you through the process.

### Tools and Materials Needed:
1. **Tools:**
socket set (including 10mm and 13mm sockets)
– Flathead screwdriver
– Ratchet wrench
– Torque wrench (for reassembly)
– Pliers
– Oil catch pan

2. **Materials:**
– New transmission fluid sensor
– New transmission fluid (if necessary)
– Rags or paper towels
– Safety glasses and gloves

### steps to Replace the Transmission Fluid Sensor:

#### 1. **Safety First**
– Park your car on a level surface and turn off the engine.
– Engage the parking brake.
wear safety glasses and gloves to protect yourself from any fluid spills.

#### 2. **Lift the Car**
– Use a jack to lift the front of the car and secure it on jack stands. This gives you better access to the transmission area.

#### 3. **Locate the Transmission Fluid Sensor**
– The transmission fluid sensor is typically located on the side of the transmission. It looks like a small plug and is usually near the fluid pan.
– You may need to remove a cover or some components to access it better.

#### 4. **Drain the Transmission Fluid**
– Place an oil catch pan underneath the transmission to catch any fluid that may leak out.
– Using a socket wrench, remove the bolts from the transmission pan (if necessary) to drain the fluid. Be careful, as the fluid can be hot and messy.

#### 5. **Disconnect the Old Sensor**
– Once you have access to the sensor, gently disconnect the wiring harness. There may be a clip or tab that you need to press to release it.
– Use the appropriate socket to unscrew the sensor from the transmission. Be cautious not to drop any debris into the transmission.

#### 6. **Install the New Sensor**
– Take your new sensor and screw it into place where the old One was. Use your hand to tighten it first, then use a torque wrench to tighten it to the manufacturer’s specifications (check your manual for the exact torque value).
– Reconnect the wiring harness to the new sensor, ensuring it clicks into place securely.

#### 7. **Reassemble the Transmission Pan (if removed)**
– If you removed the transmission pan, clean any old gasket material off the mating surface.
– Place a new gasket or sealant on the pan if required.
– Reattach the pan and tighten the bolts in a crisscross pattern to ensure even pressure.

#### 8. **Refill Transmission Fluid**
– If you drained the fluid, refill the transmission with the correct typedownload BMW 1 Series COUPE E82 workshop manual and amount of fluid as specified in your owner’s manual.
– Use a funnel to avoid spills and check for any leaks around the sensor area.

#### 9. **Lower the Car**
– Carefully remove the jack stands and lower the car back to the ground.

#### 10. **Test the New Sensor**
– Start the car and let it run for a few minutes. Check the dashboard for any warning lights related to the transmission.
– Take the car for a short test drive to ensure everything is functioning properly.

### Final Tips:
– Always refer to your vehicle’s service manual for specific instructions and torque specifications.
– If at any point you feel unsure, it may be wise to consult a professional mechanic.

By following these steps, you should be able to replace the transmission fluid sensor on your BMW 1 Series Coupe E82. good luck!
Keyless entry is an advanced automotive feature that enhances convenience and security for vehicle users. This system allows drivers to unlock and start their vehicles without the need for a traditional physical key. Instead, keyless entry utilizes a remote key fob or a smart key, which communicates wirelessly with the car’s electronic control unit.

When a driver approaches the vehicle with the key fob in their pocket or bag, sensors embedded in the car detect the fob’s proximity. This triggers the system to unlock the doors automatically, often accompanied by a welcoming light sequence. The driver can then enter the vehicle without fumbling for keys. Once inside, starting the engine is as simple as pressing a button, provided that the key fob is within the car’s interior.

Keyless entry systems often come with additional security features. For example, they may include rolling code technology, which changes the access code each time the key fob is used, making it significantly harder for potential thieves to replicate the signal. Some systems also offer features like remote locking and unlocking, allowing users to control their vehicle from a distance.

Overall, keyless entry systems represent a significant advancement in automotive technology, providing enhanced ease of use while also improving vehicle security. As vehicles become increasingly integrated with smart technology, keyless entry is likely to become a standard feature in many new models.

Download 2000 BMW 523i (E39) 5 Series OEM Download Service & Repair Manual Software –

get
Certainly! click here for more details on the download manual…..


    bmw e39 rebuild A failed attempt to properly complete rust removal and paint job A second attempt to save this e39.

    BMW E39: How to remove / replace radiator DIY. Hello! This is a DIY guide to show you how you can remove and replace a radiator on a BMW 5 series. Same procedure apply to …

Here’s a step-by-step guide for replacing the clutch master cylinder on a BMW 523i E39, presented in reverse order:

### 7. Reattach the Battery
– **Reconnect the negative battery terminal** to restore electrical power to the vehicle.

### 6. Bleed the Clutch System
– **Bleed the clutch system** to remove any air from the hydraulic line. You may need a helper for this:
– Have your assistant press the clutch pedal while you open the bleeder valve on the slave cylinder.
– Close the valve before your assistant releases the pedal to prevent air from entering the system.
– Repeat until the fluid runs clear and the pedal feels firm.

### 5. Reinstall the Clutch Slave Cylinder (if detached)
– **Reattach the clutch slave cylinder** to the transmission if it was removed during the process. Ensure that it is properly secured and connected to the hydraulic line.

### 4. Connect the Hydraulic Line
– **Reconnect the hydraulic line** to the new clutch master cylinder. Ensure it is tightened securely to prevent leaks.

### 3. Secure the Clutch Master Cylinder
– **Install the new clutch master cylinder** into its housing. Secure it using the mounting bolts or fasteners. Ensure it is aligned properly.

### 2. Remove the Old Clutch Master Cylinder
– **Disconnect the old clutch master cylinder**:
– Unplug any electrical connections (if applicable).
– Remove the hydraulic line and catch any fluid with a rag.
– Unscrew the mounting bolts and take out the old clutch master cylinder.

### 1. Prepare the Vehicle
– **Park the vehicle on a level surface** and ensure it is secure.
– **Disconnect the negative battery terminal** to avoid any electrical issues during the replacement.
– **Remove any necessary interior components** (like the driver’s side footwell trim) to access the clutch master cylinder.

### Additional Tips
– **Use appropriate fluids**: Make sure to use the correct brake fluid as specified in your owner’s manual.
– **Check for leaks** after installationdownload BMW 523i E39 5 OEM workshop manual and bleeding to ensure the system is sealed properly.
– **Dispose of old fluid** responsibly, as it can be hazardous.

By following these steps in reverse order, you can effectively replace the clutch master cylinder on a BMW 523i E39. Always refer to a service manual for specific torque specifications and additional details unique to your vehicle.
The power steering hose is a crucial component of a vehicle’s power steering system, designed to facilitate the transfer of hydraulic fluid between the power steering pump and the steering gear or rack. This hose is typically constructed from durable materials, such as rubber or reinforced synthetic compounds, to withstand the high pressures generated By the hydraulic system, as well as exposure to heat, chemicals, and environmental elements.

In essence, the power steering system functions By using hydraulic pressure to assist the driver in steering the vehicle, making it easier to maneuver, especially at low speeds. The power steering pump generates hydraulic fluid pressure, which is then conveyed through the power steering hose to the steering gear. This fluid pressure helps to move the steering mechanism, reducing the effort required By the driver to turn the steering wheel.

Over time, power steering hoses can experience wear and tear due to constant flexing, exposure to high temperatures, and potential contact with other engine components. Signs of a failing power steering hose may include fluid leaks, a whining noise when steering, or a stiff steering wheel. Regular inspection and maintenance of the power steering hose are vital to ensuring the proper functioning of the steering system and overall vehicle safety. If a hose is found to be damaged or leaking, it should be replaced promptly to maintain optimal performance and prevent further damage to the power steering system.

Download BMW 3 Series 1993 Repair Service Manual –

diy
Replacing the clutch plate on a BMW 3 Series involves several steps and requires various tools. click here for more details on the download manual…..


    5 Checks You MUST DO Before Buying A Used BMW Help us reach 100k subscribers! http://youtube.com/c/beemerfam Use code “BeemerFam” to get 15% off your Carly purchase until …

    Customize the BMW iDrive Instrument Cluster and Head-Up Display | BMW How-To Discover how to customize the Instrument Cluster and the optional Head-Up Display with BMW Operating System 8. From the right …

Below is a detailed guide with bullet points outlining the process and the tools you’ll need.

### Tools Required

– **Socket Set:** A complete set including 8mm to 19mm sockets to remove various bolts.
– **Torque Wrench:** To ensure bolts are tightened to the manufacturer’s specifications.
– **Ratchet and Extensions:** For better reach in tight spaces.
– **Pliers:** For removing clips and securing cables.
– **Screwdrivers:** Flathead and Phillips for various trim and panel removals.
– **Clutch Alignment Tool:** Essential for aligning the new clutch plate properly.
– **Flywheel Locking Tool:** To prevent the flywheel from rotating.
– **Jack and Jack Stands:** For safely lifting the vehicle.
– **Transmission Jack:** To support the transmission during removal and installation.
– **Brake Cleaner:** For cleaning surfaces before assembly.
– **Shop Towels/Rags:** For cleaning and wiping down parts.
– **Safety Glasses and Gloves:** For personal protection during the repair.

### Preparation

– **Disconnect the Battery:** Remove the negative terminal to prevent any electrical issues.
– **Lift the Vehicle:** Use a jack and secure it with jack stands to provide easy access to the transmission.
– **Remove Underbody Covers:** If applicable, remove any protective panels or covers beneath the car.

### Removing the Transmission

– **Disconnect Linkages:** Remove the shift linkage and any other connections (like speed sensors) to the transmission.
– **Support the Transmission:** Use a transmission jack to support the weight of the transmission securely.
– **Unbolt Transmission:** Remove the bolts securing the transmission to the engine. Keep track of the bolts as they may vary in size.
– **Separate the Transmission:** Carefully pull the transmission away from the engine. Use the transmission jack to lower it once it is free.

### Removing the Clutch Assembly

– **Inspect Flywheel:** Check the flywheel for damage or excessive wear. It may need resurfacing or replacement.
– **Remove Clutch Pressure Plate:** Unbolt the clutch pressure plate from the flywheel. Be cautious as the springs may be under tension.
– **Take Out Clutch Plate:** Remove the old clutch plate carefully. Note its orientation for the installation of the new one.

### Installing the New Clutch Plate

– **Clean Surfaces:** Use brake cleaner to clean the flywheel and pressure plate surfaces to ensure proper adhesion and performance.
– **Align New Clutch Plate:** Use the clutch alignment tool to center the new clutch plate on the flywheel.
– **Install Pressure Plate:** Position the new pressure plate over the clutch plate and secure it with bolts. Tighten them in a criss-cross pattern to ensure even pressure.

### reinstalling the Transmission

– **Reattach Transmission:** Carefully maneuver the transmission back into place. Ensure it aligns properly with the engine and clutch assembly.
– **Bolt Transmission:** Reinstall all the transmission boltsdownload BMW 3 workshop manual and tighten them to the specified torque settings.
– **Reconnect Linkages:** Reattach the shift linkage, speed sensors, and any other components that were disconnected.

### Final Steps

– **Reattach Underbody Covers:** If any were removed, reattach them now.
– **Reconnect Battery:** Reconnect the negative terminal of the battery.
– **Test the Clutch:** Before starting the vehicle, press the clutch pedal to ensure it feels correct. Check for any unusual noises or issues.
– **Lower the Vehicle:** Carefully lower the vehicle off the jack stands.

### Post-Installation Checks

– **Test Drive:** After completing the installation, take the vehicle for a test drive to ensure the clutch engages and disengages smoothly.
– **Check for Leaks:** Inspect under the vehicle for any signs of fluid leaks.

### Safety Precautions

– Always use appropriate safety gear (gloves, glasses).
– Ensure the vehicle is securely lifted and supported before working underneath it.
– Dispose of any old parts and fluids responsibly.

By following this detailed guide, you can successfully replace the clutch plate on a BMW 3 Series. Remember to consult your vehicle’s service manual for specific torque specifications and additional guidance tailored to your model year.
The interior light of a vehicle is an essential component designed to enhance visibility and comfort within the cabin space. Typically situated in the ceiling area of the car, the interior light can take various forms, including overhead dome lights, map lights, and ambient lighting. Its primary function is to illuminate the interior when needed, such as during nighttime driving or when passengers enter or exit the vehicle.

Most modern cars are equipped with interior lights that utilize LED technology, which offers advantages such as energy efficiency, longer lifespan, and a variety of color options for customization. these lights can be activated through different mechanisms, including door switches, which automatically turn on the light when a door is opened, or manual switches that allow the driver or passengers to control the lighting as needed.

Beyond functionality, interior lights contribute to the overall aesthetic of the vehicle’s interior. Many manufacturers offer ambient lighting options that allow for color changes and dimming, creating a more inviting atmosphere. Additionally, some cars feature illuminated entry systems, which enhance safety by illuminating the ground when a door is opened, preventing trips or falls.

Overall, the interior light plays a crucial role in enhancing the driving experience, providing practical illumination while also contributing to the vehicle’s style and ambiance. It is an often-overlooked yet vital feature that ensures safety and comfort for both drivers and passengers.

Download BMW 535 535i 1994 Factory Service Repair Manual –

book store
Certainly! click here for more details on the download manual…..


    How to replace Axles and Brakes | BMW 535i xdrive F10 Replacing my worn out axles and brake pads with rotors on the front and rear of the 535i This video may contain affiliate links, …

    One bad day for a customer! CAR WIZARD found TWO insanely unrelated issues at time on '12 BMW… This car perfectly explains why the CAR WIZARD ‍♂️ hates BMWs! Customer brings in his car only to find two totally unrelated …

The shift interlock system in a BMW 535i (or similar models) is designed to prevent the driver from shifting out of “Park” without pressing the brake pedal. If you’re experiencing issues with the shift interlock, it may need some repair or adjustment. Here’s a simple guide to help you understand and potentially fix it.

### Tools and Materials Needed:
– Screwdriver (flathead and Phillips)
– Pliers
– Socket set or wrench (if needed)
– Flashlight (for better visibility)
– Replacement parts (if necessary, depending on the issue)

### Steps for Shift Interlock Repair:

1. **Safety First:**
– Make sure the car is parked on a flat surface with the engine off. Engage the parking brake for added safety.

2. **Locate the Shift Interlock System:**
– The shift interlock mechanism is usually located underneath the gear shifter. In many BMW models, you may need to remove a cover or trim piece to access it.

3. **Remove the Gear Shift Cover:**
– Use a screwdriver (or your hands) to carefully pry off the cover surrounding the gear shift. Be gentle to avoid breaking any clips or connectors.

4. **Inspect the Mechanism:**
– With the cover removed, locate the shift interlock solenoid (a small electrical component) and the linkage that connects it to the gear shifter. Check for any visible signs of damage, such as broken parts or loose connections.

5. **Check the Brake Switch:**
– The shift interlock system is activated By the brake pedal. Make sure the brake light switch (which is usually located above the brake pedal) is functioning properly. If the brakes lights don’t turn on when you press the pedal, you may need to replace the brake switch.

6. **Test the Shift Interlock:**
– While someone presses the brake pedal, try moving the gear shift out of “Park.” If it shifts smoothly, the interlock issue might be resolved. If not, you may need to look deeper into the solenoid or linkage.

7. **Repair or Replace Parts:**
– If you identify any broken or damaged components, you can either repair them or replace them. For example, if the solenoid is faulty, you’ll need to disconnect it from its wiring and replace it with a new one.

8. **Reassemble Everything:**
– Once you’ve repaired or replaced any damaged parts, carefully reassemble the cover and any other components you removed. Make sure everything is securely fastened.

9. **Test the System:**
– Reconnect the battery (if disconnected) and test the gear shift again. With the brake pedal pressed, see if you can now shift out of “Park.”

10. **Seek Professional Help If Needed:**
– If after all these steps, the issue persists, it might be best to take the vehicle to a professional mechanic. There could be more complex electrical issues involved.

### Tips:
– **Keep Track of screwsdownload BMW 535 535i workshop manual and Parts:** Use a small container to hold any screws or small parts you remove so they don’t get lost.
– **Take Photos:** If you’re unsure about how things fit together, take photos during disassembly to help with reassembly.
– **Consult the Manual:** If you have a service manual for your BMW, refer to it for specific details regarding the shift interlock system.

By following these steps, you should be able to troubleshoot and potentially repair the shift interlock system in your BMW 535i. Good luck!
The clutch fork is a crucial component in manual transmission vehicles, serving as an intermediary between the clutch pedal and the clutch assembly. Its primary function is to engage and disengage the clutch, allowing the driver to shift gears smoothly. Typically made from durable materials like steel or cast iron, the clutch fork is engineered to withstand the stresses and strains associated with the operation of the clutch system.

When the driver presses the clutch pedal, a mechanism—often a hydraulic or cable system—transmits this action to the clutch fork. The fork then pivots on a shaft, pushing against the release bearing, which in turn disengages the clutch plate from the flywheel. This disengagement is essential for shifting gears without grinding or damaging the transmission.

The design of the clutch fork may vary depending on the vehicle’s make and model, but it generally features a forked shape that allows it to accommodate the release bearing effectively. Over time, clutch forks can experience wear or damage, which may lead to issues such as difficulty in shifting gears or even complete clutch failure. Regular inspection and maintenance can help ensure the longevity and proper functioning of this vital component, contributing to a smoother driving experience. In summary, the clutch fork plays an indispensable role in the operation of a manual transmission, facilitating seamless gear changes and overall vehicle performance.