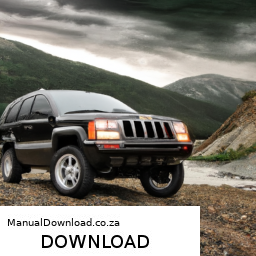
Replacing a wheel bearing on a Jeep Cherokee XJ can seem daunting, but with some basic tools and a little patience, you can do it yourself. click here for more details on the download manual…..
- Jeep Cherokee: Engine Options & Basics Explained 2.5L, 2.8L, 4.0L, 2.1L ['84-'01 XJ] The 1984 – 2001 Jeep Cherokee saw 5 different engine options. In this video I document a quick rundown of each one. What’s a …
- 5 SIMPLE Upgrade Mods For The Jeep Cherokee Xj Here’s 5 simple upgrade mods that are sure to improve the experience you have with your Jeep Cherokee XJ. 1st MOD 6 LED …
Here’s a step-by-step guide to help you through the process.
### Tools and Materials Needed:
– Jack and jack stands
– Lug wrench
– Socket set (including a 12-point socket for the bearing nut)
– Torque wrench
– Hammer
– Screwdriver (flathead)
– Pliers
– New wheel bearing (make sure it’s the correct one for your Jeep)
– Grease
– Safety glasses and gloves
### Step-by-Step Guide:
1. **Preparation:**
– **Safety First:** Wear safety glasses and gloves to protect yourself.
– **Gather Tools:** Make sure you have all tools and materials ready.
2. **Lift the Vehicle:**
– **Loosen the Lug Nuts:** Use the lug wrench to slightly loosen the lug nuts on the wheel where you’ll be replacing the bearing. Do this while the wheel is still on the ground.
– **Jack Up the Jeep:** Use the jack to lift the vehicle off the ground.
– **Secure the Jeep:** Place jack stands under the frame to ensure the vehicle is stable and secure.
3. **Remove the Wheel:**
– **Take Off the Wheel:** Finish removing the lug nuts and take off the wheel. Set it aside.
4. **Access the Brake Assembly:**
– **Remove the Brake Caliper:** Locate the brake caliper and remove the bolts holding it in place. Carefully slide the caliper off the brake rotor and hang it using a bungee cord or wire (don’t let it hang by the brake line).
– **Remove the Brake Rotor:** If necessary, remove any retaining screws and slide the brake rotor off the hub.
5. **Remove the Hub Assembly:**
– **Identify the Hub Nut:** Look for a large nut in the center of the hub. this is the nut that holds the bearing in place.
– **Remove the Hub Nut:** Use a socket wrench to remove the hub nut. You may need to use a hammer to tap the socket if it’s stuck. Be careful not to damage anything.
– **Take Off the Hub:** Once the nut is removed, pull the hub assembly straight off. You might need to wiggle it a bit if it’s stuck.
6. **Replace the Wheel Bearing:**
– **Remove the Old Bearing:** The bearing is typically pressed into the hub. You may need a bearing puller if it’s stuck. Gently tap around the bearing with a hammer and screwdriver to loosen it, but be careful not to damage the hub.
– **Install the New Bearing:** Place the new bearing into the hub. You may need to press it in using a vise or a bearing installer tool. It should fit snugly.
7. **Reassemble Everything:**
– **Reattach the Hub:** Slide the hub back onto the spindle. Make sure it fits securely.
– **Install the Hub Nut:** Thread the hub nut back on and tighten it to the manufacturer’s specifications using a torque wrench.
– **Reinstall the Brake Rotor:** Slide the brake rotor back on and secure it with any retaining screws.
– **Reattach the Brake Caliper:** Slide the caliper back over the rotor and tighten the bolts.
8. **Put the Wheel Back On:**
– **Reattach the Wheel:** Place the wheel back onto the hub and hand-tighten the lug nuts.
– **Lower the Vehicle:** Carefully lower the vehicle back to the ground using the jack.
– **Tighten the Lug Nuts:** Once the vehicle is on the ground, use the lug wrench to tighten the lug nuts in a crisscross pattern to ensure even pressure.
9. **Final Checks:**
– **Check Everything is Tight:** Go over the bolts and nuts to make sure everything is secure.
– **Test Drive:** Take the Jeep for a short test drive to ensure the new bearing is working properly. Listen for any unusual noises.
### Important Tips:
– Always refer to your vehicle’s manual for specific torque specifications and bearing types.
– If you’re unsure about any step, consider seeking help from a more experienced mechanic or watching tutorial videos for visual guidance.
By following these steps, you should be able to replace the wheel bearing on your Jeep Cherokee XJ successfully! Remember to take your time and don’t rush through the process.
The cigarette lighter, often referred to as a “power outlet” or “12V socket” in modern vehicles, is a small but significant component found in many automobiles. Originally designed for igniting cigarettes, this device has evolved to serve a wider range of purposes in contemporary vehicles. Typically located on the dashboard or center console, the cigarette lighter consists of a cylindrical metal socket that accepts a plug, which can be used for various electronic devices.
The traditional design features a spring-loaded heating element that, when pressed down, heats up and glows red, indicating that it is ready to ignite a cigarette. However, as smoking in cars has declined, the functionality of the cigarette lighter has shifted towards providing power for electronic devices. Many drivers and passengers now use it to charge mobile phones, GPS units, and other portable electronics through compatible adapters.
Modern cigarette lighters are often designed to accommodate a standard 12V power source, making them versatile for a wide range of applications. The advent of usb ports in cars has somewhat diminished the need for traditional lighter sockets, but they remain an integral part of many vehicles, particularly older models. Overall, the cigarette lighter exemplifies how automotive components can adapt to the changing needs and preferences of drivers over time, transforming from a smoking accessory to an essential power source for modern technology.