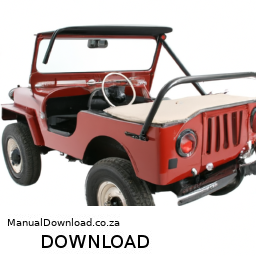
Replacing the ball joints on a 1964 Jeep CJ-5A is a task that requires careful attention to detail and a good understanding of automotive mechanics. click here for more details on the download manual…..
- 1966 Jeep CJ-5 Test Drive – GR Auto Gallery See 100+ photos, pricing & specs at: https://www.grautogallery.com/vehicles ▻ Subscribe: …
- Battery drain, classic car edition, quick tutorial It seems that one of the most common and misunderstood problems i see in my daily business restoring and maintaining vintage …
Below is a detailed guide on how to perform this procedure, including descriptions of all necessary components and tools.
### Tools and Materials Needed
1. **Tools:**
– Floor jack and jack stands
– Socket and ratchet set (including extensions)
– Wrenches (including adjustable wrenches)
– Ball joint separator (pickle fork)
– Hammer
– Torque wrench
– Grease gun
– Pliers
– Safety glasses
– Gloves
2. **Parts:**
– New upper and lower ball joints (ensure they are compatible with a 1964 Jeep CJ-5A)
– New cotter pins (if applicable)
– New grease (for pre-lubricating the ball joints)
– New dust seals (if not included with the ball joints)
### Preparation
1. **Safety Precautions:**
– Always wear safety glasses and gloves.
– Ensure the work area is clean and well-lit.
– Make sure the vehicle is parked on a flat surface and the parking brake is engaged.
2. **Lift the Vehicle:**
– Use the floor jack to lift the front of the Jeep. Place jack stands under the frame or designated lifting points to secure the vehicle.
### Removing the Old Ball Joints
1. **Remove the Wheel:**
– Use a socket and ratchet to remove the lug nuts and take off the front wheel.
2. **Remove the Brake Caliper and Rotor (if applicable):**
– If your Jeep has disc brakes, unbolt the brake caliper using the appropriate socket. Hang it out of the way using a bungee cord or rope (do not let it hang from the brake line).
– Remove the brake rotor If necessary.
3. **Remove the Steering Knuckle:**
– Locate the bolts securing the steering knuckle to the axle housing. These are typically large bolts.
– Use a socket and ratchet to remove these bolts.
– Carefully pull off the steering knuckle; you may need to gently tap it with a hammer If it’s stuck.
4. **Remove the Old Ball Joints:**
– The upper and lower ball joints are typically pressed into the steering knuckle. Use a ball joint separator (pickle fork) to separate the ball joint from the knuckle.
– If your Jeep has retaining clips or bolts holding the ball joints in place, remove them first.
– Using a hammer and the ball joint separator, drive the ball joint out of the steering knuckle.
### Installing New Ball Joints
1. **Prepare the New Ball Joints:**
– Compare the new ball joints to the old ones to ensure they are the correct parts.
– If your new ball joints have grease fittings, ensure they are oriented correctly.
2. **Install New Ball Joints:**
– Align the new ball joint with the hole in the steering knuckle.
– Using a press (or a hammer If necessary), carefully press the ball joint into place. Be careful not to damage the joint during this process.
3. **Reattach the Steering Knuckle:**
– Position the steering knuckle back onto the axle housing.
– Reinstall the bolts and torque them to the manufacturer’s specifications (check a service manual for specific torque values).
4. **Reattach the Brake Rotor and Caliper:**
– If you removed the brake rotor, install it back onto the hub.
– Reattach the brake caliper and secure it with the bolts.
5. **Reinstall the Wheel:**
– Place the wheel back onto the hub and hand-tighten the lug nuts. Lower the vehicle from the jack stands and then torque the lug nuts to the manufacturer’s specifications.
### Final Steps
1. **Grease the Ball Joints:**
– Use a grease gun to apply grease to the new ball joints through their fittings, ensuring they are well-lubricated.
2. **Check Alignment:**
– After replacing ball joints, it’s advisable to have the vehicle’s alignment checked, as changes in suspension components can affect wheel alignment.
3. **Test Drive:**
– Take the vehicle for a short test drive to ensure everything is functioning correctly and listen for any unusual noises.
### Conclusion
Replacing ball joints on a 1964 Jeep CJ-5A can be a rewarding task If done carefully. Always consult a repair manual for specific details and torque specifications, and don’t hesitate to seek professional help If you feel unsure about any step in the process. Proper maintenance of ball joints is crucial for ensuring safe and reliable vehicle operation.
The camshaft seal is a critical component in an engine’s design, primarily responsible for preventing oil leaks from the camshaft housing. Typically made from durable materials such as rubber or silicone, the camshaft seal is a circular gasket that fits snugly around the camshaft as it exits the engine block or cylinder head. Its primary function is to maintain the lubrication system’s integrity by sealing the gap between the moving camshaft and the stationary engine components.
In an internal combustion engine, the camshaft plays a vital role in controlling the timing of the engine’s valves, which allows for the optimal intake of air-fuel mixture and exhaust expulsion. As the camshaft rotates, it generates movement that necessitates a reliable seal to prevent engine oil from leaking out, which could lead to a drop in oil pressure and potential engine damage. A faulty or worn camshaft seal can result in oil leaks, which not only pose risks to the engine’s performance But can also create hazards If oil drips onto hot engine parts.
Regular inspection and maintenance of the camshaft seal are essential, especially in older vehicles or those with high mileage. If a leak is detected, replacing the camshaft seal is crucial to preserving engine health, enhancing overall performance, and ensuring the longevity of the vehicle.