
Suspension alignment on a Mazda RX-7 involves adjusting the angles of the wheels to ensure that they are set to the manufacturer’s specifications. click here for more details on the download manual…..
- Why Rotary Engines Kinda Suck The RX-7, the RX-8 and the 787B race car all have something in common – the rotary engine. The famous spinny ‘Dorito’ holds a …
- V12 Zonda Swapped Mazda RX7 VS. Rotary? 👀 When I was at SEMA I ran into Gooichi Motors and their V12 powered Zonda Mazda RX7 nicknamed “Pistachio.” During my …
Proper alignment can improve handling, tire life, and overall driving performance. The RX-7, known for its unique rotary engine and lightweight design, has specific alignment requirements. Below is a detailed guide on how to perform suspension alignment on a Mazda RX-7, including the necessary tools, components, and steps involved.
### Tools and Equipment Needed
1. **Alignment Rack**: A specialized platform with adjustable arms to measure wheel angles.
2. **Camber Gauge**: To measure the camber angle of the wheels.
3. **Toe Plates**: For measuring toe angle adjustments.
4. **Caster Camber Gauge**: For measuring caster angles.
5. **Wrench Set**: For loosening and tightening suspension components.
6. **Jack and Jack Stands**: To lift the vehicle safely.
7. **Tire Pressure Gauge**: To ensure tires are inflated to proper pressures.
8. **Measuring Tape**: For checking distances and alignment specifications.
9. **Chalk or Marking Tool**: For marking tire positions if necessary.
### Components Involved in Suspension Alignment
1. **Camber**: The angle of the wheels in relation to the vertical axis. Positive camber means the top of the wheel is tilted outwards, while negative camber means it is tilted inwards.
2. **Caster**: The angle of the steering axis when viewed from the side of the vehicle. Positive caster means the steering axis tilts towards the rear of the vehicle.
3. **Toe**: The angle of the wheels in relation to the centerline of the vehicle when viewed from above. Toe-in means the front of the wheels is closer together than the rear, while toe-out means the opposite.
4. **Control Arms**: Components that connect the wheel hub to the chassis and allow for up-and-down movement.
5. **Tie Rods**: Adjust the toe angle and connect the steering rack to the wheels.
6. **Struts and Shocks**: Absorb road impacts and maintain wheel contact with the road.
7. **Bushings**: Rubber or polyurethane components that allow for movement while providing support.
### Steps to Perform Suspension Alignment
1. **Preparation**:
– **Park the Vehicle**: Ensure the Mazda RX-7 is parked on a flat, level surface.
– **Check Tire Pressure**: Ensure all tires are inflated to the recommended pressure (usually found on the driver’s door jamb).
– **Inspect Suspension Components**: Before alignment, check for any worn or damaged components (e.g., bushings, tie rods, control arms).
2. **Lift the Vehicle**:
– Use a jack to lift the front of the vehicle and secure it with jack stands. Ensure the car is stable before proceeding.
3. **Initial Measurements**:
– Place the camber gauge on the wheel to measure the current camber angle. Record these measurements.
– Use toe plates to measure the toe angle by placing them against the front and rear edges of the tires and measuring the distance between them.
4. **Adjust Camber**:
– Locate the camber adjustment bolts on the strut assembly. Loosen these bolts slightly.
– Adjust the camber angle by tilting the top of the strut assembly inwards or outwards as needed. Tighten the bolts once the desired angle is achieved.
– Recheck the camber with the gauge.
5. **Adjust Caster**:
– Caster is typically adjusted by using offset bushings or adjustable control arms. If necessary, make these adjustments according to the specifications.
– Verify caster angles using the caster camber gauge.
6. **Adjust Toe**:
– Loosen the tie rod ends. Adjust the length of the tie rods to achieve the desired toe angle (in or out).
– Ensure that both sides are adjusted equally to maintain straight tracking.
– Re-measure using the toe plates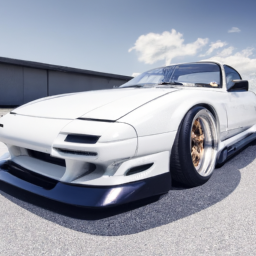 and make further adjustments as necessary.
7. **Final Checks**:
– Double-check all adjustments made. Ensure all bolts are tightened to the manufacturer’s specifications.
– Lower the vehicle back to the ground.
8. **Test Drive**:
– Take the vehicle for a test drive to ensure it handles correctly and that there are no unusual noises or vibrations.
### Conclusion
Proper suspension alignment is crucial for the performance and safety of your Mazda RX-7. By following these detailed steps and using the correct tools, you can achieve a well-aligned suspension that enhances handling and prolongs tire life. always refer to a service manual for specific alignment specifications for your model year, as they may vary. If you’re unsure about any part of the process, it’s wise to consult with a professional mechanic or alignment specialist.
The exhaust manifold gasket is a crucial component in an internal combustion engine, serving as a seal between the exhaust manifold and the engine block. Its primary function is to prevent exhaust gases from leaking out of the exhaust system, ensuring that these gases are directed through the exhaust pipes and ultimately out of the vehicle. This component is typically made from materials that can withstand high temperatures and corrosive substances, such as graphite, metal, or composite materials.
When an engine operates, it generates a significant amount of heat, and the exhaust manifold gasket must endure these extreme conditions. Over time, exposure to heat, pressure, and vibration can cause the gasket to degrade or fail, leading to various issues. A blown or damaged gasket can result in exhaust leaks, which may cause a noticeable decrease in engine performance, increased emissions, and a rise in fuel consumption. Moreover, an exhaust leak can produce a loud, unpleasant noise and may even lead to harmful exhaust fumes entering the vehicle cabin, posing safety risks to occupants.
Replacing an exhaust manifold gasket typically involves a labor-intensive process, as it requires the removal of the exhaust manifold. regular inspections and timely replacement of this component are essential for maintaining optimal engine performance and ensuring the longevity of the exhaust system. Proper installation and the use of high-quality gaskets can help mitigate future issues and enhance overall vehicle reliability.

 and a clean work area to perform the repair.
 and brushes to clean all parts thoroughly.
 and detach it from the assembly.
 and push out any air.
 tands and lower the vehicle back to the ground
 and gloves.
 and thread the new belt around the pulleys, following the same path as the old belt.
 and seated.
 tands to provide safe access to the underside.