
Repairing the exhaust manifold on a Case CX145C SR excavator can be a complex task, but I’ll break it down into simple steps for you. click here for more details on the download manual…..
- Case Construction DEMO-DAY II @ Key-Tec Case Construction DEMO-DAY (20/08/2013 @ Key-Tec BVBA, Moerbeke-Waas) Crawler excavator : CX250C, CX145C SR …
- Case CX145C Excavator: Unleash the Power of Earthmoving & Transform Your Construction Site To… As the sun rises on a bustling construction site, a symphony of heavy machinery roars to life, each playing its part in the harmony …
Before beginning any repair work, ensure you have the proper safety gear, including gloves, goggles, and a hard hat. Here’s a straightforward guide:
### Tools and materials You May Need:
– Basic hand tools (wrenches, sockets, ratchet)
– Torque wrench
– Gasket scraper or razor blade
– replacement exhaust manifold gasket
– New bolts (if necessary)
– Engine oil (for lubricating bolts)
– Cleaning cloths
– Safety gloves and goggles
### Steps to Repair the Exhaust Manifold:
1. **Safety First**:
– Turn off the engine and let it cool completely.
– Disconnect the battery to prevent any electrical issues.
2. **Locate the Exhaust Manifold**:
– The exhaust manifold is usually located on the engine block and is connected to the exhaust system. It collects exhaust gases from the engine cylinders.
3. **Remove Obstructions**:
– If there are any components (like hoses or covers) blocking access to the exhaust manifold, remove those first. Keep track of any screws or bolts you take out.
4. **Inspect the Exhaust Manifold**:
– Look for cracks, warping, or any signs of damage. If the manifold itself is damaged, it may need to be replaced.
5. **Remove the Exhaust Manifold**:
– Use a wrench or socket to remove the bolts holding the exhaust manifold in place. Keep the bolts in a safe place, as you may need to reuse them.
– Carefully lift the manifold off the engine. Be cautious as it may be heavy.
6. **Clean the Surface**:
– Once the manifold is removed, use a gasket scraper or razor blade to clean the surface of the engine block where the manifold sits. Make sure there are no old gasket materials left, as this can cause leaks.
7. **Check the Gasket**:
– Inspect the gasket that goes between the manifold and the engine. If it’s damaged or worn, replace it with a new gasket.
8. **Install the New Gasket**:
– Place the new gasket onto the engine block, ensuring it lines up with the bolt holes.
9. **Reattach the Exhaust Manifold**:
– Carefully place the exhaust manifold back onto the gasket. Align it with the bolt holes.
– Hand-tighten the bolts to hold the manifold in place.
10. **Torque the Bolts**:
– Use a torque wrench to tighten the bolts to the manufacturer’s specifications. This is important to ensure a proper seal and prevent leaks.
11. **Reinstall Any Removed Components**:
– If you had to remove any hoses or covers, reinstall them in the same order you took them off.
12. **Reconnect the Battery**:
– Once everything is reassembled, reconnect the battery.
13. **Test the Repair**:
– Start the engine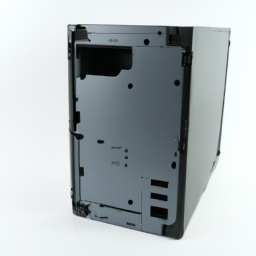 and let it run for a few minutes. Check for any leaks around the exhaust manifold. If everything sounds good and there are no leaks, you’re done!
### Final Tips:
– Always refer to the service manual for specific torque specifications and any particular procedures for your model.
– If you feel unsure or uncomfortable at any step, it’s best to consult with a professional mechanic.
By following these steps carefully, you can successfully repair the exhaust manifold on a Case CX145C SR excavator. Good luck!
A trip meter is an essential feature found in most modern vehicles, designed to track the distance traveled during a specific journey or trip. It provides drivers with valuable information about their driving habits, fuel efficiency, and overall trip duration. Typically, the trip meter can be reset at the beginning of a journey, allowing for accurate measurement from that moment onward.
There are generally two types of trip meters: the standard trip meter and the odometer. The standard trip meter counts the distance from the point it is reset, while the odometer keeps a cumulative total of all distance traveled by the vehicle over its lifetime. Users can often toggle between multiple trip meters, usually labeled as Trip A and Trip B, enabling drivers to keep track of various journeys simultaneously.
Trip meters serve practical purposes beyond just distance measurement. They can help drivers monitor fuel consumption by correlating distance traveled with fuel used, allowing for better budgeting for fuel expenses. Additionally, they can assist in planning maintenance schedules, as regular trips can indicate when certain services are due based on mileage.
In more advanced vehicles, trip meters may be integrated with digital displays that show average speed, estimated fuel economy, and trip duration, enhancing the driver’s awareness and control over their driving experience. Overall, the trip meter is a simple yet invaluable tool for enhancing driving efficiency and awareness.