
Replacing the clutch pressure sensor on a Holland 270TL S involves several steps. click here for more details on the download manual…..
- New Holland Loader Cylinder Rebuild Be sure to watch the entire video, I have a special trick to install the internal seal which is very difficult to install.
- How to Repair a Hydraulic Cylinder In the last video we showed you what’s inside a hydraulic cylinder, (here’s the link in case you missed it: …
The clutch pressure sensor is an essential component that monitors the pressure within the clutch system, providing crucial information for the proper operation of the vehicle’s transmission. Below is a detailed guide on how to replace this sensor, including the necessary tools and components.
### Tools and Materials Needed:
1. **Tools:**
– Socket set (including extensions)
– Wrenches (metric and SAE)
– Screwdrivers (flat and Phillips)
– Torque wrench
– Pliers
– Wire cutters/strippers (if needed)
– Multimeter (for testing)
– Safety goggles
– Gloves
2. **Replacement Parts:**
– New clutch pressure sensor (specific to Holland 270TL S)
– Gasket or O-ring (if applicable)
– Electrical connectors (if the old ones are damaged)
### Steps for Replacement:
#### 1. Preparation:
– **Safety First:** Ensure the vehicle is parked on a flat surface, the Engine is off, and the keys are removed from the ignition. Always wear safety goggles and gloves for protection.
– **Disconnect the Battery:** Disconnect the negative terminal of the battery to avoid any electrical shorts or shocks during the replacement.
#### 2. Accessing the Clutch Pressure Sensor:
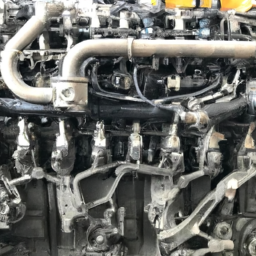
– **Locate the Sensor:** The clutch pressure sensor is typically located near the clutch assembly, often on the hydraulic clutch line or directly on the clutch housing. Refer to the vehicle’s service manual for the exact location if necessary.
– **Remove Any Obstructions:** Depending on the vehicle’s design, you may need to remove components such as the air intake, battery, or other accessories to gain access to the sensor.
#### 3. disconnecting the Old Sensor:
– **Unplug the Electrical Connector:** Carefully disconnect the electrical connector from the sensor. If it is stuck, gently wiggle it while pulling to avoid damaging the connector.
– **Remove the Sensor:** Using the appropriate socket or wrench, unscrew the clutch pressure sensor from its mounting position. Be cautious of any hydraulic fluid that may leak out when you remove the sensor.
#### 4. Installing the New Sensor:
– **Prepare the New Sensor:** If the new sensor comes with a gasket or O-ring, ensure it is properly seated. Apply a small amount of thread sealant if recommended by the manufacturer.
– **Install the New Sensor:** Screw the new sensor into place, ensuring it is snug but not overly tightened (refer to the torque specifications in the service manual).
– **Reconnect the Electrical Connector:** Attach the electrical connector to the new sensor, ensuring it clicks into place and is secured.
#### 5. Reassembly:
– **Reinstall Any Removed Components:** If you had to remove any components to access the sensor, reinstall them in the reverse order of removal. Ensure all bolts and screws are tightened to the manufacturer’s specifications.
– **Reconnect the Battery:** Reattach the negative terminal of the battery.
#### 6. Testing:
– **Start the Engine:** start the vehicle and let it idle. Check for any leaks around the new sensor and ensure that the Engine operates smoothly.
– **Test the Sensor Functionality:** Use a multimeter or diagnostic tool to verify that the new sensor is functioning correctly. Consult the vehicle’s service manual for specific testing procedures and parameters.
#### 7. final Inspection:
– **Check for Errors:** Monitor the dashboard for any warning lights related to the clutch system. If all is well, the replacement was successful.
– **Cleanup:** Dispose of the old sensor and any other materials properly. Clean the work area.
### Conclusion:
Replacing the clutch pressure sensor on a Holland 270TL S is a straightforward process if you follow these steps carefully. Make sure to refer to the vehicle’s service manual for any specific procedures or torque specifications. If you encounter any difficulties or uncertainties, it may be best to consult a professional mechanic for assistance.
A neutral safety switch is a critical component in an automobile’s transmission system, designed to ensure that a vehicle can only be started when it is in the neutral or park positions. This safety feature is essential for preventing unintended vehicle movement during starting, which can lead to accidents or injuries.
Typically found in automatic transmissions, the neutral safety switch acts as a circuit breaker that interrupts the electrical flow necessary to crank the Engine when the vehicle is in gear. When the shifter is in the park (P) or neutral (N) position, the switch closes the circuit, allowing the starter motor to engage and the Engine to start. Conversely, if the vehicle is in any forward or reverse gear, the switch remains open, preventing the starter from operating.
The switch is usually located on or near the transmission and may be integrated into the transmission assembly or mounted separately. Over time, wear and tear, exposure to heat, and environmental factors can cause the neutral safety switch to malfunction, leading to starting issues. Symptoms of a faulty switch can include the inability to start the vehicle, erratic starting behavior, or even starting in gear, which can pose safety risks.
In summary, the neutral safety switch is a vital safety mechanism that enhances the overall functionality and safety of automatic vehicles, ensuring that they start only when it is safe to do so. Regular maintenance and inspection of this component can help prevent potential hazards associated with its failure.

 and safety glasses.
 and size of hoses to ensure proper fit and function.
 and provide a comfortable ride. Unlike traditional coil or leaf spring systems that rely on metal components, air suspension systems use air-filled bags, commonly referred to as air springs. These bags can be inflated or deflated to adjust the vehicle’s ride height and stiffness, offering a level of customization and adaptability not available with conventional suspensions.
 and align it with the bolt holes.
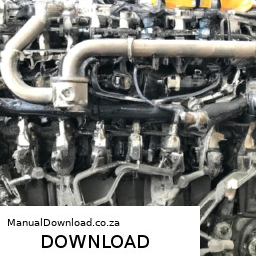
 and check that the alternator is working. Use a multimeter to check the voltage; it should be around 13.8 to 14.4 volts when the engine is running. If the voltage is outside this range, you may need to troubleshoot further.
 and the surrounding area to remove any debris or old gasket material.
 and Transmission**
 and stable before starting any work.
 tands:** Carefully remove the jack stands.